Dagor Damages Setup Tool
Installation
Install the script following the provided instructions.
3ds Max Version Requirement
This script requires 3ds Max 2013 or later.
Accessing Damage Setup Tool
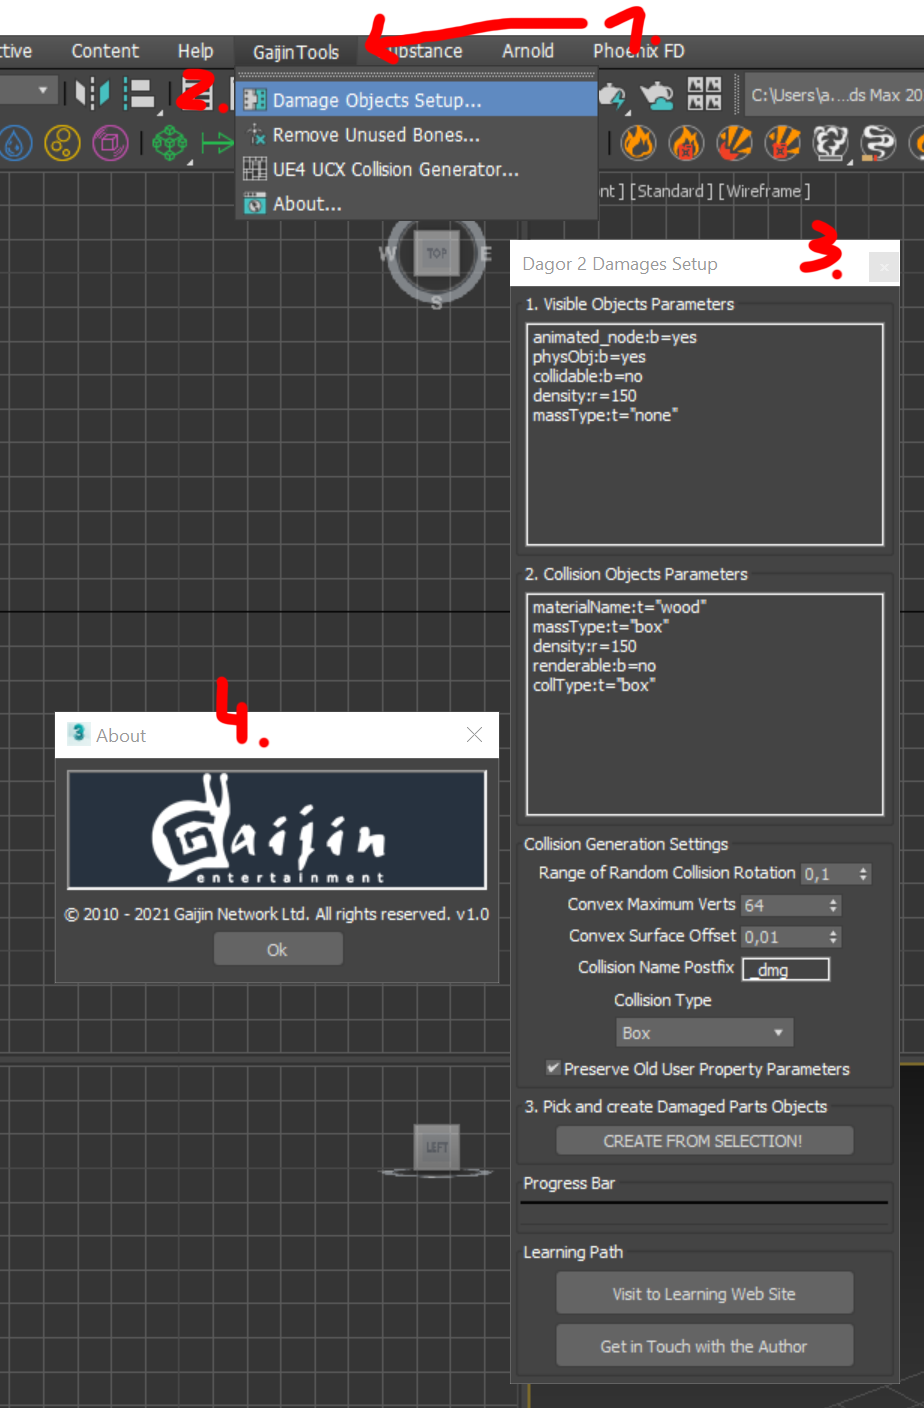
Navigate to Gaijin Tools 1 > Damage Objects Setup… 2. This will open the main window of the Dagor Damages Setup 3.
To verify the version of the script, go to Gaijin Tools 1 > About. The About window will display the current version. It’s important to check this regularly to ensure your script is up to date.
Plugin Version Requirement
Requires plugin version 1.4 or higher.
Configuring Damage Setup Tool
Download the following test scene:
dmg_example.max
and open the downloaded project in 3ds Max.
3ds Max Version Requirement
This scene requires 3ds Max 2018 or later.
Open the utility window:
Parameters:
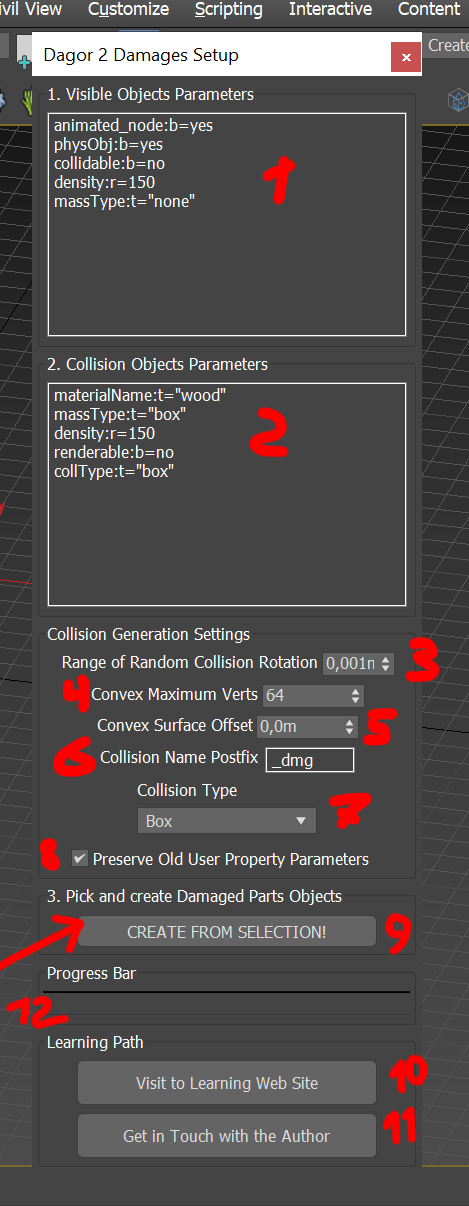
Visible Object Parameters 1: defines parameters for object chunks that will be visually displayed in the game. Default settings are optimized for most cases but can be customized as needed.
Collision Object Parameters 2: sets parameters for the collisions generated by the tool. These are pre-configured for common use cases, but you can modify them to fit specific requirements.
Random Collision Rotation 3: adjusts the rotation limits for generated collisions to create more natural-looking destruction effects.
Convex Maximum Verts 4: specifies the maximum number of points in a generated collision. This option is only active if a convex hull is selected as the collision type.
Convex Surface Offset 5: defines the displacement of the collision surface relative to the object surface. This setting is also only active when using a convex hull collision type.
Collision Name Postfix6: adds a postfix to the names of generated collisions to easily distinguish them from other objects.
Collision Type 7: selects the type of collision to generate. The default is a box, but other options include sphere, capsule, and convex hull.
Preserve Old User Parameters 8: determines whether the existing parameters in Visible Object Parameters 1 and Collision Object Parameters 2 will be overwritten. If unchecked, all existing parameters will be removed and replaced with the new ones.
CREATE FROM SELECTION! 9: after selecting the objects for which you want to generate collisions, click this button to start the process.
Open Local Documentation 10: links to this documentation.
Get in Touch with the Author 11: provides contact information for the developer if assistance is needed.
Progress 12: bar displays the progress of the scene processing. For scenes with many objects (from 50 to 100), this may take several minutes.
Generating Collisions
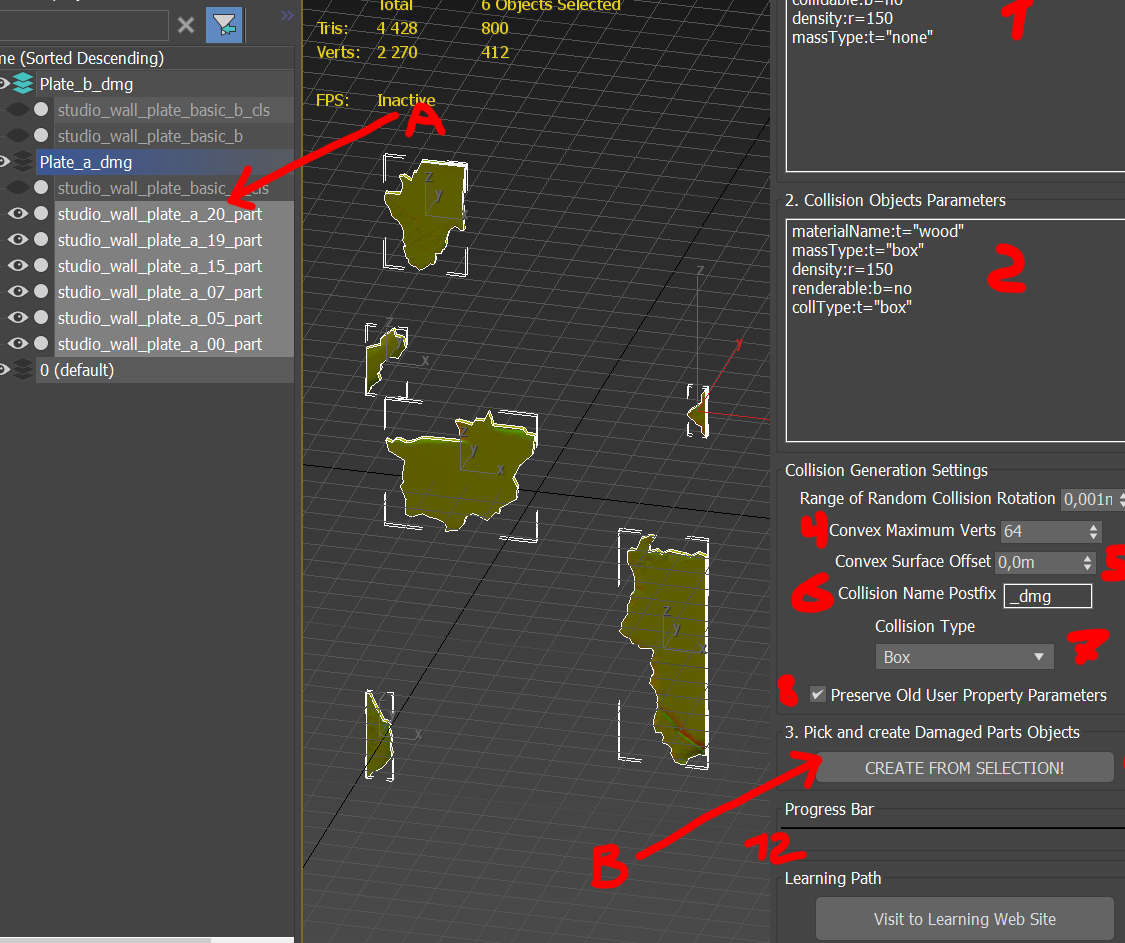
Select the objects you want to generate collisions for A.
Prepare them for export to the engine.
Click the CREATE FROM SELECTION! button B.
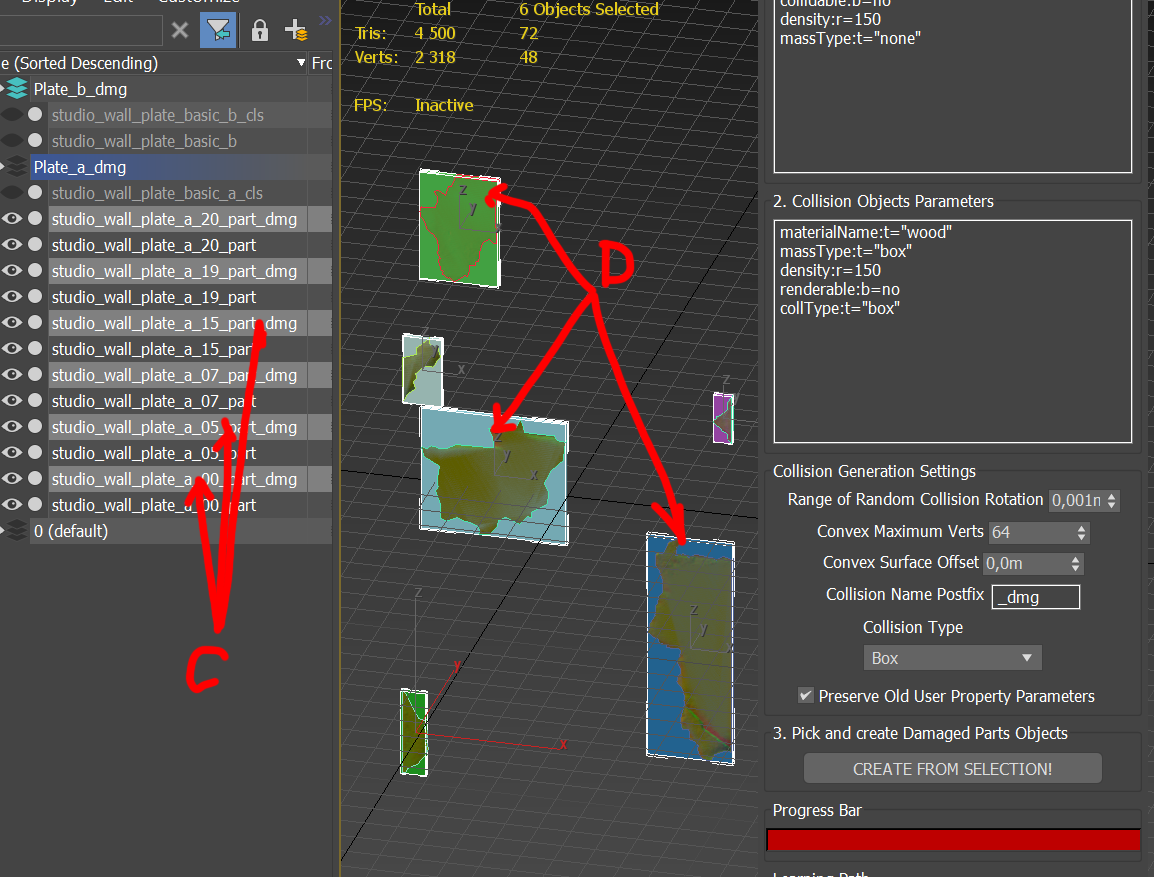
Reviewing Generated Collisions
After processing, a list of new objects C and generated collisions D will appear.