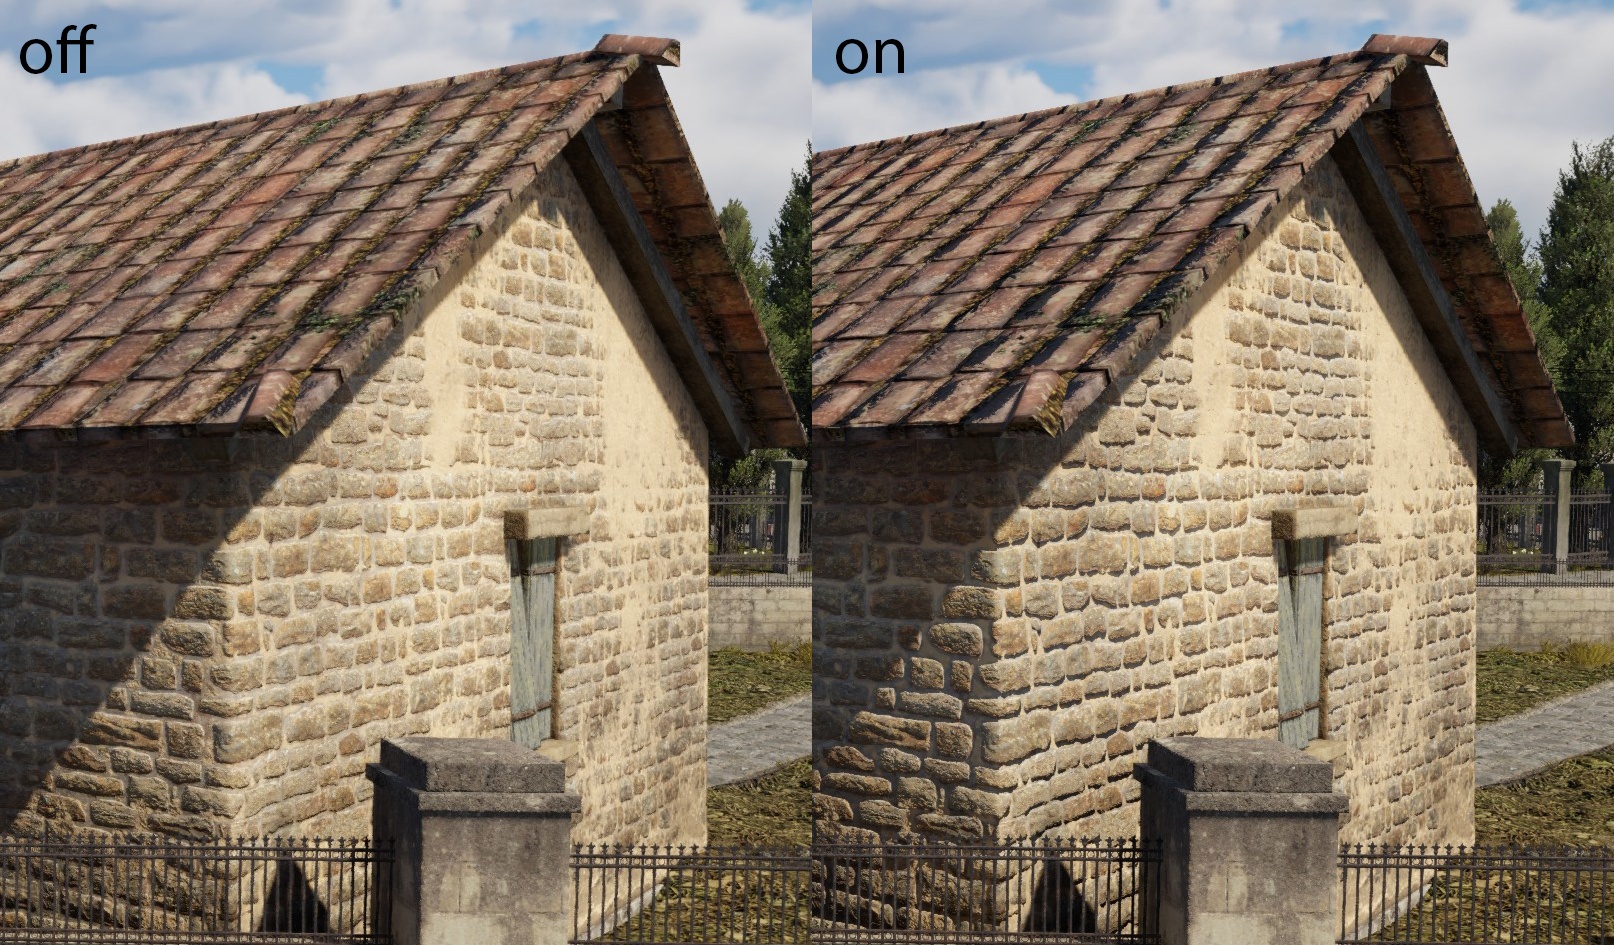
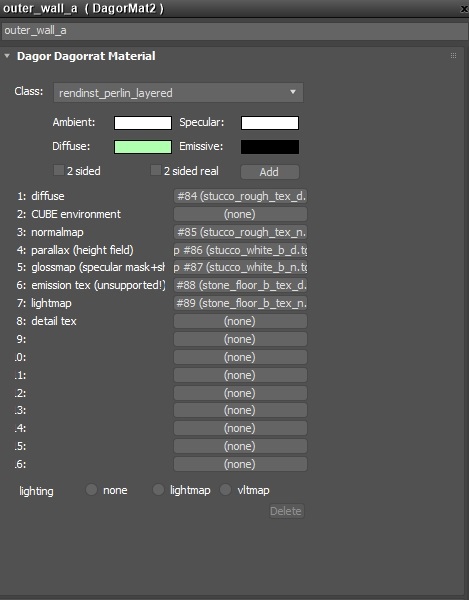
rendinst_perlin_layered
Overview
This shader is a complex tool for creating layered textures on terrain and assets. It supports blending multiple detail layers with normal maps, controlling detail tiling, and generating shadows from heightmaps. The shader includes features like height-based painting, which applies color based on object elevation using a predefined palette, and integrates Perlin noise to enhance texture blending. Parameters allow fine-tuning of shadow intensity, texture scale, and noise behavior, making it useful for adding depth and variation to surfaces in large-scale environments.
Parameters
General Parameters
script:t="blend_normals=0,0,0,0"- Normal blending. The first three components specify the normals involved in the blend, while the fourth component determines the normal through which the others will blend.script:t="invert_heights=0,0,0,0"- The first three components control the inversion of heightmaps (values can be fractional). The fourth component adjusts the height gradient of Detail3.script:t="mask_gamma=0.1,0.1,0.1,0.5"- The first three components control the gamma of the details (the power of their heightmaps). The fourth component is a multiplier for noise tiling.script:t="paint_details=0,0,0,0"- Detail painting. The first three components control the intensity of detail painting. The fourth component specifies the paint string.script:t="micro_detail_layer=0"- Index of the micro detail.script:t="micro_detail_layer_v_scale=1"- Vertical scale of the micro detail (for rectangular textures).script:t="micro_detail_layer_uv_scale=1"- Tiling of the micro detail.
daNetGame-based Parameters
script:t="mask_by_normal=0,1,0,0.5"- Specifies which normals allow Detail2 to show through other details. The first three components are normals (which can be fractional values), and the fourth component decides whether to use normals or Perlin noise.script:t="perlin_noise_offset=1,2,3,1"- Noise freezing on the model. The first three components define the noise offset along the x, y, z axes, while the fourth component toggles the noise freezing on or off.script:t="paint_points_black=0,0,0,0"- Painting points. The first three components set black points for three details. The fourth component is unused but required.script:t="paint_points_white=1,1,1,0"- Painting points. The first three components set white points for three details. The fourth component is unused but required.script:t="palette_index=0"- Paint palette selection.0for global,1for per-map.script:t="detail0_const_color=0,0,0,1"- Paint color for Detail1 (using modulate2x).script:t="detail1_const_color=0,0,0,1"- Paint color for Detail2 (using modulate2x).script:t="detail2_const_color=0,0,0,1"- Paint color for Detail3 (using modulate2x).script:t="enable_hmap_blend=1"- Enable/disable blending with the heightmap (default is 0).script:t="hmap_blend_height=0.1"- Height of the blend strip (default is 0.1).
War Thunder-based Parameters
script:t="details_tile=1,1,1,0"- Tiling of the details. The first three components are multipliers for the tiling of Details1-3. The fourth component is unused but required.
Functionality
The shader operates with three details (layered), blending them based on:
Details are assigned to the following slots:
Detail 1 (gray stucco): Albedo texture (heightmap in alpha) - empty.
Detail 1 (gray stucco): Normal texture (metalness in blue, smoothness in alpha).
Detail 2 (white stucco): Albedo texture (heightmap in alpha).
Detail 2 (white stucco): Normal texture (metalness in blue, smoothness in alpha).
Detail 3 (stone): Albedo texture (heightmap in alpha).
Detail 3 (stone): Normal texture (metalness in blue, smoothness in alpha).
Note
You can use two details instead of three. Detail1 is mandatory and constant. You can omit either Detail2 or Detail3, but not both.
If only Detail1 is used, there’s no point in blending – consider using a simple shader instead.
Blending Details
First Level: Blending by Height Gradient
This is a special case where Detail3 is blended based on its height gradient from the ground. If not configured properly, Detail3 may not be visible on most of the object, dominating only at the bottom.
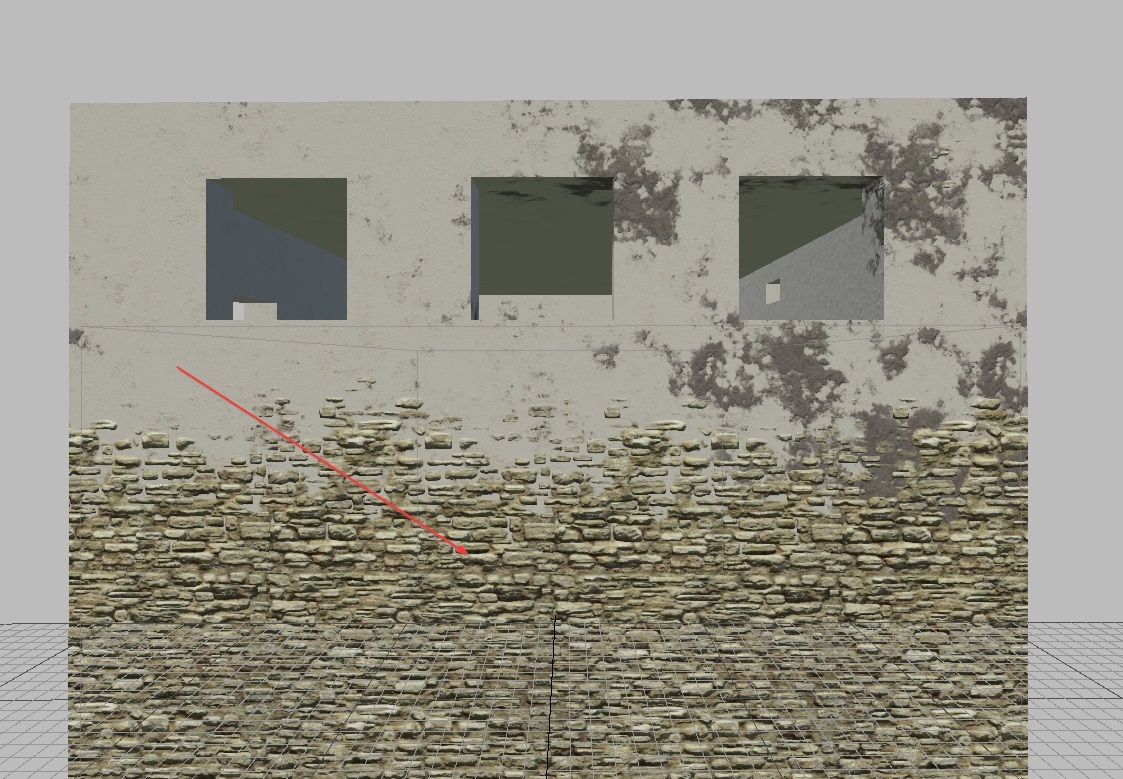
Essentially, this complex “height gradient” represents a natural gradient applied to the heightmap of Detail3.
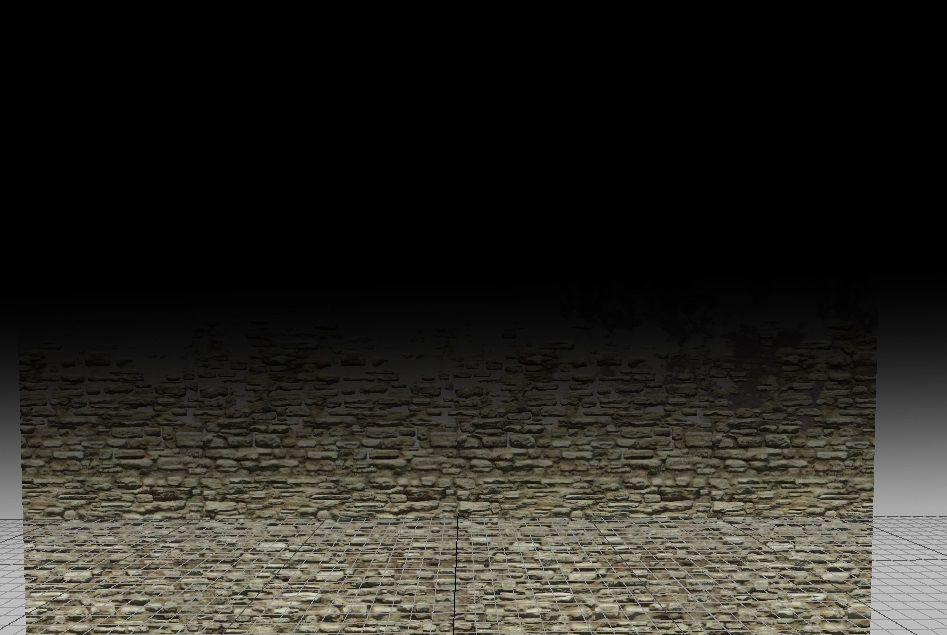
Second Level: Blending by Heightmaps
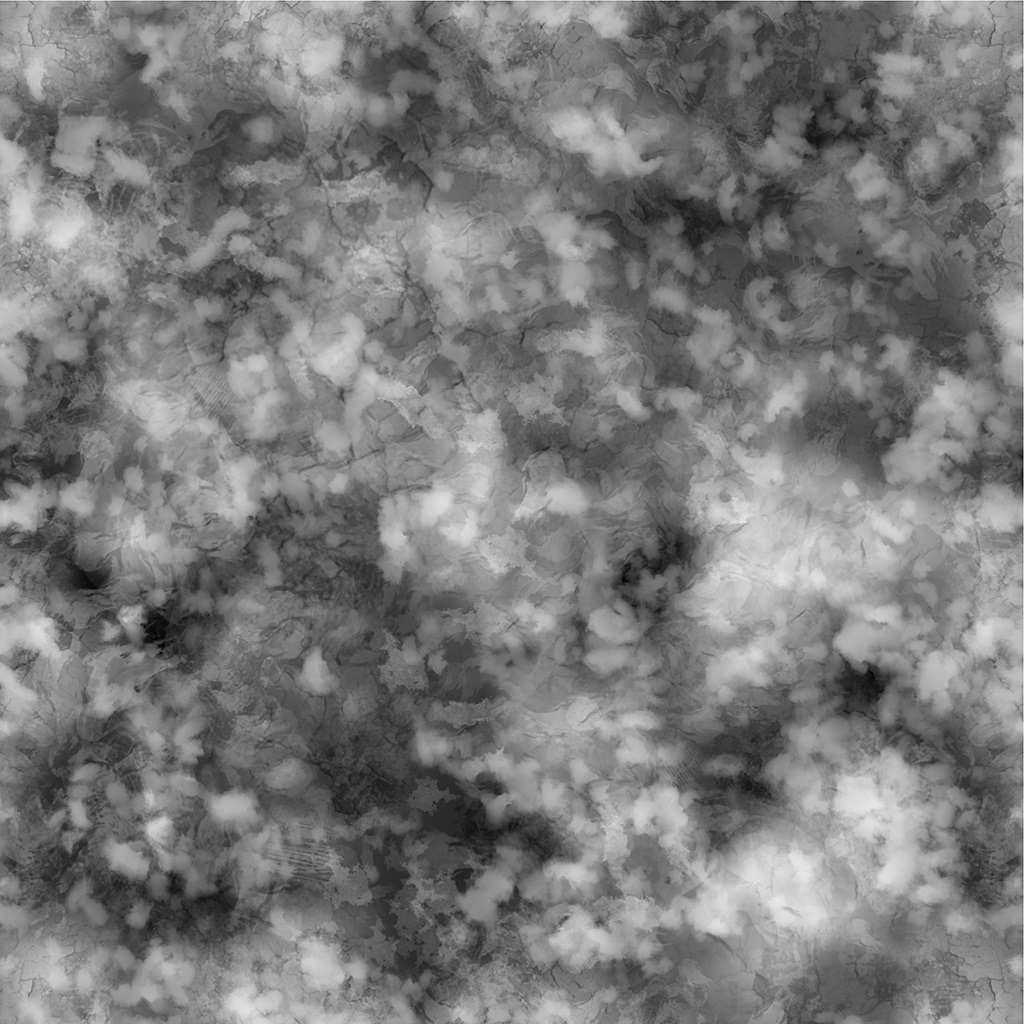
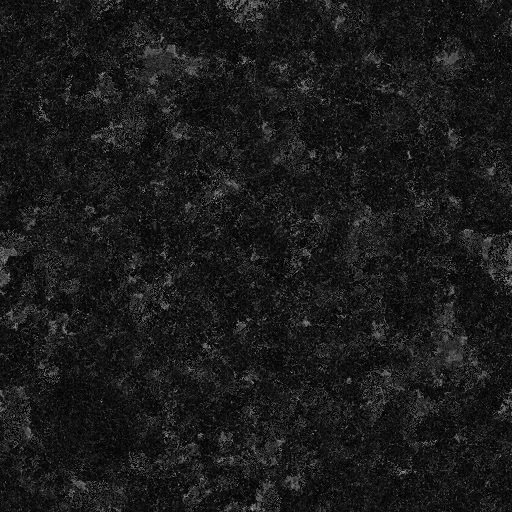
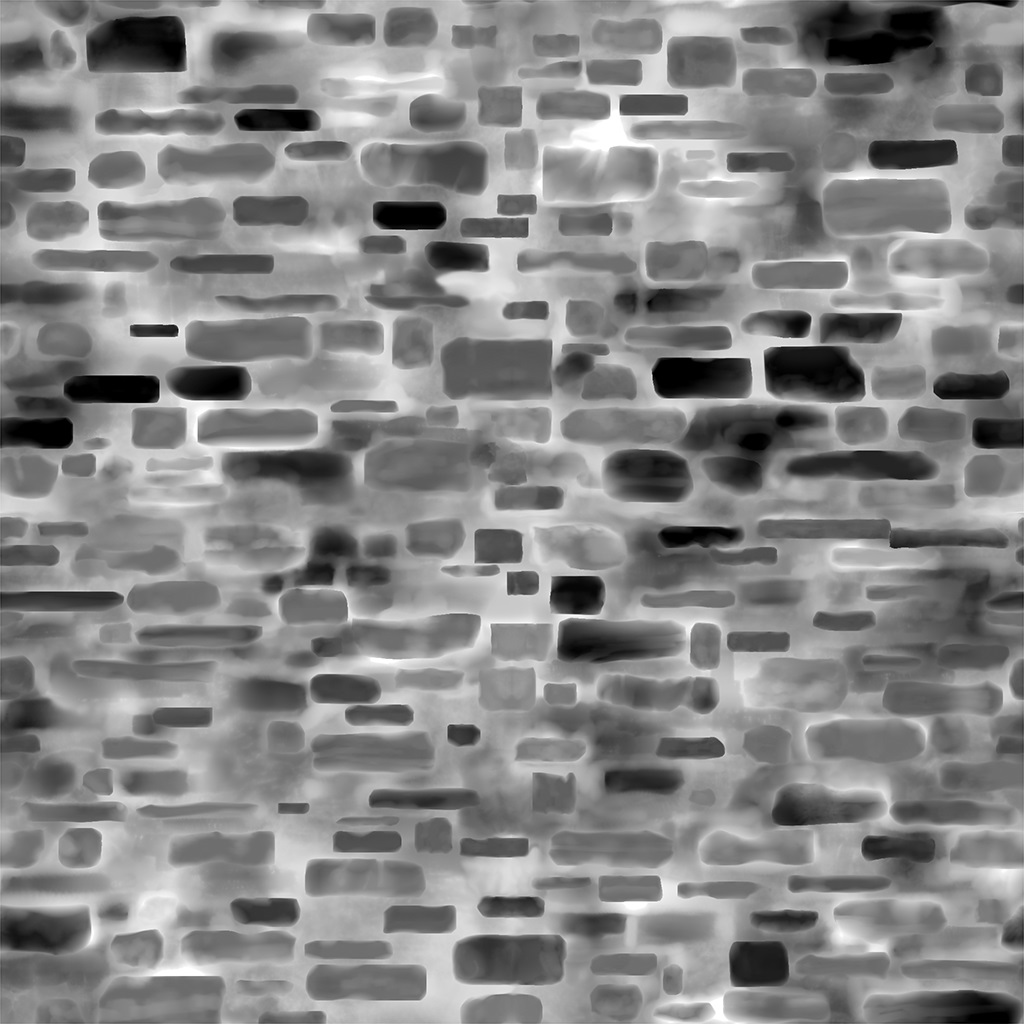
Each detail has its own heightmap. Let’s examine them:
Detail1 |
Detail2 |
Detail3 |
|---|
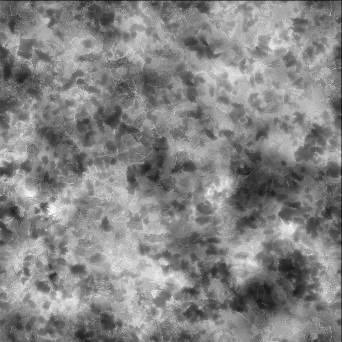
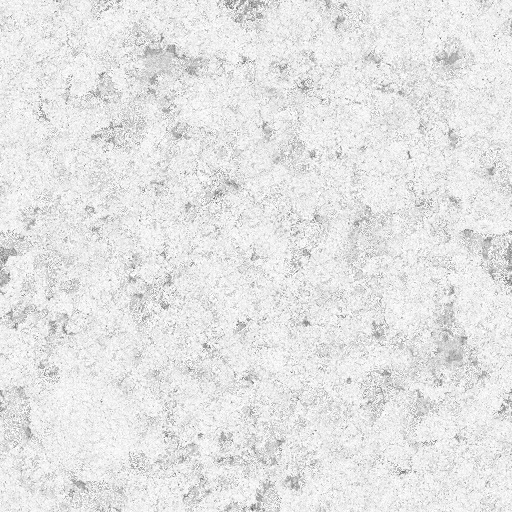
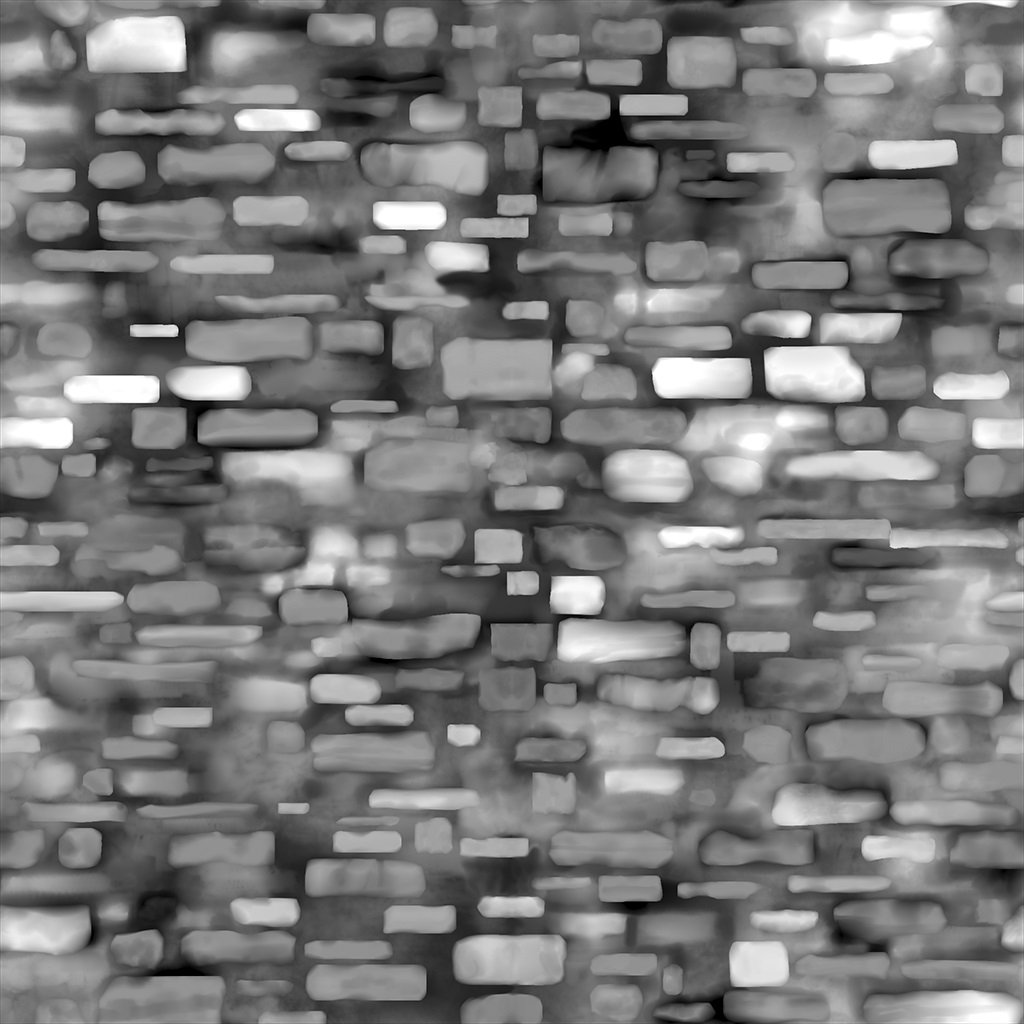
When blending three details over each other, they are strictly blended according to these heightmaps.
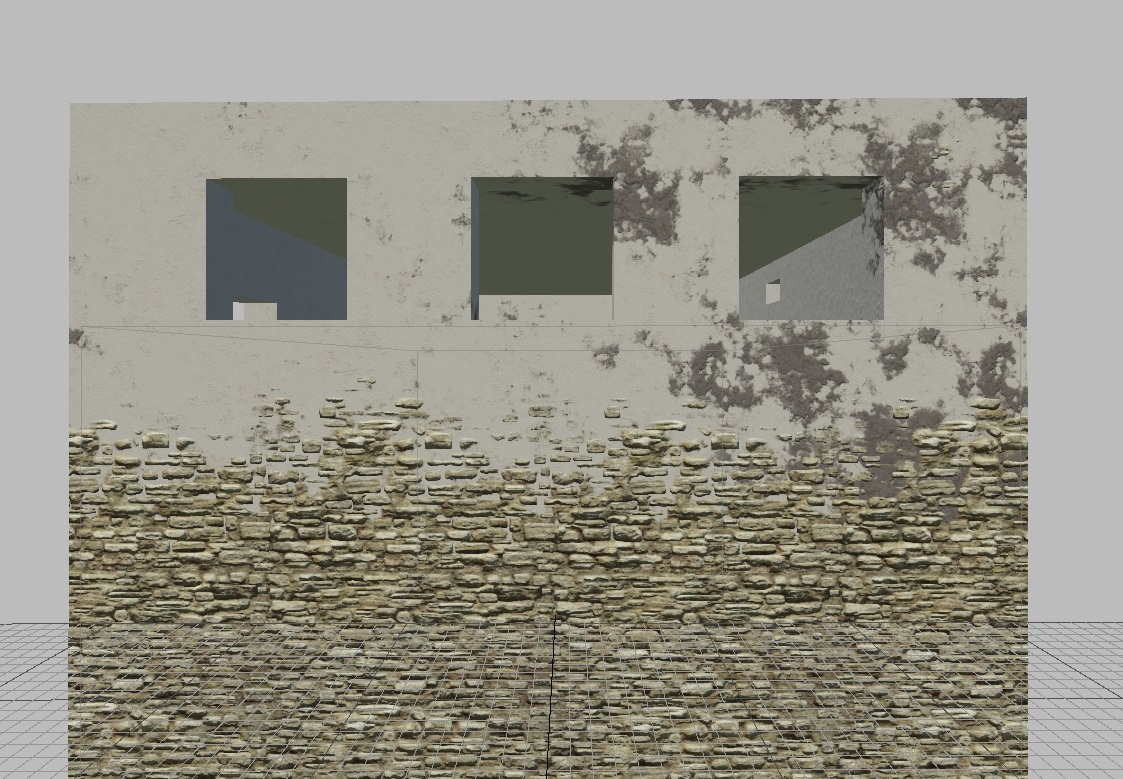
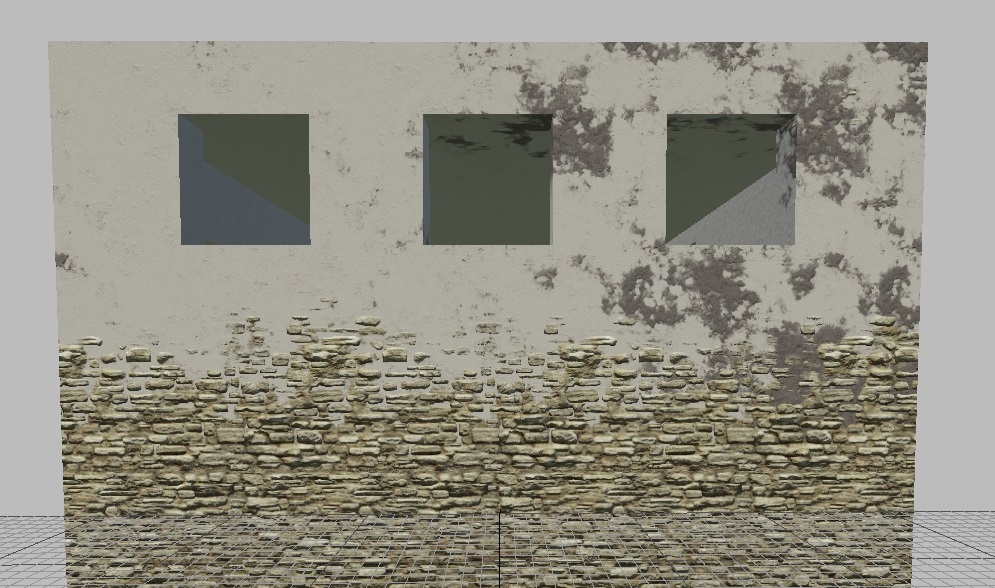
As shown in the screenshot, the heightmap of the white stucco (Detail2) is significantly “higher” than that of the gray stucco (Detail1). Meanwhile, Detail3 appears at the bottom based on the height gradient.
Third Level: Blending by Perlin Noise
As seen in the screenshots above, the gray stucco (with a weaker heightmap) appears in a specific corner. It’s absent in other areas because the Perlin noise at that location lightened the heightmap of Detail2, making it higher than Detail1.
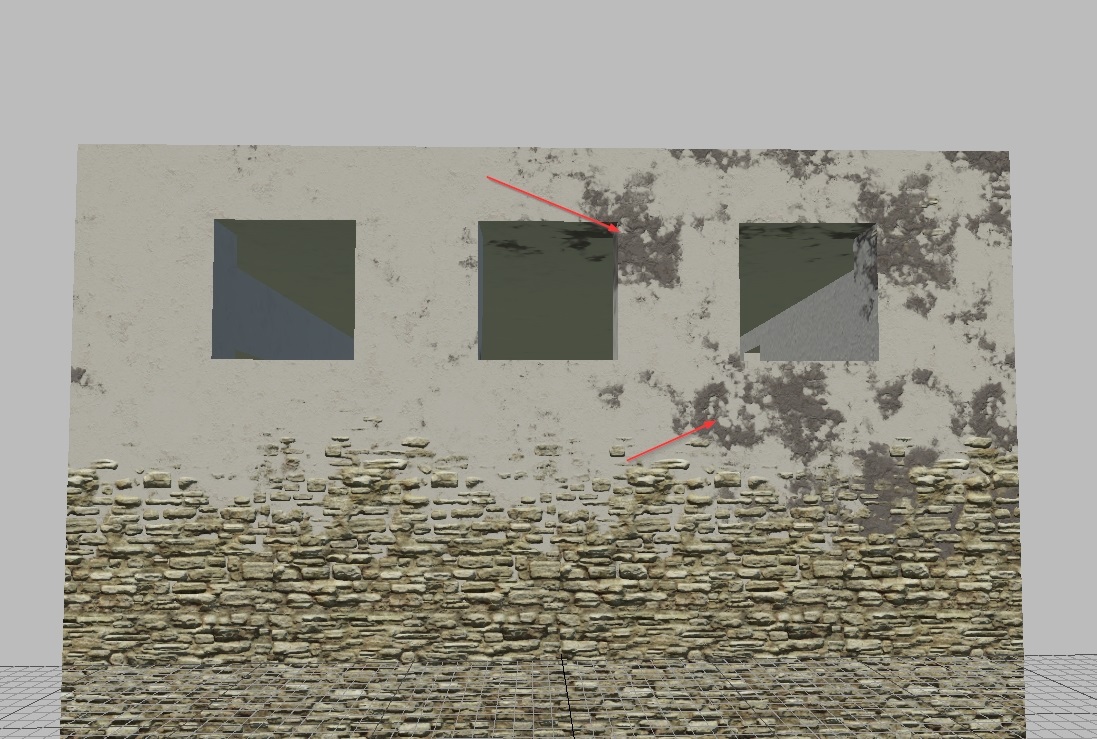
Blending Control
Blending is controlled using the following parameters:
Parameter: invert_heights=0,0,0,1
First Three Components
These invert the heightmaps of the respective details (values can be fractional, representing the linear interpolation factor between the inverted and original heightmaps).
0- original,1- inverted.
Result of Inverted Heightmaps:
Detail1 |
Detail2 |
Detail3 |
|---|
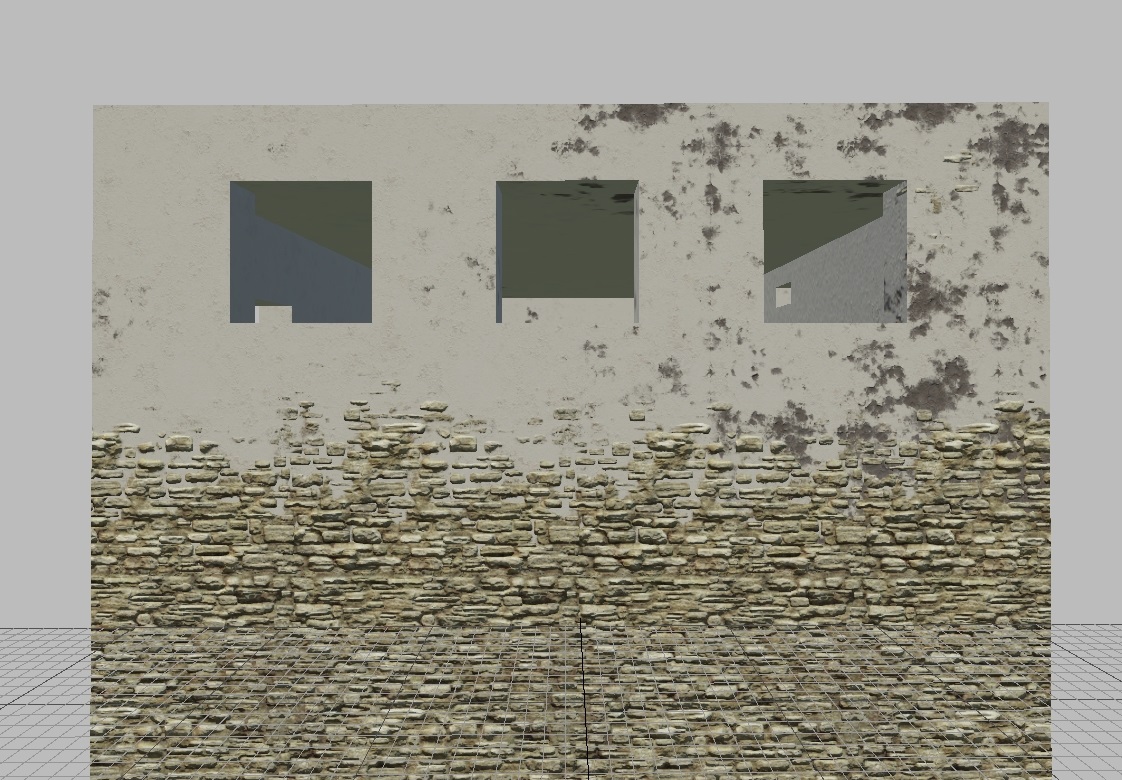
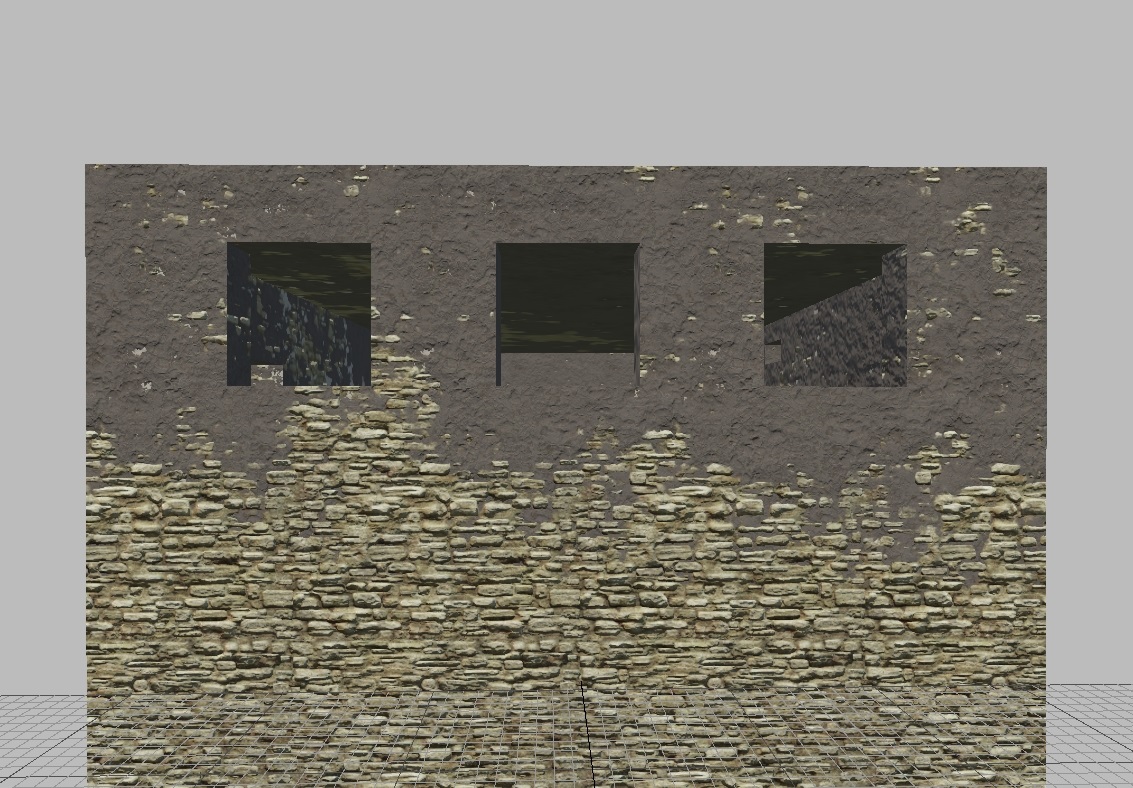
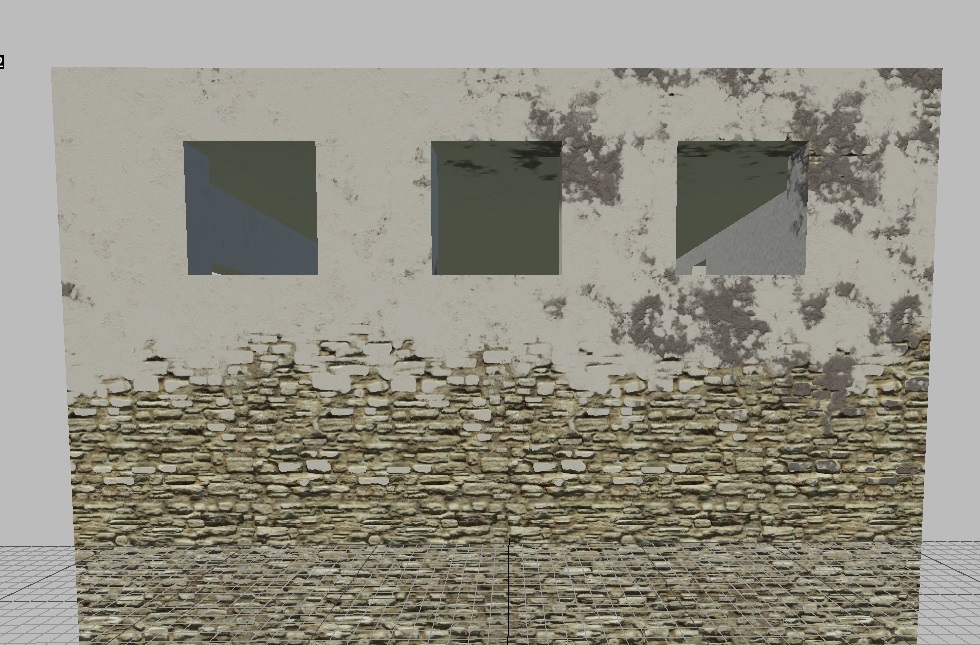
Visual Appearance of Inverted Heightmap:
Detail1 |
Detail2 |
Detail3 |
|---|
Explanation:
Detail1 |
Detail2 |
Detail3 |
|---|
Inverting the "gray" heightmap has little effect, as it stays "gray" even after inversion. |
Inverting the "white" heightmap makes Detail1 visible, as its "gray heightmap" becomes higher than the "black" (after inversion) heightmap of Detail2. |
It may seem unchanged, but note how the brick protrudes through the stucco. It no longer sticks out, as if it was pushed out from underneath. Now, the stucco lies on top of the brick plane, crumbling between layers (which looks much more realistic). |
Fourth Component
This controls the height gradient for Detail3.
0- original height gradient,1- no gradient.
Let’s see how this works:
value = 0 |
value = 0.5 |
value = 1 |
|---|
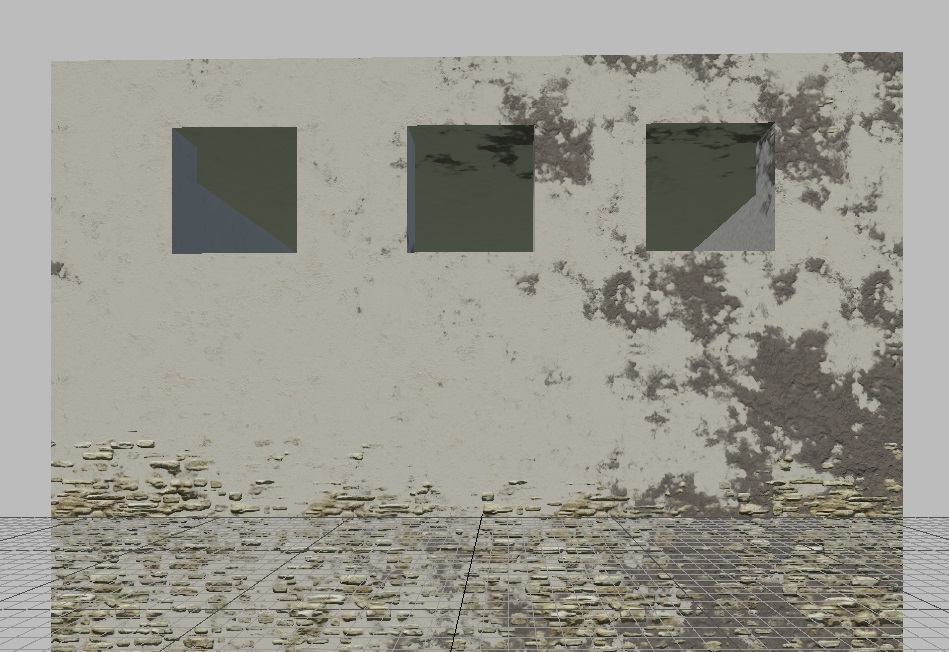
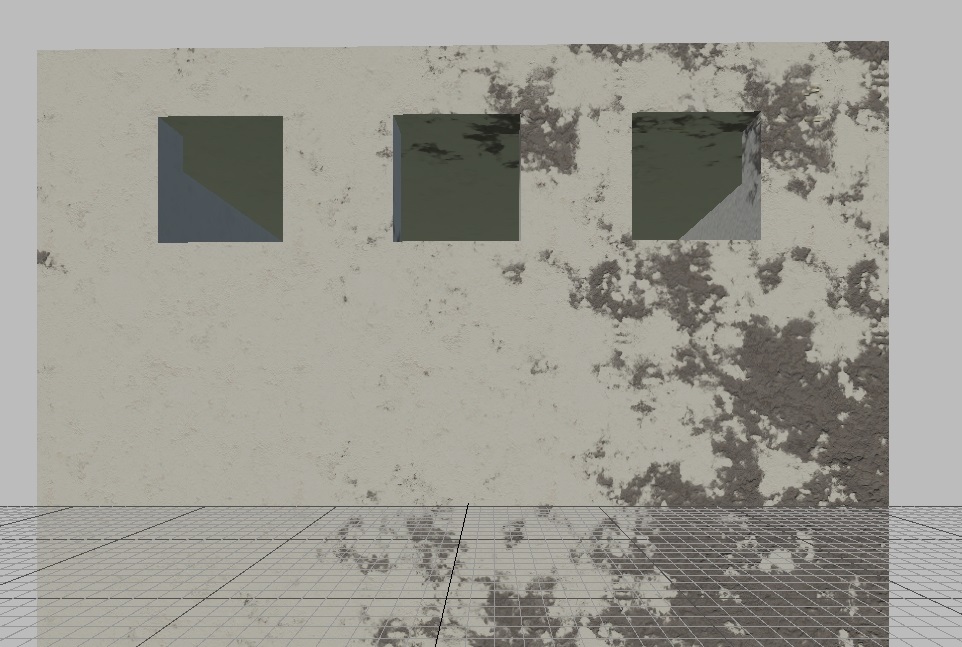
As shown, the higher the value, the less visible Detail3 becomes. This is because the parameter represents gamma (or the power) of the height gradient.
Note
What does this mean?
It means the height gradient ranges from almost 0 (black) to nearly 1
(white). Essentially, from around 0.01 to 0.99 (conditional, as the exact
implementation in code is unknown).
If we set a gamma of 0 for the nearly black part of the gradient (0.01), it
becomes 1 (white). Therefore, a value of 0 represents the maximum height of
Detail3.
As the gamma increases, the height decreases. For example, 0.01^0.5 = 0.1. And
0.01^1 = 0.01 - the gradient is completely black.
Parameter: mask_gamma=1,1,1,1
First Three Components
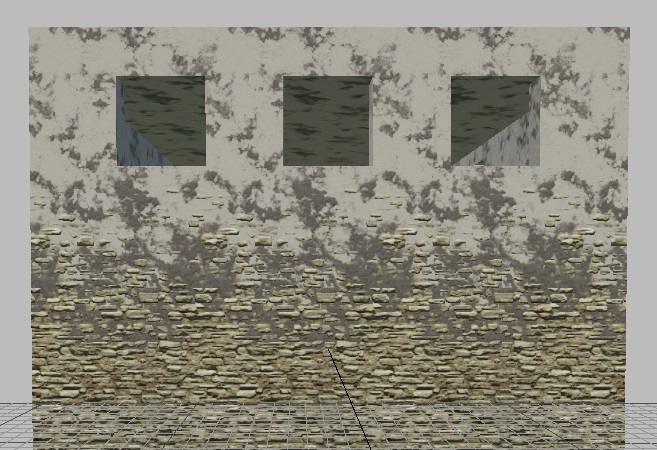
These set the gamma for a specific heightmap (as explained above). They effectively darken the heightmaps of the specified details.
0- untouched heightmap,1- completely darkened heightmap.
Note
The formula requires a value slightly above zero, typically around 0.1.
Let’s see how this works:
Heightmap 1
value = 0.1 |
value = 0.5 |
value = 1 |
|---|

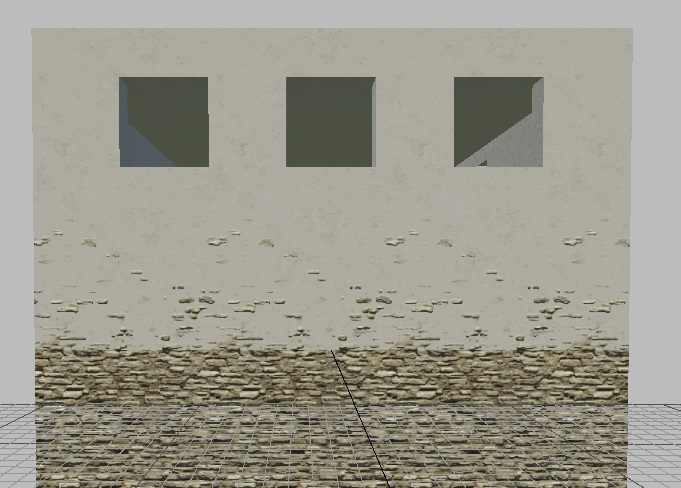

Heightmap 2
value = 0.1 |
value = 0.5 |
value = 1 |
|---|

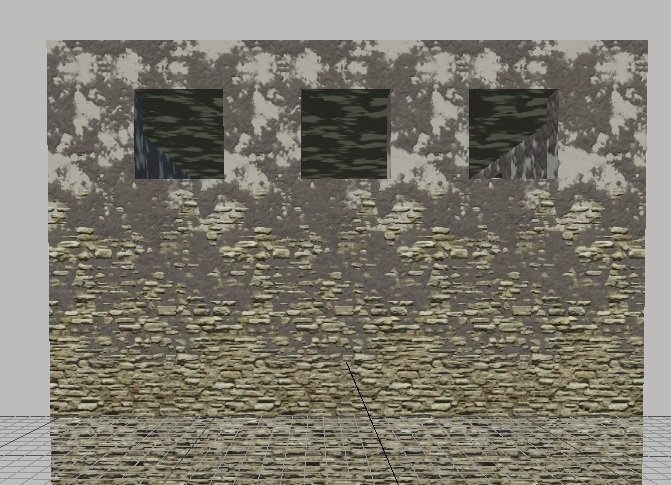
Heightmap 3
value = 0.1 |
value = 0.5 |
value = 1 |
|---|
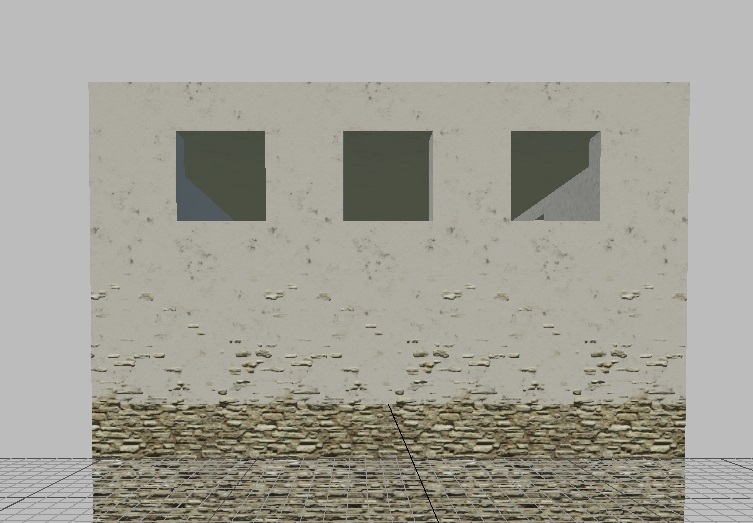
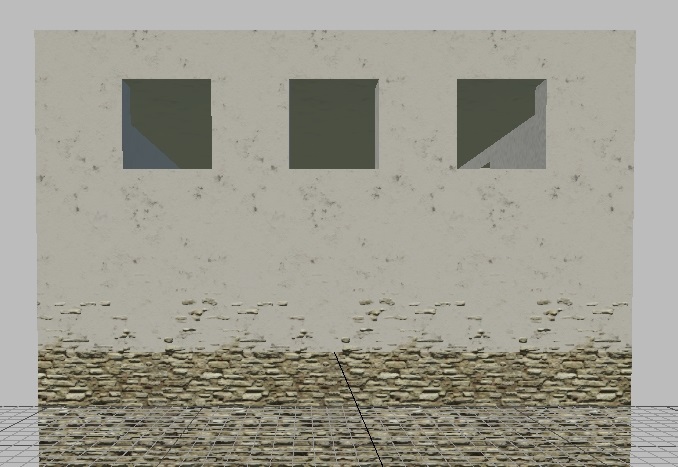
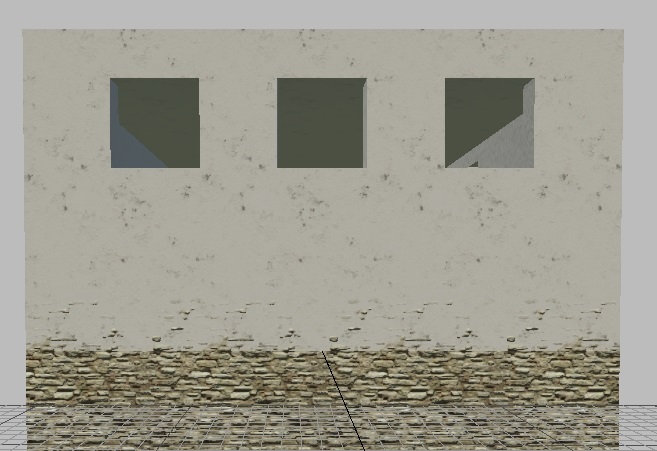
Fourth Component
This sets the scale (or more precisely, the tiling) of the world noise. Let’s
examine a longer object to see the difference. A value of 0 is not used, as
noise would be absent, and blending would occur solely based on heightmaps.
Normal Map Blending
Often, there’s a need to reveal the relief or texture of one detail through another. For example, you might want to show wood through peeling paint, or moss growing over tiles. In some cases, you might want to depict painted rusty metal, or simply add variation to the detail by using different textures.
Instead of generating a bunch of separate textures for each scenario, the shader provides a parameter for blending the normals of details. Essentially, this parameter allows the “lower” or “farther” (relative to the camera’s position) details’ normals to show through the “upper” or “closer” ones.
Parameter: blend_normals=1,1,1,1
This parameter controls how the normal maps of different details blend with each other.
The first three components specify which details’ normals participate in the blending process.
The fourth component determines the “main” detail through which the other normals will show. This is important because the blending effect will only be visible through this selected detail (keep in mind that the details are numbered starting from 0).
Important
You must be cautious with the fourth component. If you set it to the “lower” detail that is not visible due to blending, you won’t see any blending effect – because the detail through which the other normals should be visible is itself not visible.
In other words, for the blending effect to work correctly, the selected “main” detail (fourth component) must be visible. This ensures that the normals of the other details can properly blend through it.
blend_normals=0,0,0,0 |
blend_normals=1,1,1,1 |
blend_normals=1,0,1,0 |
|---|
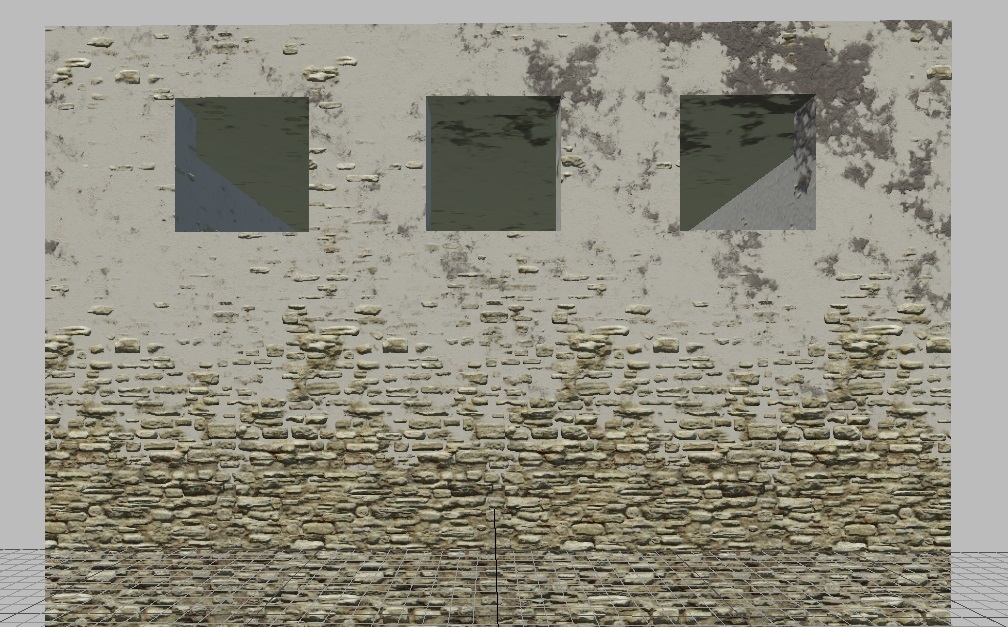
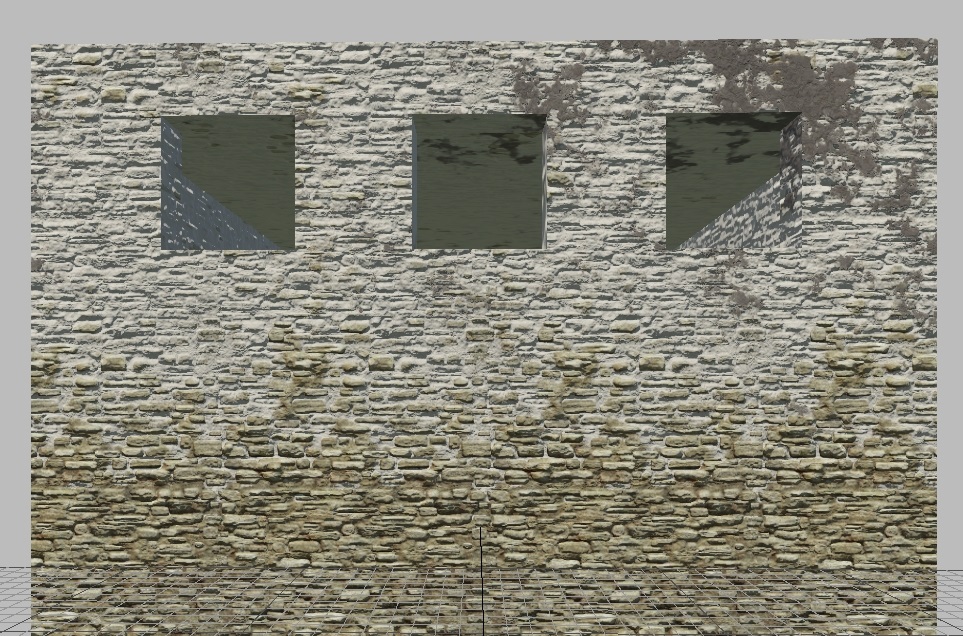
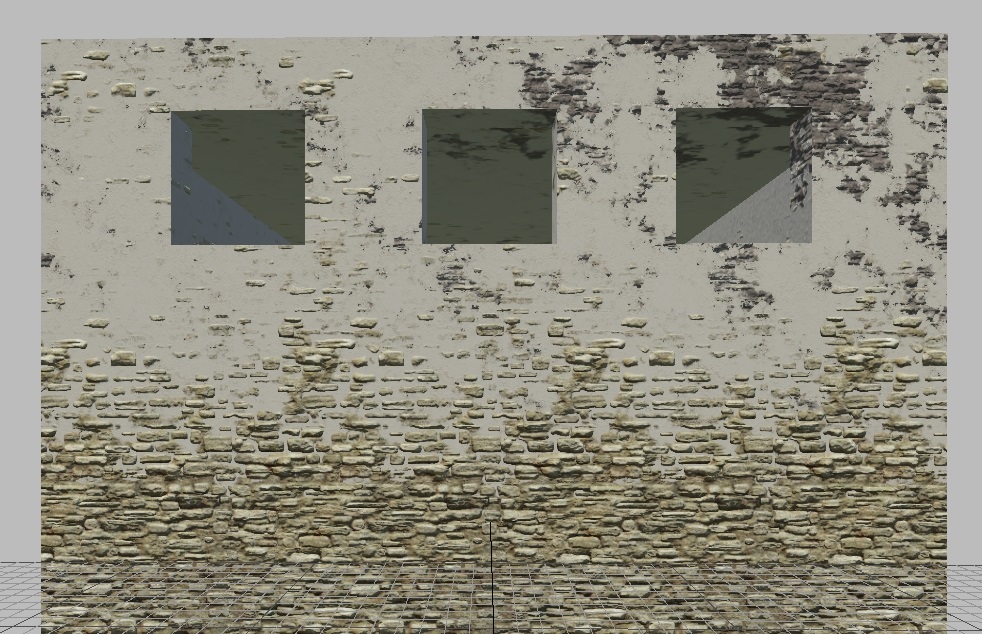
All Values Set to 0: No normal map blending occurs. |
All Values Set to 1: All normals (first three components) are blended, with the main normal (through which others blend) set to 1, representing white stucco. |
Blending Through 0 (fourth component): This blends through the gray stucco (Detail3). The Detail2 (white stucco) does not participate in the blend. |
Procedural Object Painting
See also
For more information on procedural painting, see Procedural Rendinst Painting.
Microdetails
The shader supports one microdetail across the entire stack of details. The
syntax is similar to simple_aces. For example:
micro_detail_layer=0- Index of the microdetail.micro_detail_layer_v_scale=1- Vertical-to-horizontal ratio for the microdetail texture.micro_detail_layer_uv_scale=16.371- Scale (tiling) of the microdetail texture.
daNetGame-based Parameters
Overlaying the Detail2 by Normals
This is controlled by the parameter:
script:t="mask_by_normal=0,1,0,0.5"
The first three components set the reference normal that dictates where
the second detail will appear (these are not normalized normals, so values greater than one will cause the detail to appear more strongly with sharper edges).
The last component controls the interpolation (lerp) between the noise mask weight and the normal mask weight (0 means no normals are used, 1 means only normals are used).
Freezing Perlin Noise
Controlled by the parameter:
script:t="perlin_noise_offset=1,2,3,1"The first three components determine the Perlin noise offset in the x, y, and z directions.
The fourth component:
0keeps the default noise unaffected by the offset, while1freezes the noise, making it look consistent across both the editor and the game regardless of the asset’s position, orientation, and scale.
This parameter is recommended only for extreme cases, where more artistic control over noise on unique assets is required.
Paint Points
These are analogous to black/white points in rendinst_simple_painted and rendinst_mask_layered.
Controlled by the parameters:
script:t="paint_points_black=0,0,0,0"The first three components set the black points for the three details, and the fourth component is mandatory but unused.
script:t="paint_points_white=1,1,1,0"The first three components set the white points for the three details, and the fourth component is mandatory but unused.
Important
Black and white points must always be different, even if their details are not being painted. If these parameters are added, ensure all black and white points are different. By default, you can copy these parameters directly – black points as all zeros, white points as all ones:
script:t="paint_points_black=0,0,0,0"script:t="paint_points_white=1,1,1,0"
Otherwise, you will encounter a “divide by zero” error:
rendinst_perlin_layered: divide by zero [real] while exec shader code. stopped at operand #45
Painting Details in Different Constant Colors
You can color each detail separately. However, this technology works with shader-defined colors rather than a paint map – there is no randomness. Only the color you specify will be applied.
Important
Painting works via modulate2x, so the resulting color may differ slightly from
what you set. This is a limitation of the technology.
Controlled by parameters like:
script:t="detail0_const_color=0,0,0,1"- Paints the Detail1script:t="detail1_const_color=0,0,0,1"- Paints the Detail2script:t="detail2_const_color=0,0,0,1"- Paints the Detail3
Important
To activate these parameters, detail painting must be enabled, meaning the
parameter script:t="paint_details=1,1,1,0" should be set to 1 (or another
necessary value, just not 0) for the required details. The fourth component
(the paint line) does not affect those details for which a fixed color is set.
Parameter values:
The first three components represent the color in RGB, scaled to the 0-1 range.
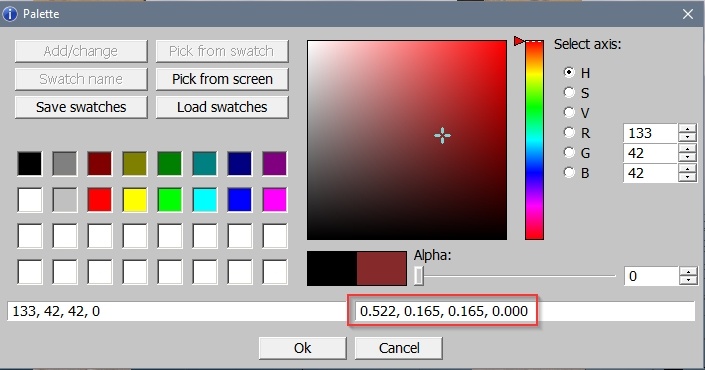
The fourth component controls the influence of the paint map on the specified color:
0means full influence,1means no influence.
This type of painting can be combined with standard paint map-based painting – some details can use the map, while others use the specified color.
Paint points still apply.
Heightmap Blending
To better integrate objects with the terrain, you can use parameters that blend the details of the terrain and the asset based on the mask of where the asset intersects with the heightmap. This is useful for piles, rocks, cliffs, etc.
Important
This is a computationally expensive technique, so use it only when necessary.
Example of blending:
Without Blending |
With Blending |
|---|
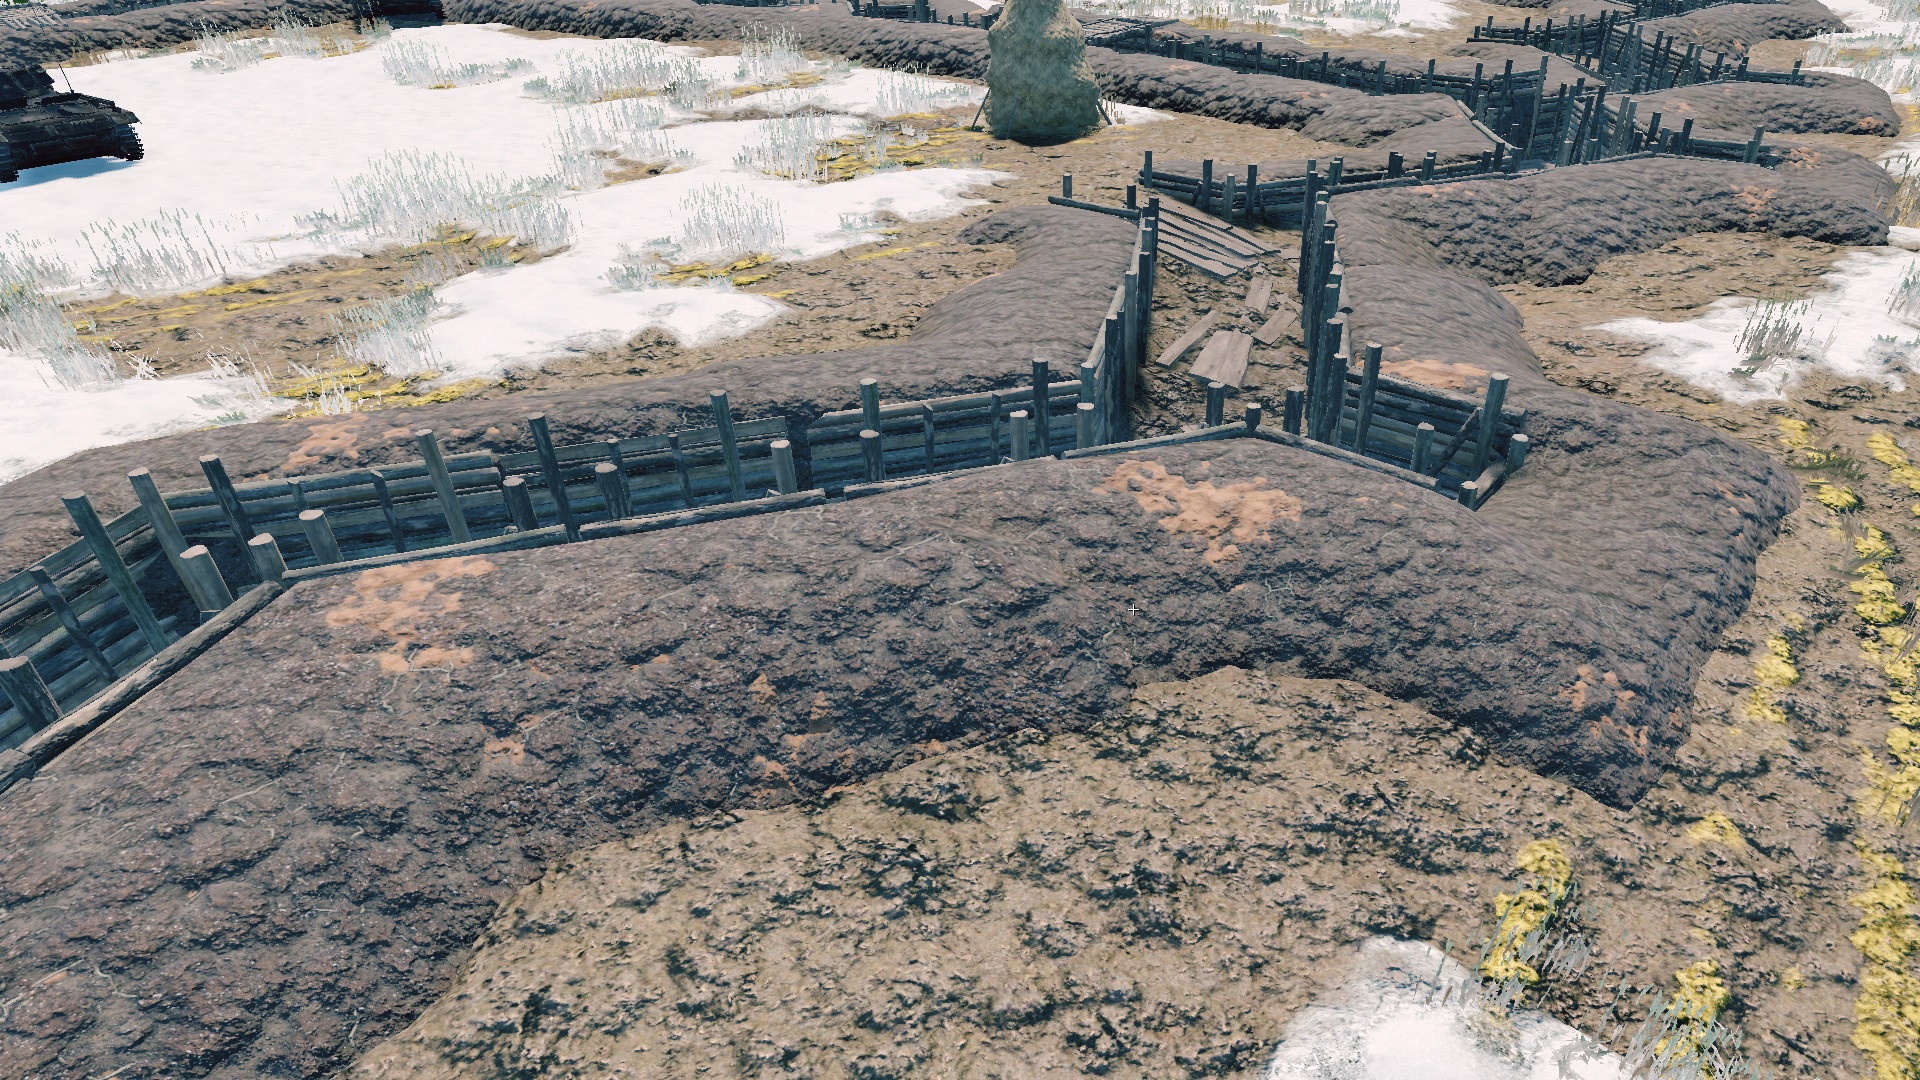
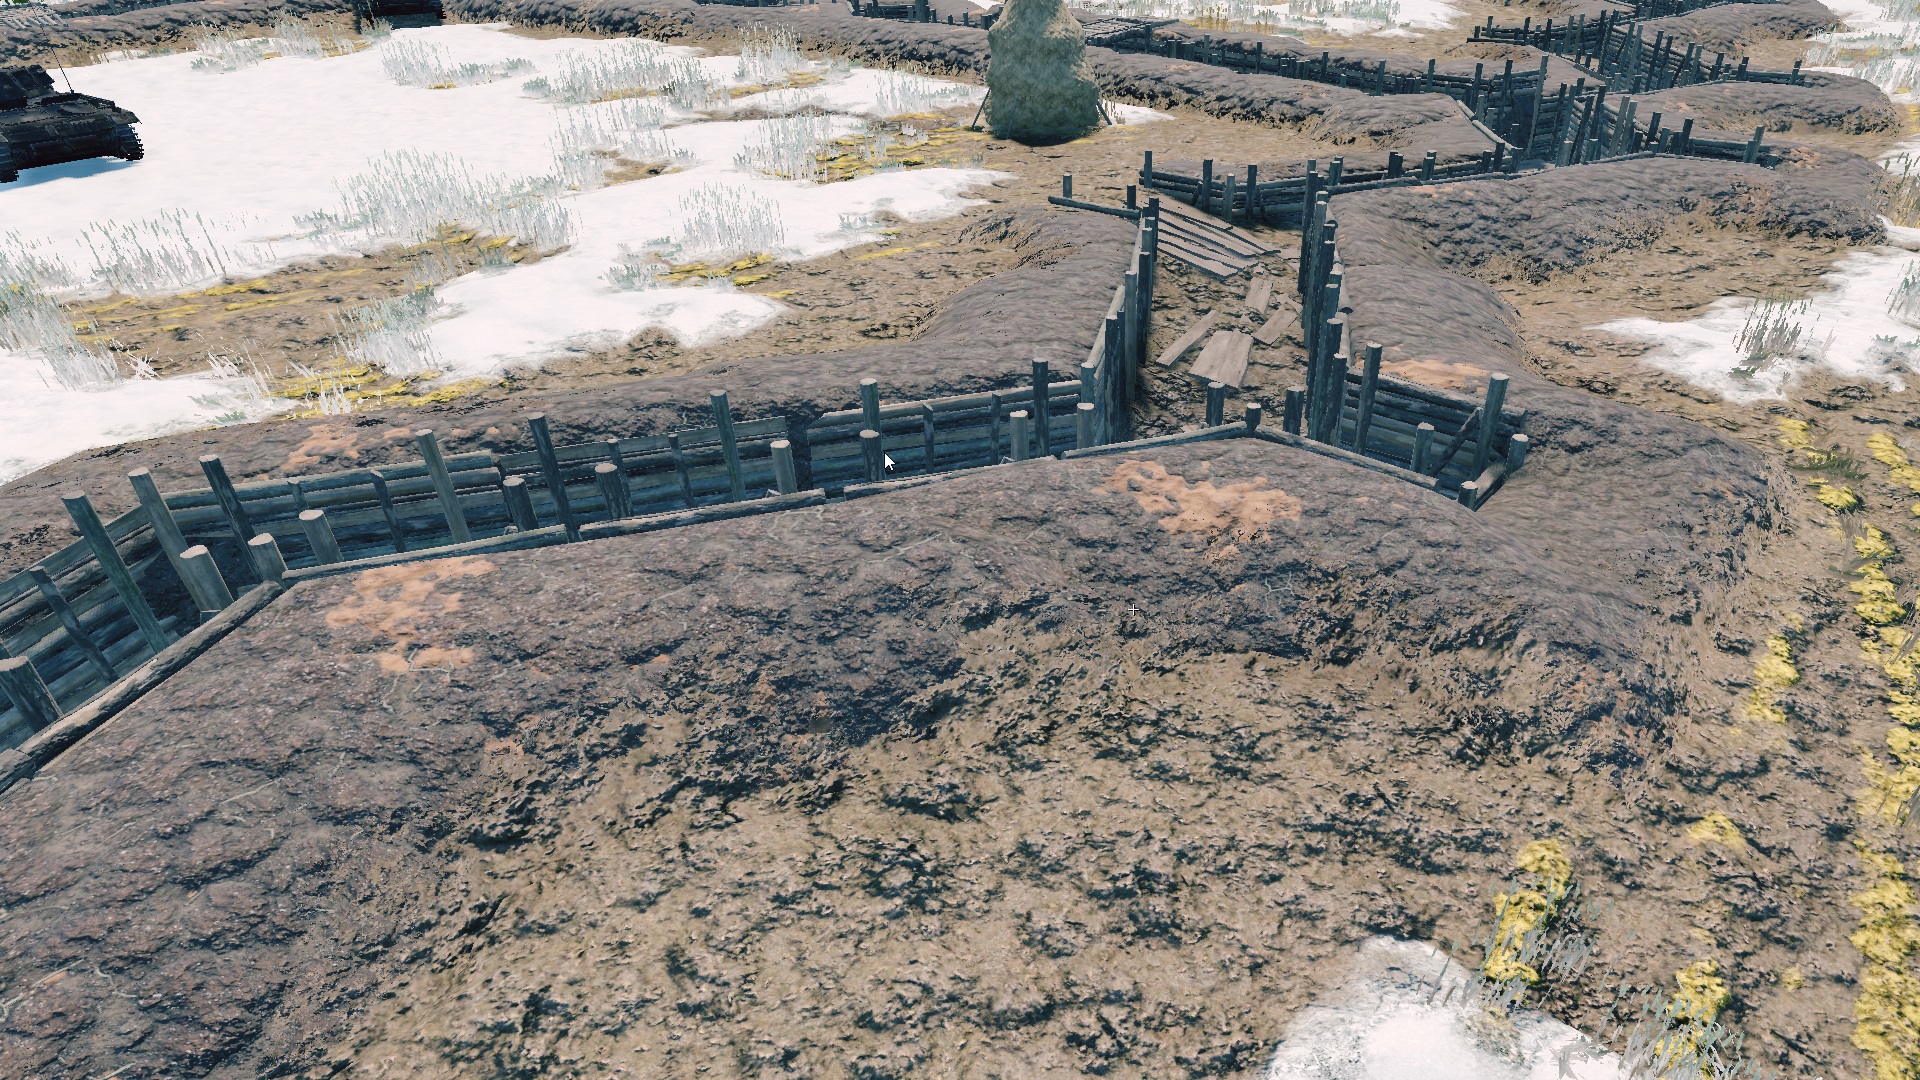
Initialization and Operation of the Blend
Parameters to initialize the blend in the shader:
script:t="enable_hmap_blend=1"- (default - 0) - enable/disable blending with the heightmap.script:t="hmap_blend_height=0.1"- (default - 0.1) - height of the blend stripe.
Global Shadervars
Primary shader parameters, initialized in gamedata/.../scene.blk in the
"shader_vars__vars:object" block:
ri_hmap_blend_sharpness = 8.0- (default - 8.0) - higher value means sharper blend edges.ri_hmap_min_angle = 12.0- (default - 12.0) - gradient perlin noise starts from this angle to the max angle.ri_hmap_max_angle = 50.0- (default - 50.0) - maximum angle.ri_hmap_perlin_tex_scale = 0.25- (default - 0.25) - perlin noise tiling multiplier.ri_hmap_min_height = 0.5- (default - 0.5) - minimum blend height, overrides shader parameter if necessary.
Static Shadervars
Additional shader parameters that adjust the influence of global shadervars for a specific asset:
script:t="ri_hmap_blend_sharpness_mul = 1.0"- multiplier forri_hmap_blend_sharpness.script:t="ri_hmap_min_angle_mul = 1.0"- multiplier forri_hmap_min_angle.script:t="ri_hmap_max_angle_mul = 1.0"- multiplier forri_hmap_max_angle.script:t="ri_hmap_perlin_tex_scale_mul = 1.0"- multiplier forri_hmap_perlin_tex_scale.script:t="ri_hmap_min_height_mul = 1.0"- multiplier forri_hmap_min_height.
Global and Static Shadervars for ri_hmap
Global Shadervars: Affect all assets on a level with initialized blending.
Default Values: If global shadervars are not initialized in
scene.blk, the default values listed above are used.Static Shadervars: These are shader parameters that act as multipliers for the global shadervars initialized in
scene.blk.
For example, if the global shadervar is:
ri_hmap_blend_sharpness = 8.0
and the asset example.dag has a static shadervar set to:
script:t="ri_hmap_blend_sharpness_mul = 0.5"
the final blend sharpness value for example.dag on the level will be
calculated as:
blend_sharpness = ri_hmap_blend_sharpness * ri_hmap_blend_sharpness_mul = 8.0 * 0.5 = 4.
Important
The heightmap blending shader works in the
daEditor, but since the
global shadervars for the editor are initialized separately and not pulled from
scene.blk, be aware that if you select global shadervars values in scene.blk
that differ from the default values, the editor will display something different
from what you will see in the game. Instructions on how to set global shadervars
for the editor will be added to the article later.
Tip
Global shadervars can be changed in the game in real-time:
If global shadervars are not initialized in
scene.blk, they can only be changed through the web UI Shader_vars – show global shader vars;If initialized, they can be changed in the game itself using the mission settings UI, which is called up by pressing
F12.
War Thunder-based Parameters
Detail Tiling
In War Thunder, the texel density of details isn’t always consistent (although
all new details are created with correct texel density). To address this, the
parameter details_tile=1,1,1,0 was introduced.
Only the first three components are used, with each one controlling the tiling of its corresponding detail.
The default value for each component is
1.
Height-based Painting
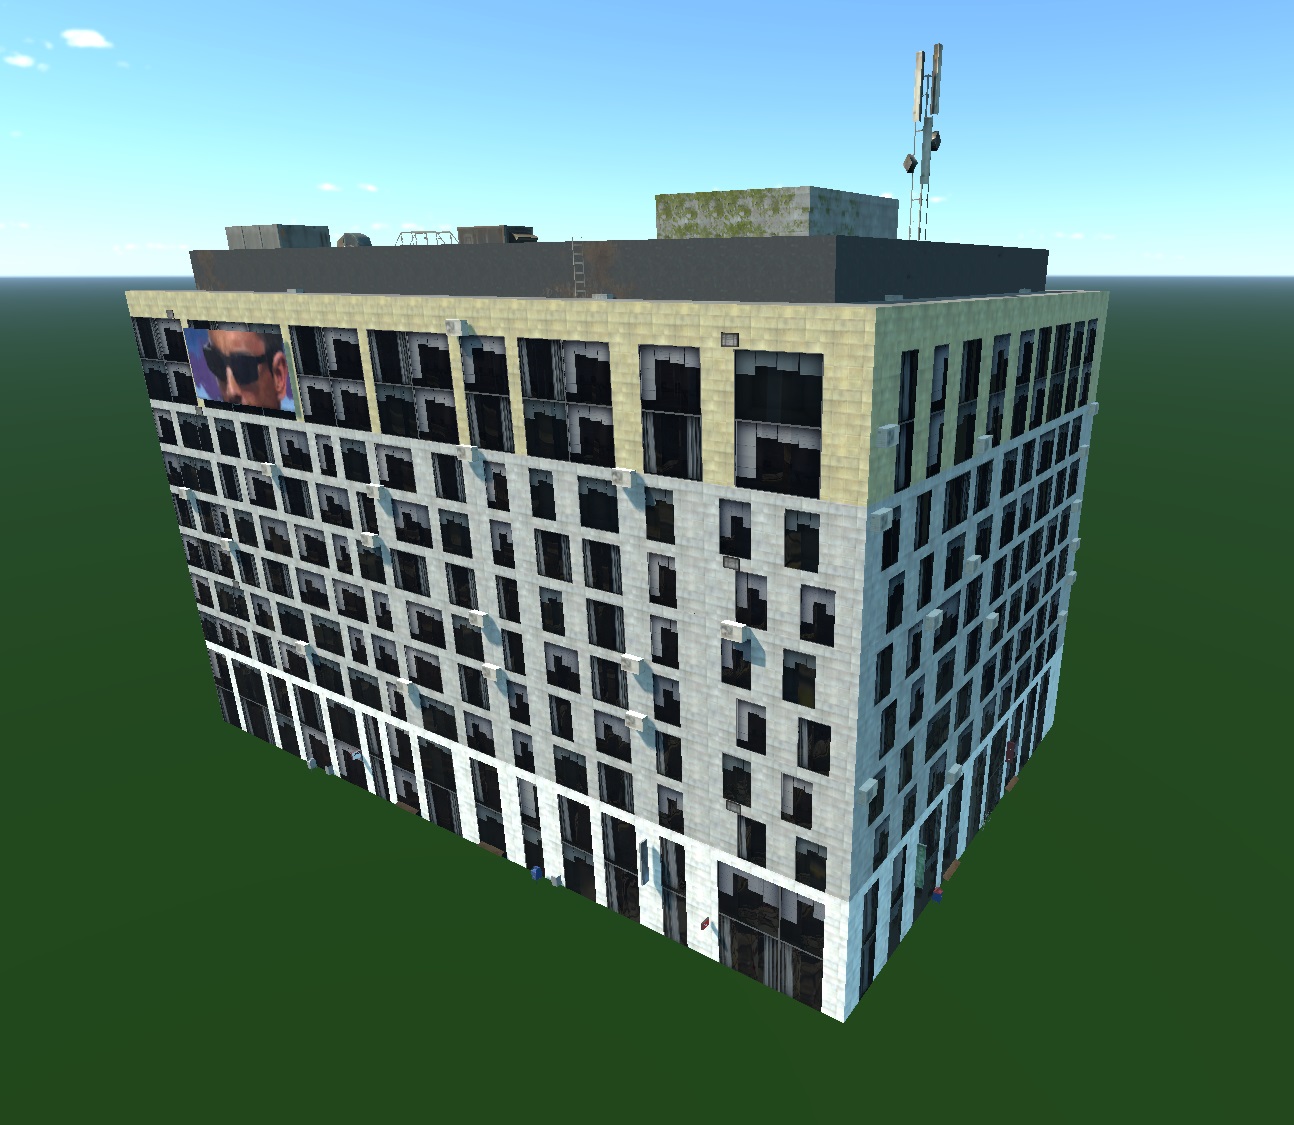
script:t="use_painting=1": Controls painting from a palette defined in the scene’s shader variables.1enables painting, while0disables it.Values between
0.01and0.9reduce the painting intensity (multiplier). Painting is based on the alpha of the diffuse texture, multiplied by theuse_paintingvalue.Values between
1.01and1.9affect the painting intensity from0.0to1.0but disable the random pixel selection from the paint stripe when the object is displaced vertically. This is useful for ensuring that modular skyscrapers, for example, are painted the same color.
The palette used is called paint_colors.dds and can be found at
.../develop/assets/textures/colorize_textures.
See also
For more information on procedural painting, see Procedural Rendinst Painting.
Material Shadows
These are shadows derived from the heightmap of the details. The available parameters include:
script:t="material_shadow_influence=0.5, 1, 0.3, 0": Controls the “strength” of shadows for each detail.Each component affects the corresponding detail (e.g.,
0.5for the first detail,1for the second, and0.3for the third).The fourth component is not used in the
rendinst_perlin_layeredshader.
script:t="material_shadow_scale=2": Acts as a multiplier for the “size” of the shadow.This scale is applied uniformly to the shadows of all details, as calculating it individually for each detail would be computationally expensive.
