Services
Gaijin Application Platform allows users with administration rights to expand the functionality of their applications by connecting additional services, such as content delivery, matchmaking, leaderboards, inventory, bug reporting, forums, and so on. When necessary, these services can be connected to the project. GAP offers a range of available services, including the YupMaster GDN – the content delivery service.
The steps for connecting and configuring a service to a project are as follows:
The project administrator connects the service to the project.
The project administrator assigns the service administrators. Project administrators do not have service administration rights by default, but they can assign themselves as a service administrator.
The service administrator assigns users and their roles within the service and makes any other service configurations.
Connect Service to Project
To connect a service to the project, go to Services page through the Side navigation. This page shows the list of available services, as well as the list of services that are already connected in your project.
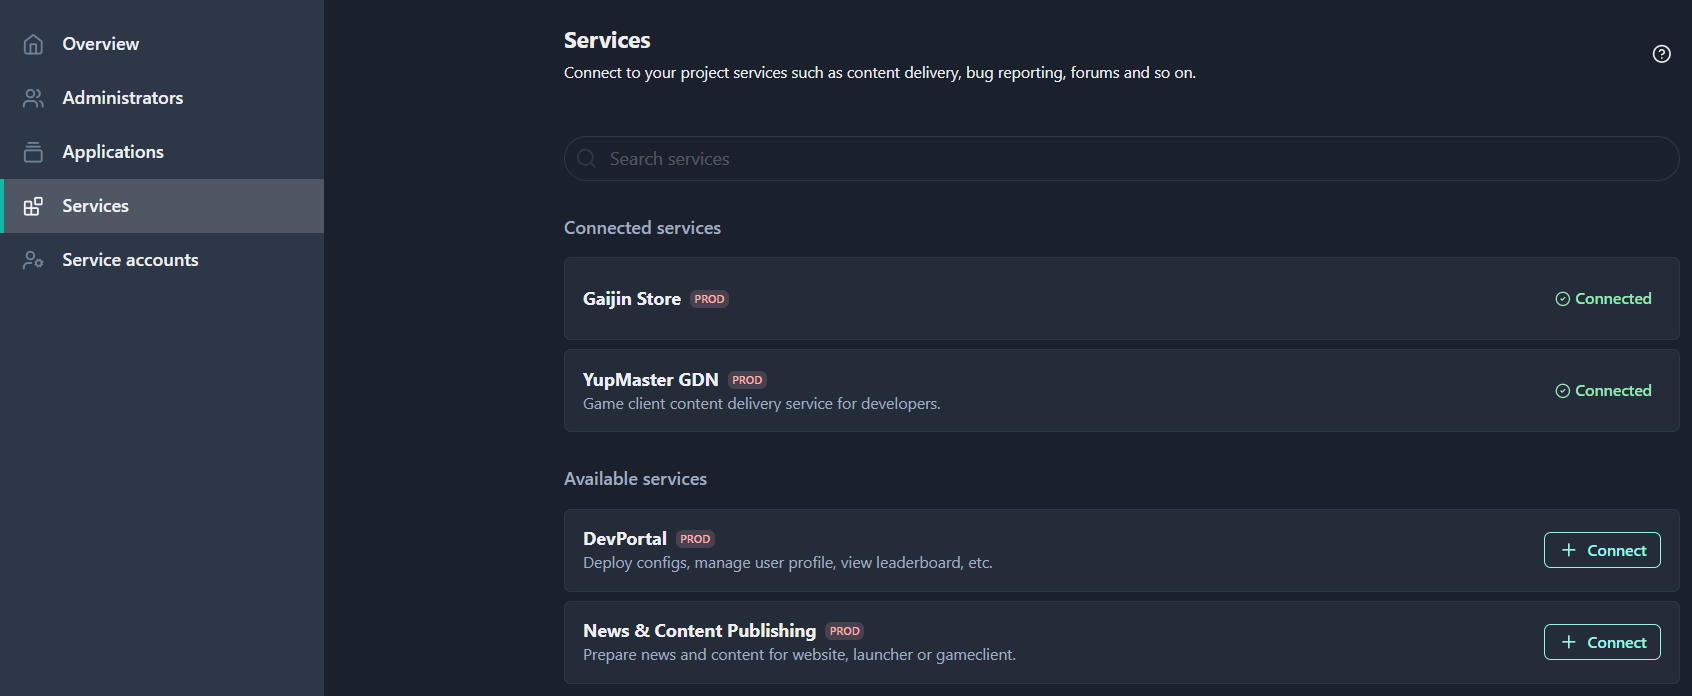
The Connect button adds the selected service to your project.
Service installation time depends on the service size. While most services install almost instantly, installation of large services may take some time.
Detailed information about the progress of the installation or the cause of the error can be found in the status field at the bottom of the Services page.
Service Page
The Overview tab opens the Services page that contains the service card and the list of service administrators.
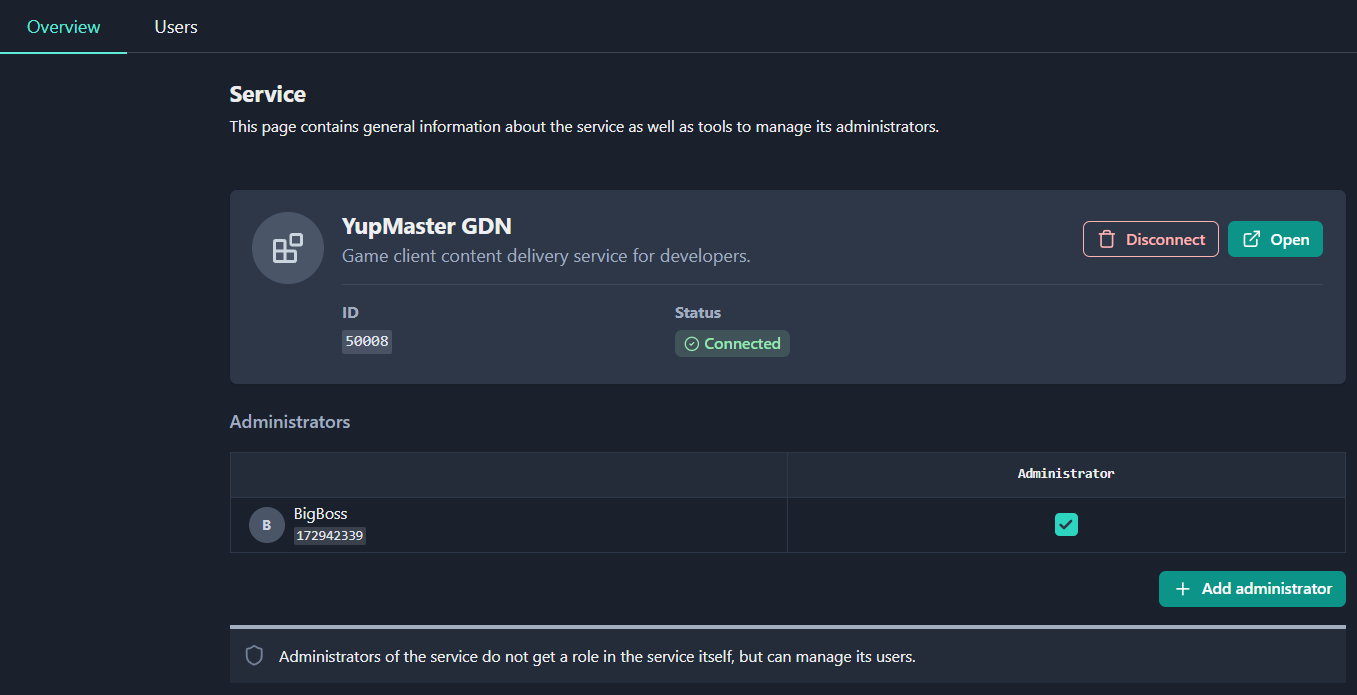
The service card displays the following information:
Service Name and Description.
Disconnect button – removes the service from the project.
Open button – opens the service in a new window and automatically logs in (if supported by the service).
Service ID – the unique service number.
Installation Status – the status of service installation. Possible service installation status values:
Connected
Setup in progress
Error occurred (hover the cursor to see the error reason)
The Administrators panel contains the list of service administrators that can manage users of the service.
The Add administrator button enables the user with project administration rights to add a service administrator.
Note
Disabling a service will revoke all roles assigned to users and invalidate secret keys (if any) used for the service integration. After reconnecting, you must perform all the configurations again.
Connect Users to Service
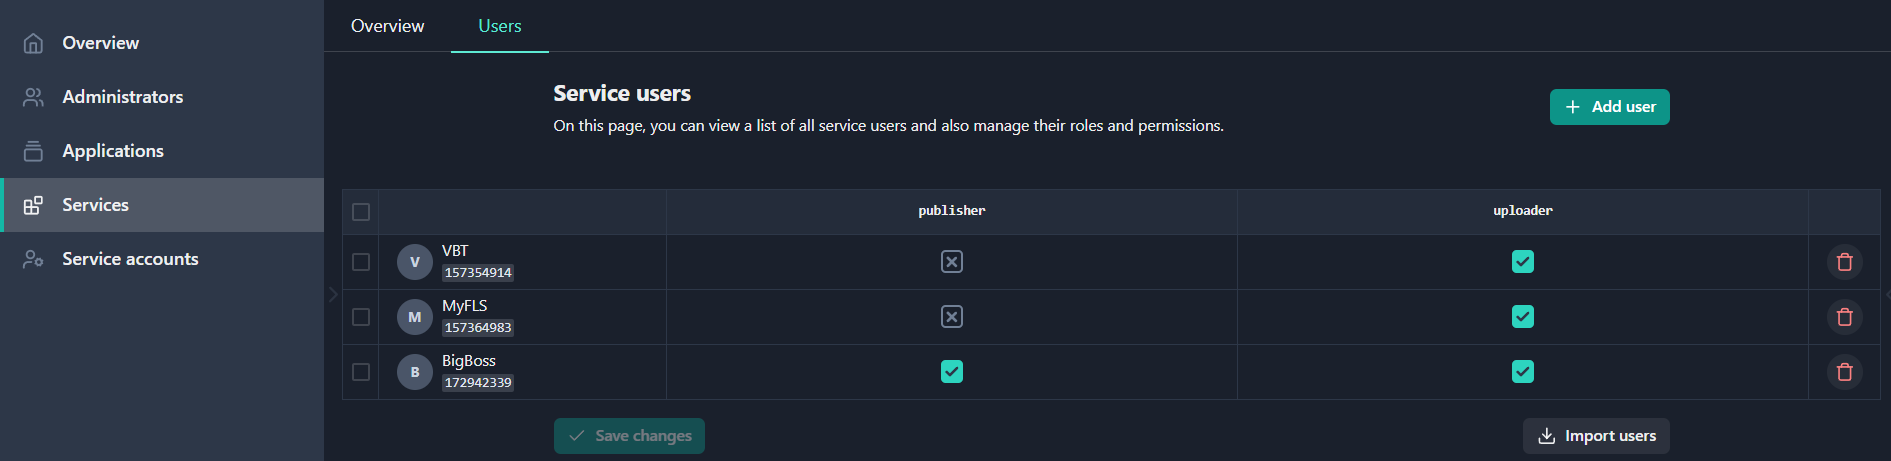
Clicking the Users tab opens the Service users page, listing the users connected to the service.
The page contains the users access table that has rows and columns, where each row represents a user and each column represents a role.
The purpose of the access table is to define which users have access to specific roles in the service. By selecting the check boxes in the table, the service administrator grants a specific user access to a specific role.
Add New Users
To add a new user to the service, perform the following steps:
Click the Add User button. This will open a modal window with the User ID input field.
Enter the user ID. If the system successfully finds the user, it will display the user information in the panel below and activate the Continue button.
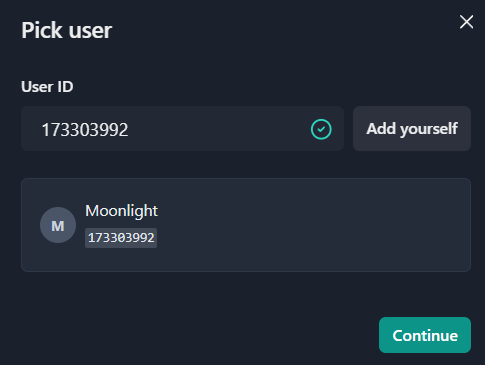
You can click the Add yourself button to enter your User ID.
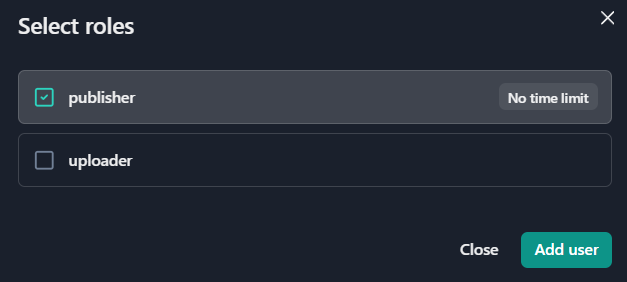
The next step will display a modal window with a choice of roles for the new user. It is required to assign at least one role. In the Select roles window, check the required user roles and click Add user.
Set Temporary Roles Within Service
Optionally, you can specify the duration for which the user role is valid for the service. Here, the system will automatically revoke the role at the expiration time.
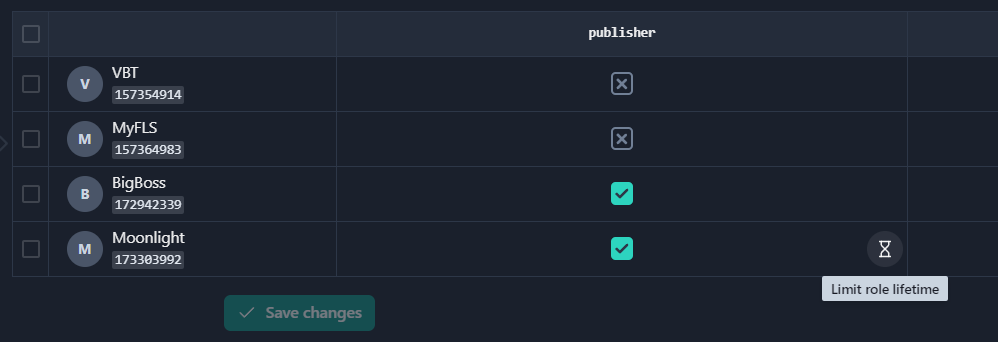
To specify a lifetime limit for a role:
Place the cursor in the corresponding cell and click the Limit role lifetime icon.
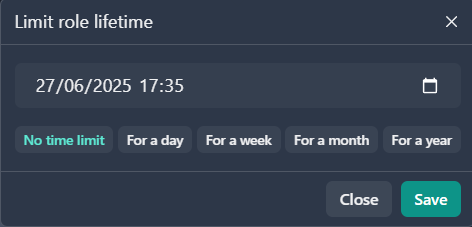
Set the role expiration time. You can click on the corresponding button or select the expiration time from the calendar.
Warning
If you choose No time limit option the expiration period will be set at 10 years.
Click Save.
Hovering the cursor over the icon will display the expiration time for the role.
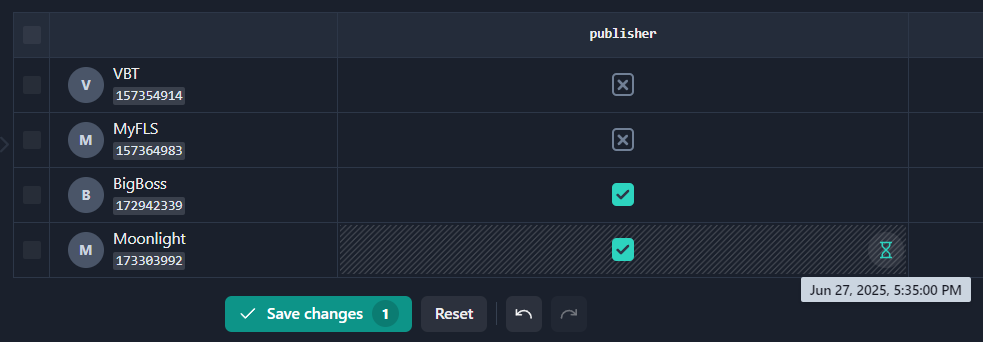
To apply changes, click Save Changes, and then click Apply.