Upload to YupMaster GDN
YupMaster GDN Service
YupMaster GDN (Gaijin Delivery Network) is the service for preparing builds, uploading them to the content delivery network, managing versions, and making them available to players.
These operations require appropriate permissions. Each service has a predefined set of roles that can be assigned to users. The roles required for YupMaster GDN and how to assign them are described in the Role Management section.
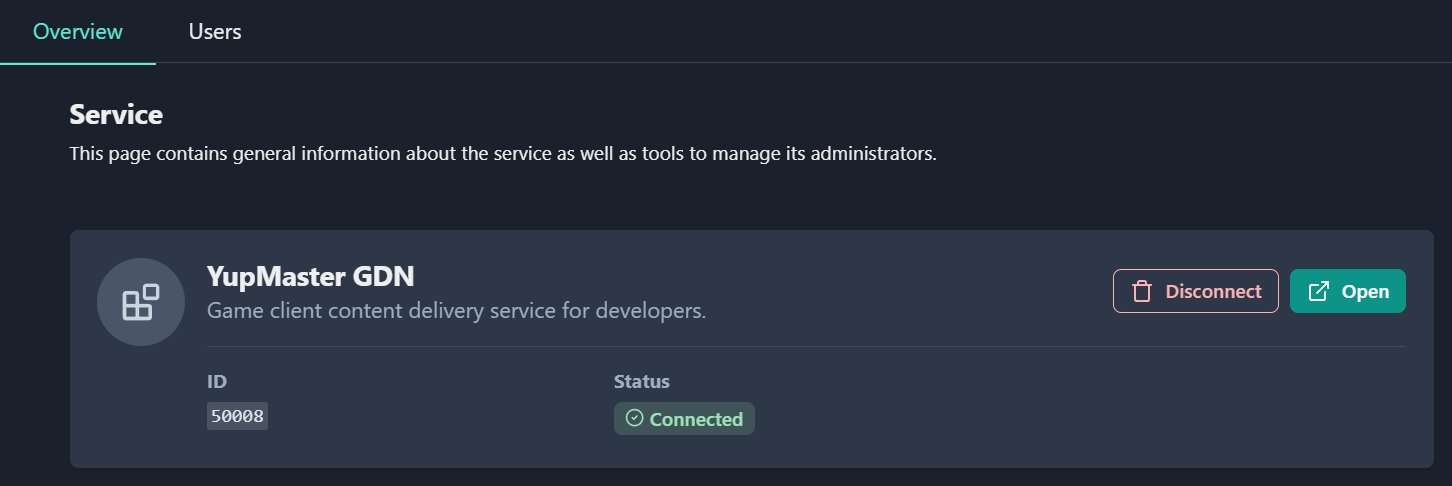
On the Overview page, click Open to access the YupMaster GDN administrative interface, where you can view uploaded projects and manage tags.
Tip
The YupMaster GDN administrative interface is also available directly at https://gdn.gaijin.net/yuitem/admin/.
Role Management
The YupMaster GDN service has two roles:
The Uploader role allows the user to upload new project versions to GDN. Typically assigned to developers or a build system account.
The Publisher role allows the user to manage project tags and control which uploaded versions are available to players.
Note
Use caution when granting the Publisher role. Incorrect tag management can make a project unavailable for download or accidentally expose a version not intended for public release.
For example, a build system account with the Uploader role can automatically upload a test build to GDN without making it public. When the build is ready for release, a user with the Publisher role sets the appropriate tag to make it available.
The Uploader and Publisher roles can be assigned to the same user or to different users.
To assign these roles:
Select Services ▸ YupMaster GDN.
Click Add yourself as an administrator.
Click the Users tab.
Note
To manage user roles for YupMaster GDN, you must have the Administrator role in your project. Without it, the Users tab will be inactive.
Add users as described in Adding Users to a Service.
Select the checkboxes for the Publisher and Uploader roles for each required user.
Click Save changes.
Click Apply.
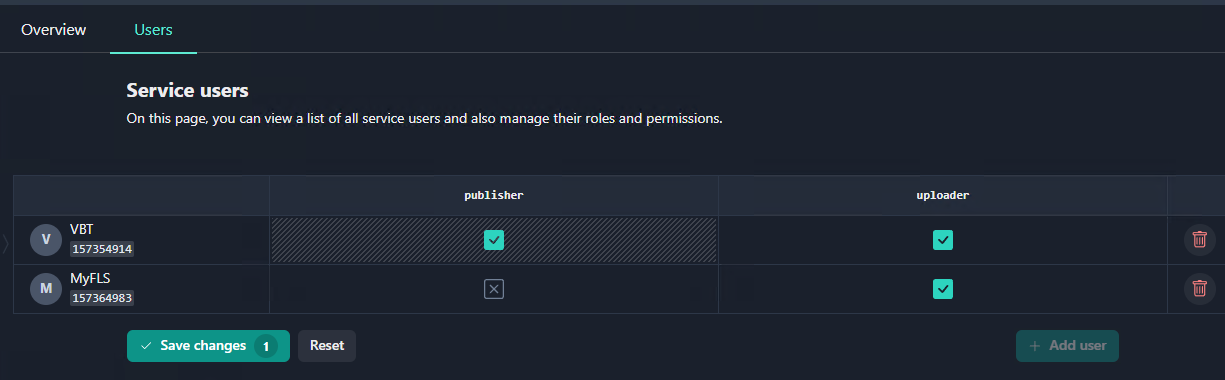
To limit how long a role stays active, set an expiration date when assigning it. The role will be revoked automatically when it expires.
See also
For more information on temporary roles, see Set Temporary Roles Within Service.
Upload Project to GDN
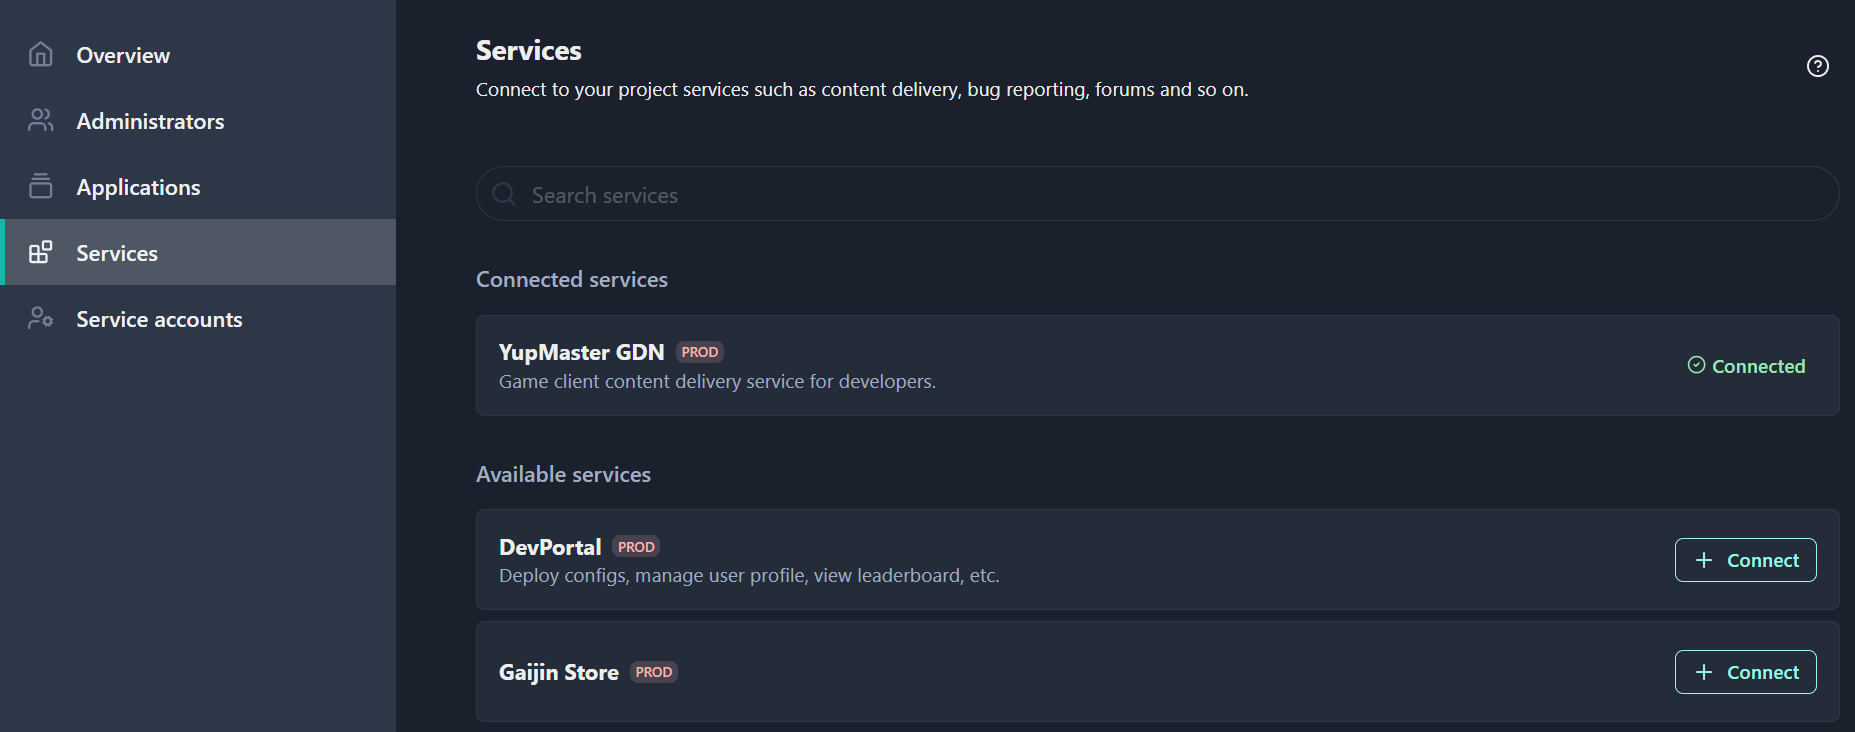
To upload a project to GDN, the YupMaster GDN service must be connected to your project. To connect it, open Services in the Side navigation menu and add the service from the list.
GDN supports two types of content:
A game build packaged as a
.yupfile for the launcher (see Upload Using.yupFile).An Android build packaged as an
.apkfile (see Upload Using .apk File).
Upload to GDN Using .yup File
Preparation
Before uploading, make sure you have:
YupMaster GDN connected to your project.
The Uploader role (see Role Management).
See also
To manage user roles for YupMaster GDN, you must have the Administrator role in your project (see Owners and Administrators).
You also need the following tools:
yupgen.exe– prepares a build for upload,yupload.exe– uploads the build to GDN,gaijin_updater64.exe– downloads a version from GDN to a local machine.
Download the tools from the releases page:
gaijin-application-platform/releases.
The examples below assume the tools are available in your system PATH. If not,
use the full path to each executable. The build directory used in the examples
is /builds/release.
Generate .yup File
Run the following command:
yupgen.exe -path ./builds/release -proj <PROJECT> -ver <VERSION>
This generates a .yup file in the current directory:
a2e61e8a631c353b59091a6b17ef64f7f358b70d.yup
The file contains the build description, project name, version, a list of all files, and a hash of their contents.
Warning
Do not modify the /builds/release directory after generating the .yup file,
as the hashes will no longer match.
Upload Build
To upload the build, run:
yupload.exe a2e61e8a631c353b59091a6b17ef64f7f358b70d.yup -check 0 -src ./builds/release -deploy -tracker http://yuptracker.gaijinent.com:27022/announce -dev https://gdn.gaijin.net/yuitem
The command prompts for login credentials, registers the build in GDN, and uploads all files, verifying that the data is complete and available for download.
Manage Builds
Builds are managed through the administrative panel at https://gdn.gaijin.net/yuitem/admin/.
Download Build
To download the build tagged nightly to the last_nightly_build directory,
run:
mkdir last_nightly_build
gaijin_updater64.exe -p <PROJECT> -t nightly -f last_nightly_build --yupmaster gdn.gaijin.net --clear --verbose --norun --noupdate
Upload to GDN Using .apk File
.apk (Android Package Kit) is the format for distributing Android
applications. You can upload an .apk file to GDN to make it available for
download.
Preparation
Before uploading, make sure you have:
YupMaster GDN connected to your project.
The Uploader role (see Role Management).
Download the upload tool:
apk-uploader.exe (10.5 MB)(for Windows)apk-uploader (10.2 MB)(for Linux)
All available tools are listed on the gaijin-application-platform/releases page.
Upload .apk File
To upload a file named last_game_build.apk, run:
./apk-uploader --jwt $(cat ~/.gaijin.jwt) --host http://gdn.gaijin.net --project my_new_game --apk-file last_game_build.apk
Parameters:
gaijin.jwt– your SSO JSON Web token (see JSON Web Tokens),my_new_game– the project name in GDN,last_game_build– the file to upload.
The server extracts the application version from inside the .apk file and
uses it as the build version. The filename itself does not matter – only the
version embedded in the file is used.
Each project can have only one .apk per version. Uploading a file with a
duplicate version returns an error.
On success, the tool outputs:
{
  "project": "my_new_game",
  "status": "OK",
  "tag": "6821ad886468d1ea",
  "url": "https://gdn.gaijin.net/apk/download?proj=my_new_game&tag=6821ad886468d1ea",
  "version": "1.0.1"
}
The url field contains a direct download link. To download the file, a user
needs only the project name and tag.
Note
If the upload is interrupted by a network failure, the tool will retry
automatically and resume from where it left off. This is especially important
for large .apk files that can be several gigabytes in size. If the tool stops
with an error, investigate and fix the underlying issue before retrying.
Open YupMaster GDN (or go to https://gdn.gaijin.net/yuitem/admin/) to confirm the upload. The project will appear in the service interface.
Tag Management
Tags are managed through the administrative panel or via the API.
Set Tag for Existing Project Version
To make an uploaded version available to players, a user with the Publisher role assigns a meaningful tag to it, replacing the random tag generated by the system.
For example, if a download page points to the tag latest, setting latest on
a version makes it immediately available to anyone following that link.
To remove a version from public access without deleting it, replace its tag with a new value and share the new tag only with the team.
Set Tag for New Project Version
When releasing a new version, assign the desired tag directly to the new version – do not manually remove the tag from the old version first. Removing a tag before assigning it to the new version creates a window where the tag points to nothing, resulting in 404 errors for users. Since server responses may be cached, the error can persist for some time.
Assigning a tag to a new version automatically moves it from the old version and replaces it there with a new random tag.
For example, if version 1.0.0 is tagged latest and you want to release
version 2.0.0, upload 2.0.0 and assign it the latest tag. The new version
becomes immediately available, and 1.0.0 is automatically assigned a new
random tag.
Note
A random tag is generated for a version whenever its previous tag is removed.
What’s Next
Your project is set up and your first build is uploaded. Here are some good next steps:
Explore Basic Concepts to understand how authentication and permissions work in GAP.
Read Roles and Permissions to learn how to design an access model for your application.
Check the Central section for a complete reference on managing projects, applications, and services.