Create News Item
What is News Item?
News is the main section of the Newsfeed service where users create and prepare news and patch notes for publication. Since the service is a content editor, news created within the News section will not be deployed anywhere until integrated by the user on a website, in the game client, or in the launcher.
A News item comprises various meta attributes like title, image, version, publication date, publication status, and some content filled in by content managers.
The layout of a News item includes several key elements (referenced by their numbers):
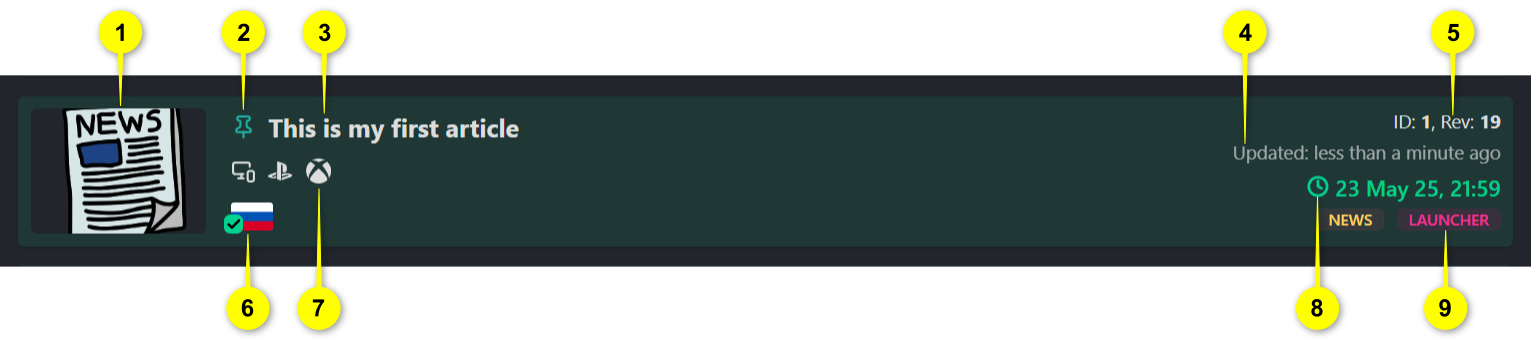
1 The thumbnail or image representing the news.
2 The pin icon showing that the news is pinned in the list.
3 The title of the news, for example, This is my first article,
indicating the headline.
4 The update status, e.g., Updated: less than a minute ago, reflecting
recent modifications.
5 The unique ID and revision number, used for identification and version control.
6 The language icon (flag), indicating the language in which the news is published.
7 Platform icons such as PC, PlayStation, and Xbox, showing the supported platforms.
8 The publication date and time, such as 23 May 25, 21:59, indicating
when the news was published.
9 Labels like NEWS and LAUNCHER, indicating that the news item is
exported as a news entry for the game client and for the launcher.
Step-by-Step Guide
Content managers create news content using the Gaijin Editor.
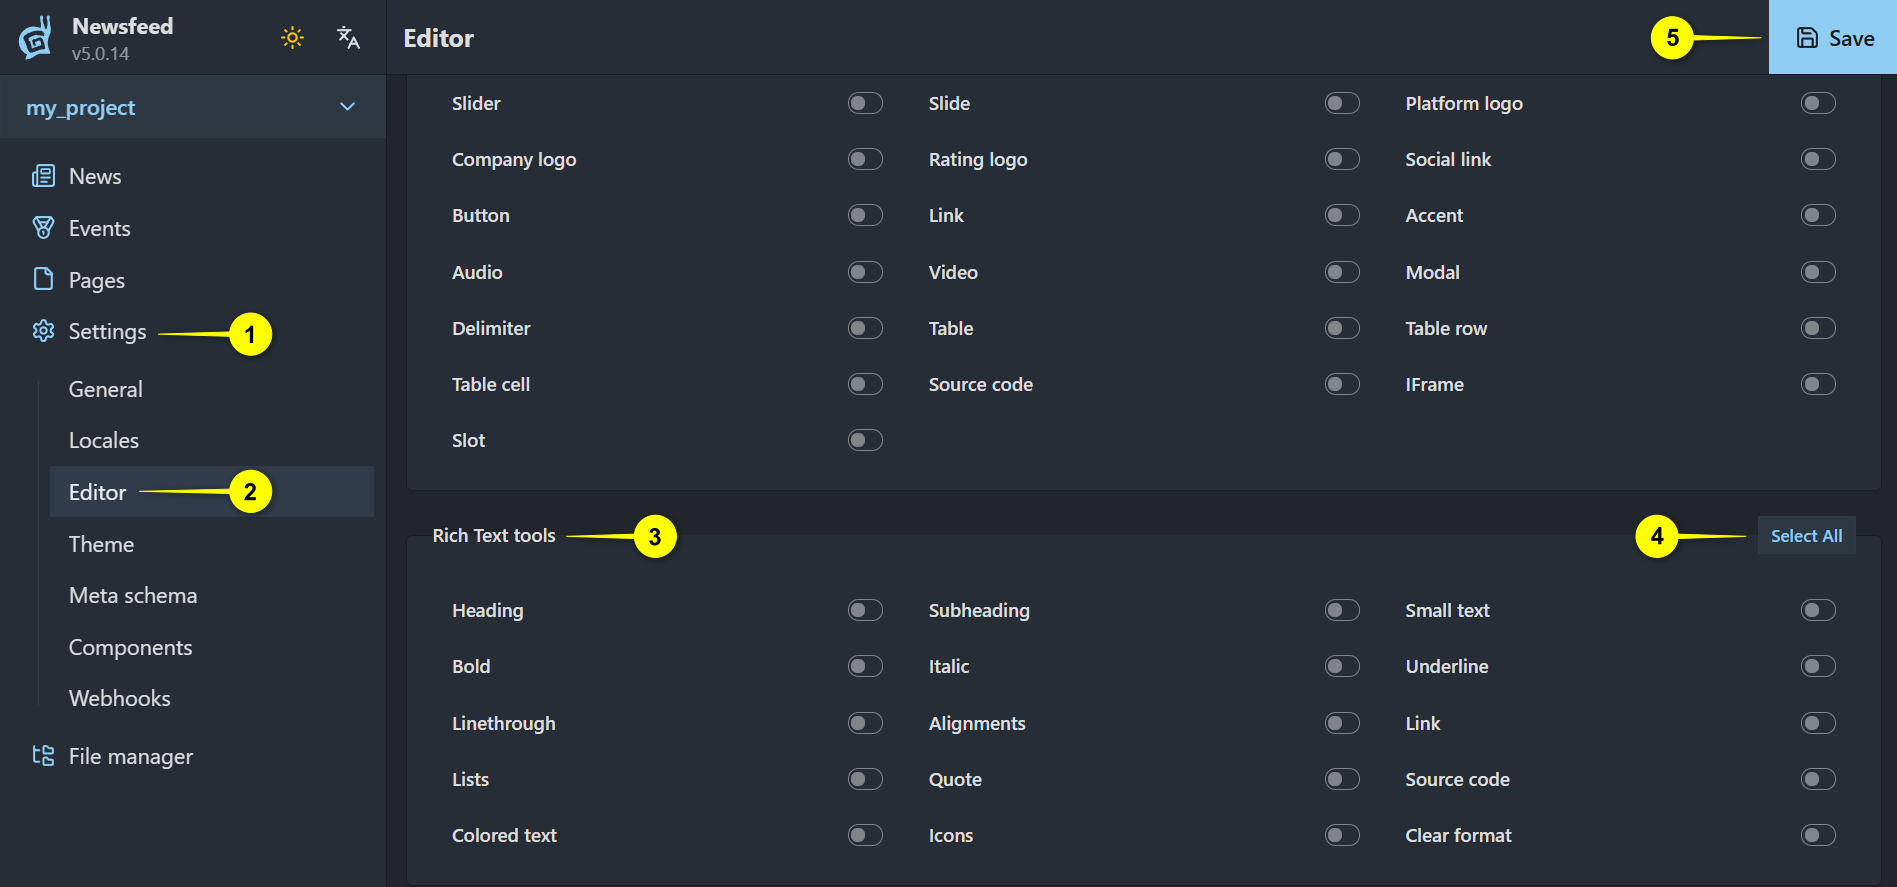
Go to the Settings 1 tab in the left sidebar.
Select Editor 2.
Scroll down to the Rich Text tools 3 section.
Click the Select All 4 button to quickly select all available tools.
Click Save 5 to apply the changes.
Go to the News 6 tab.
Click Create 7 in the top right corner.

The news creation page consists of three main sections:
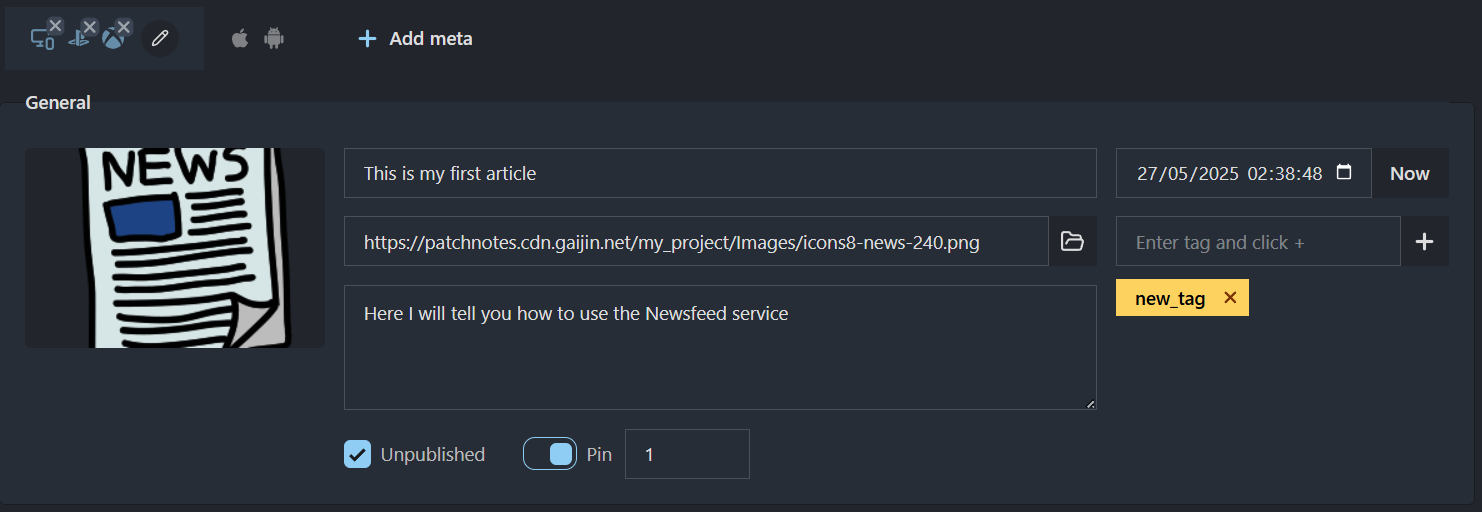
the first section 8 contains meta attributes, including main attributes such as news title, description, image, tags, etc.;
the second section 9 includes export attributes, which specify the target for content integration: website, game client, or launcher;
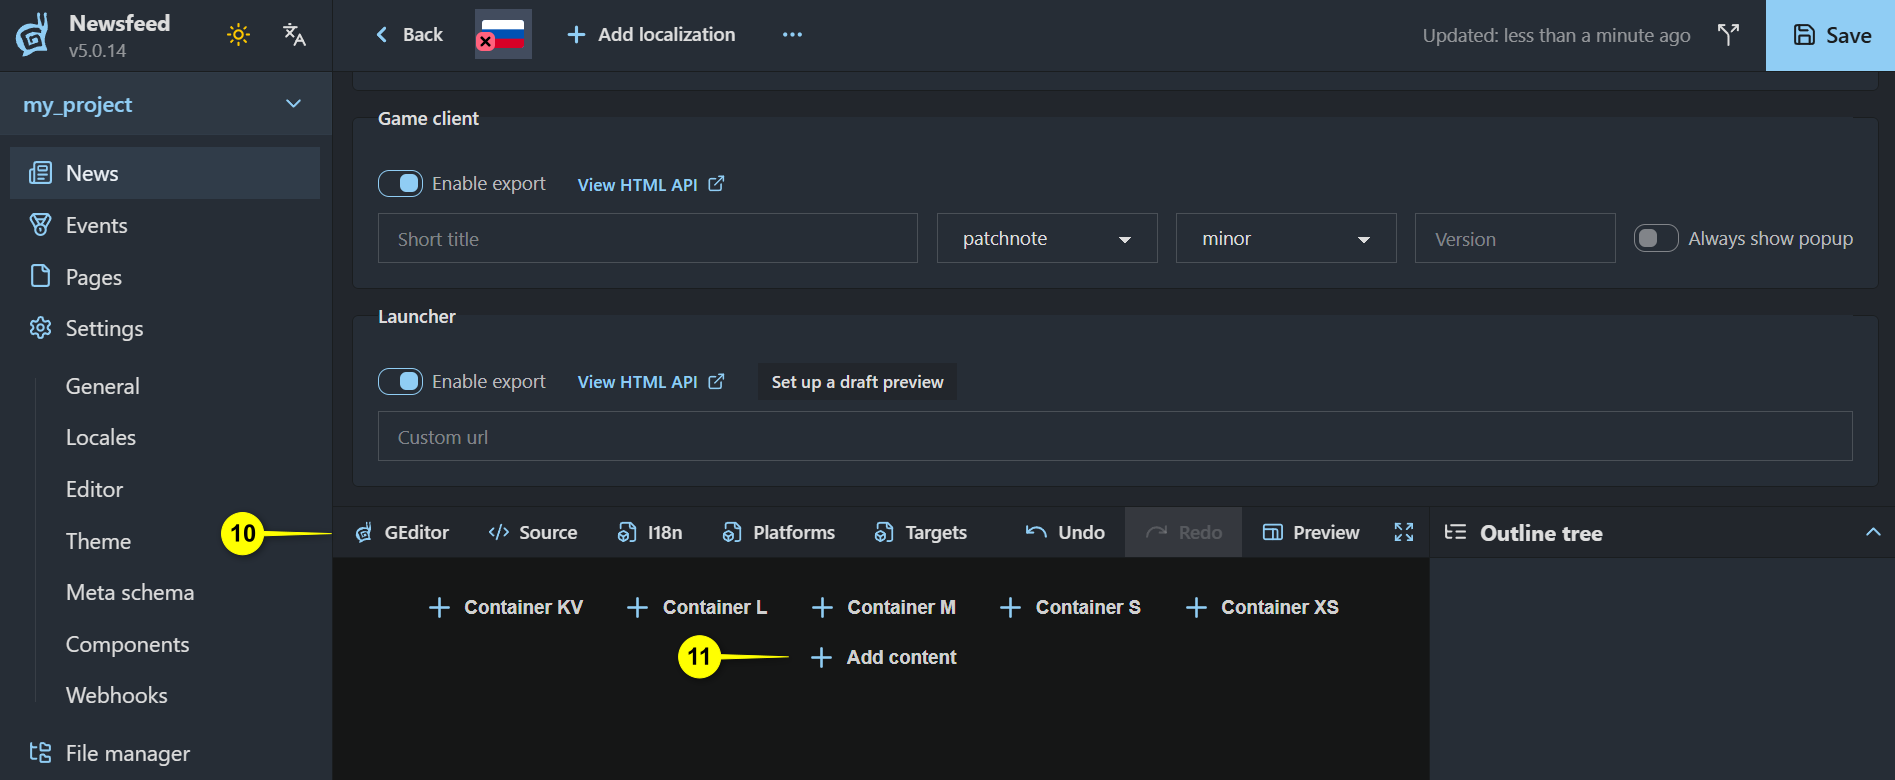
the third section 10 is the bottom area, where news content is created and edited using Gaijin Editor.
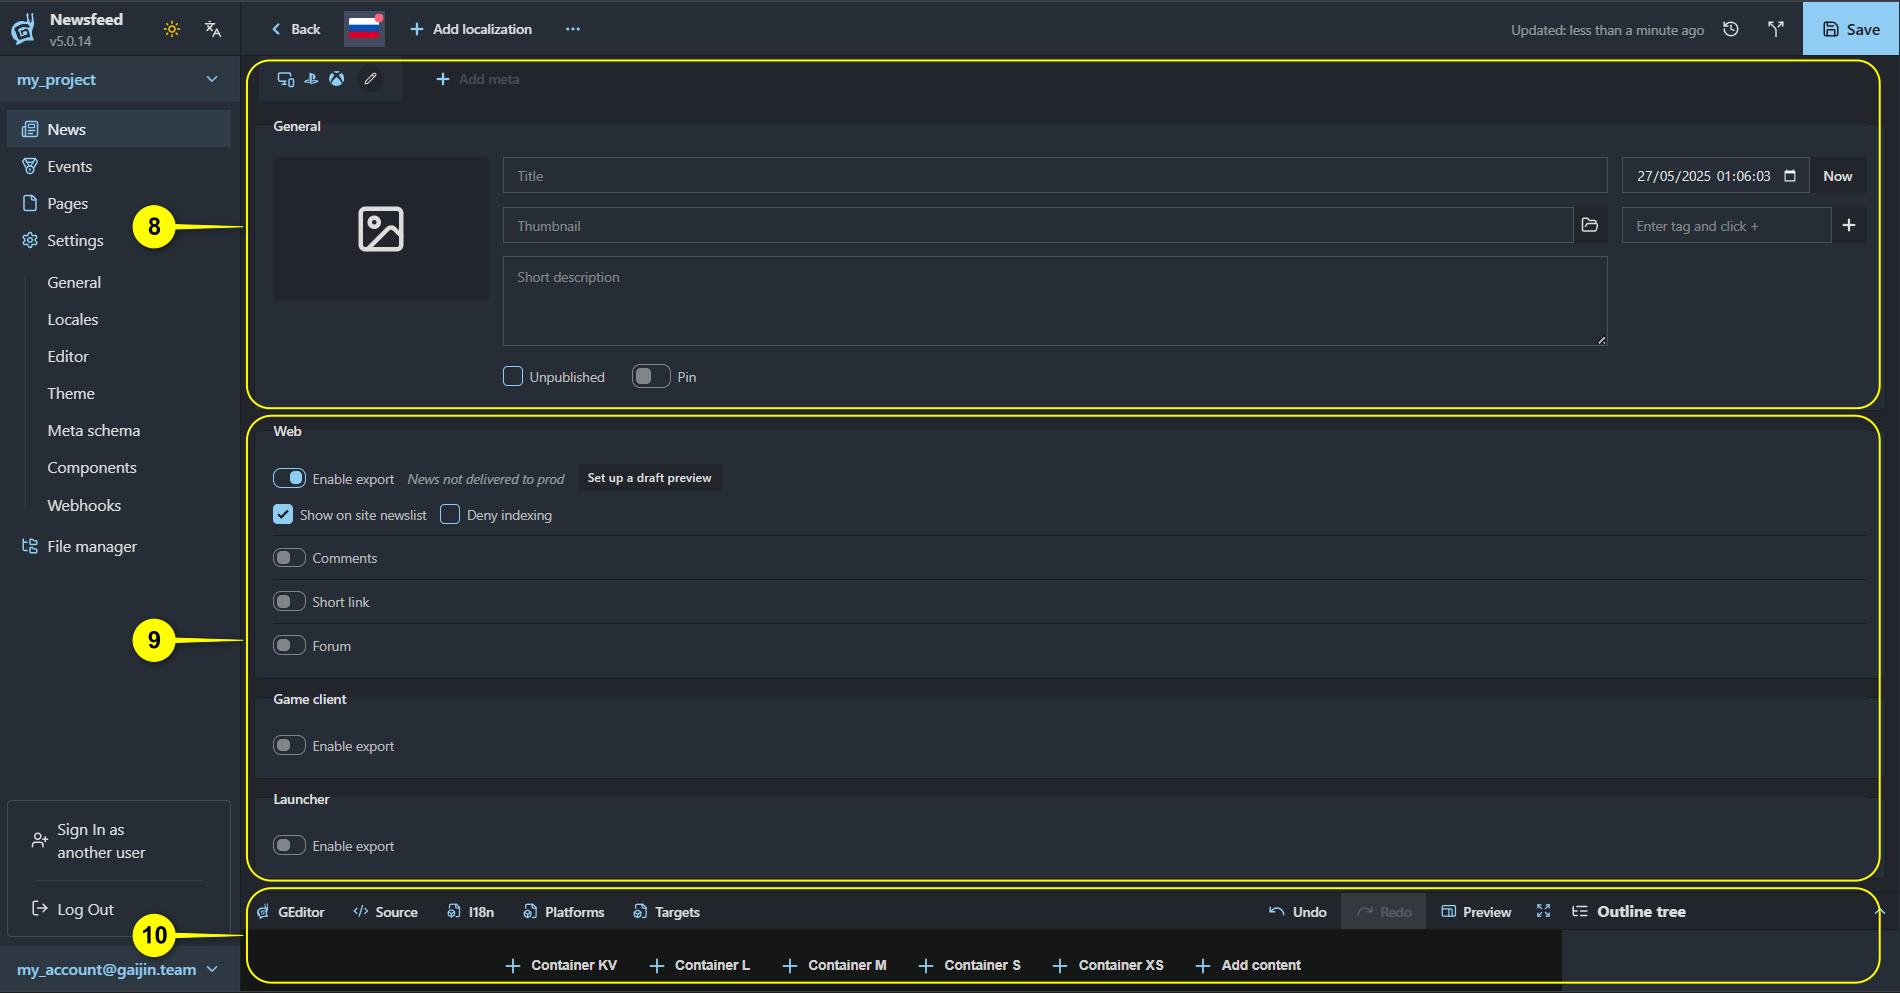
Fill in the following fields in the first section 8:
Enter the Title of the news item.
Upload or select a Thumbnail image.
Write a Short description summarizing the news.
Set the Date and time, if needed, or click Now to use the current time.
Add relevant tags using the Enter tag and click + field.
Use the checkboxes to Unpublish the news item or Pin it:
If Unpublished is selected, the selected platform icons (PC, PlayStation, Xbox, etc.) will be disabled.
If Pin is enabled, the news item will be added to the top section of the news feed. Pinned items can be ordered manually, allowing you to define their priority in the pinned queue.
Configure the export settings 9.
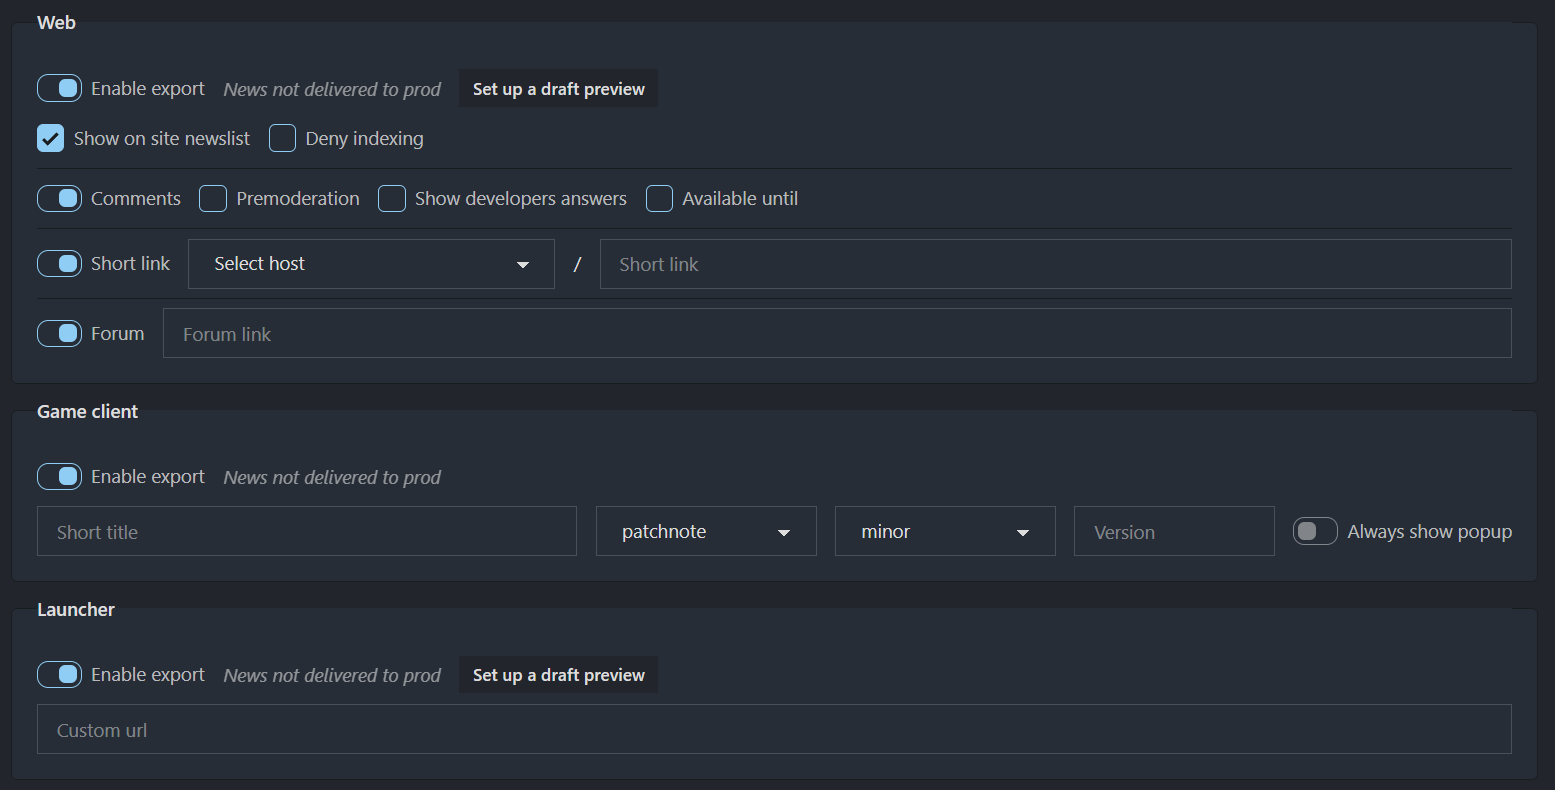
There are three types of news export: Web, Game client, and Launcher. Depending on which sections you enable, the news item will become available through the corresponding APIs: Web API, Game client API, or Launcher API. Each export type has its own configurable parameters.
Web
Toggle Enable export to make the news item available via the Web API.
Click Set up a draft preview to generate a preview token in the Settings > General > Preview & authorization section.
Enable Show on site newslist to display the news publicly on the website.
Use Deny indexing to prevent search engines from indexing this news page.
Enable Comments to allow users to comment on the news.
Use Premoderation if you want to manually approve comments before they are visible.
Enable Show developers answers to allow special replies from developers.
Set an expiration using Available until to hide the news after a specific date.
Enable Short link to generate a simplified URL. Choose the host and specify the short link.
Add a Forum link if there is a related discussion thread.
Game client
Toggle Enable export to publish the news in the Game client.
Provide a Short title, especially useful for limited display areas like mobile clients.
Choose whether the content is regular news or a patch note.
If it’s a patch note, specify the type (e.g.,
minor,major,hotfix) and its version.Toggle Always show popup if the news should always appear as a popup in the client.
Launcher
Toggle Enable export to include the news in the game launcher.
Click Set up a draft preview to generate a preview token in the Settings > General > Preview & authorization section.
Optionally, specify a Custom URL where users will be directed upon interacting with the news.
Click Save.
After clicking, a confirmation window will appear, showing the current language, time of the last save, and available actions:
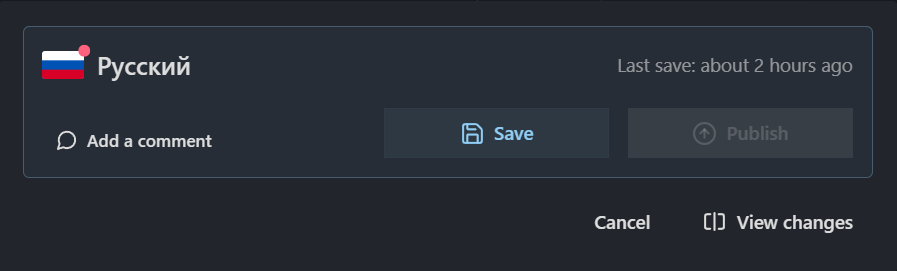
If the draft has not been saved recently, only the Save button will be active.
A user with the news.editor role can simply save the news item by clicking Save.
After a successful save, the Publish button becomes available:
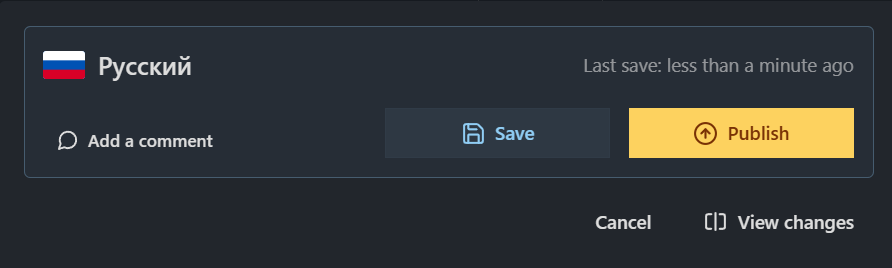
Only a user with the news.publisher role can click Publish to make the news available via the API.
You can also click View changes to review what has been modified.
Use Cancel to close the window without publishing.
Now let’s start editing the news content in Gaijin Editor 10.
In the Gaijin Editor section, click Add content 11 to begin creating the body of the news item.
In the opened window, click Rich Text 12 (it is highlighted by default).
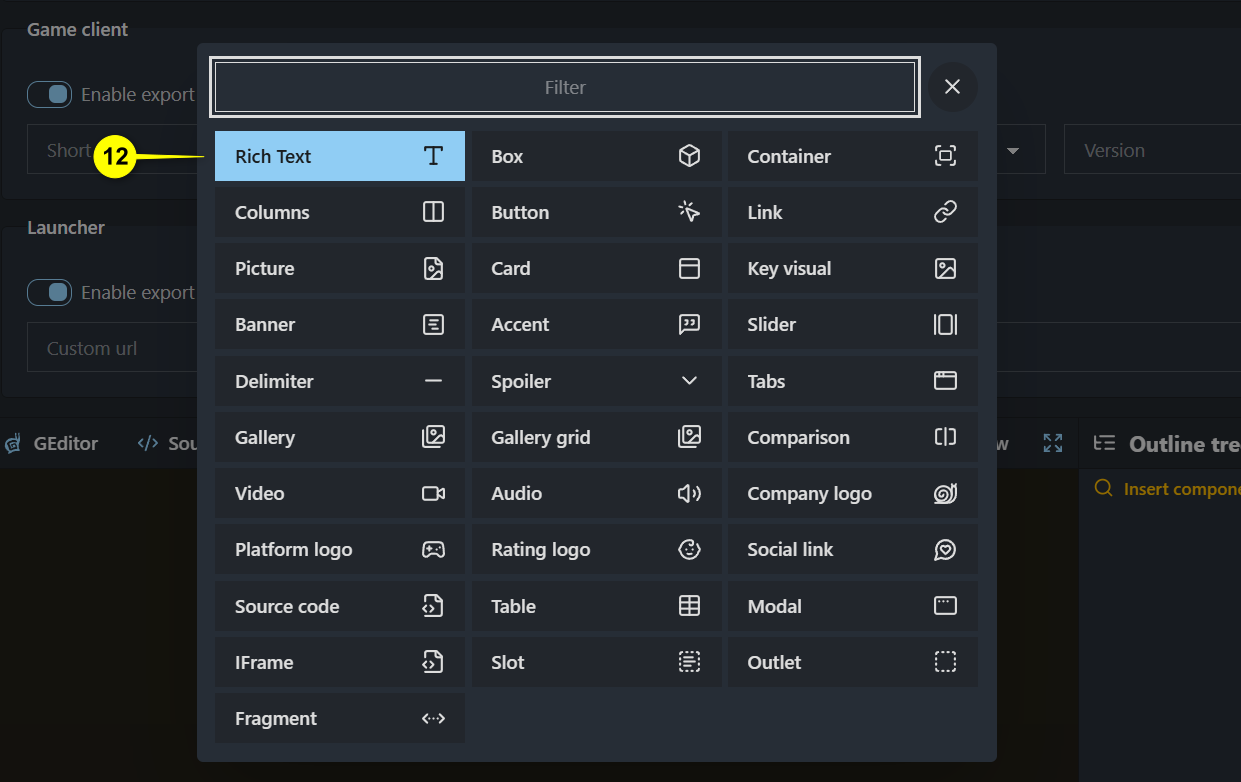
The result looks as follows:

Inside the Rich Text block, in the Text… input field, enter any text (for example,
This is the text marked as a header) and make it a heading by clicking the H2 13 button above: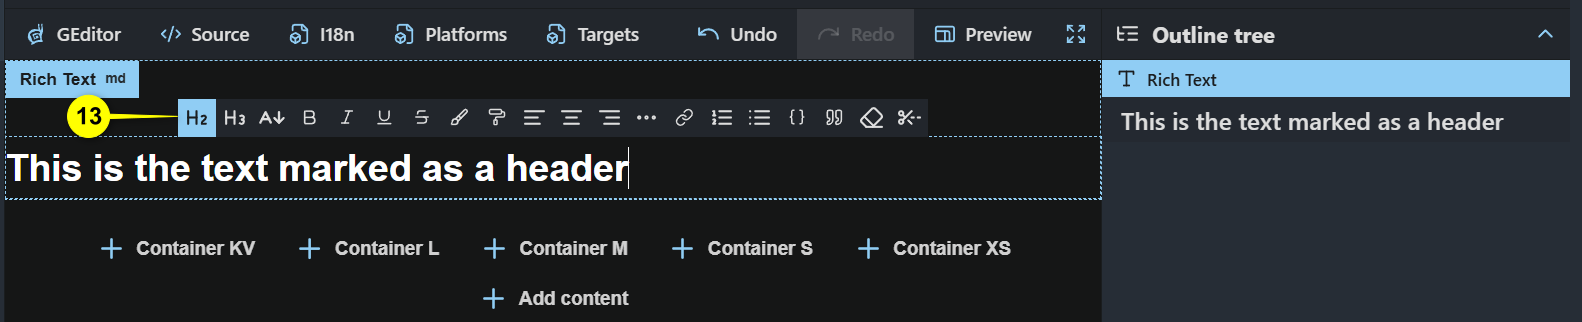
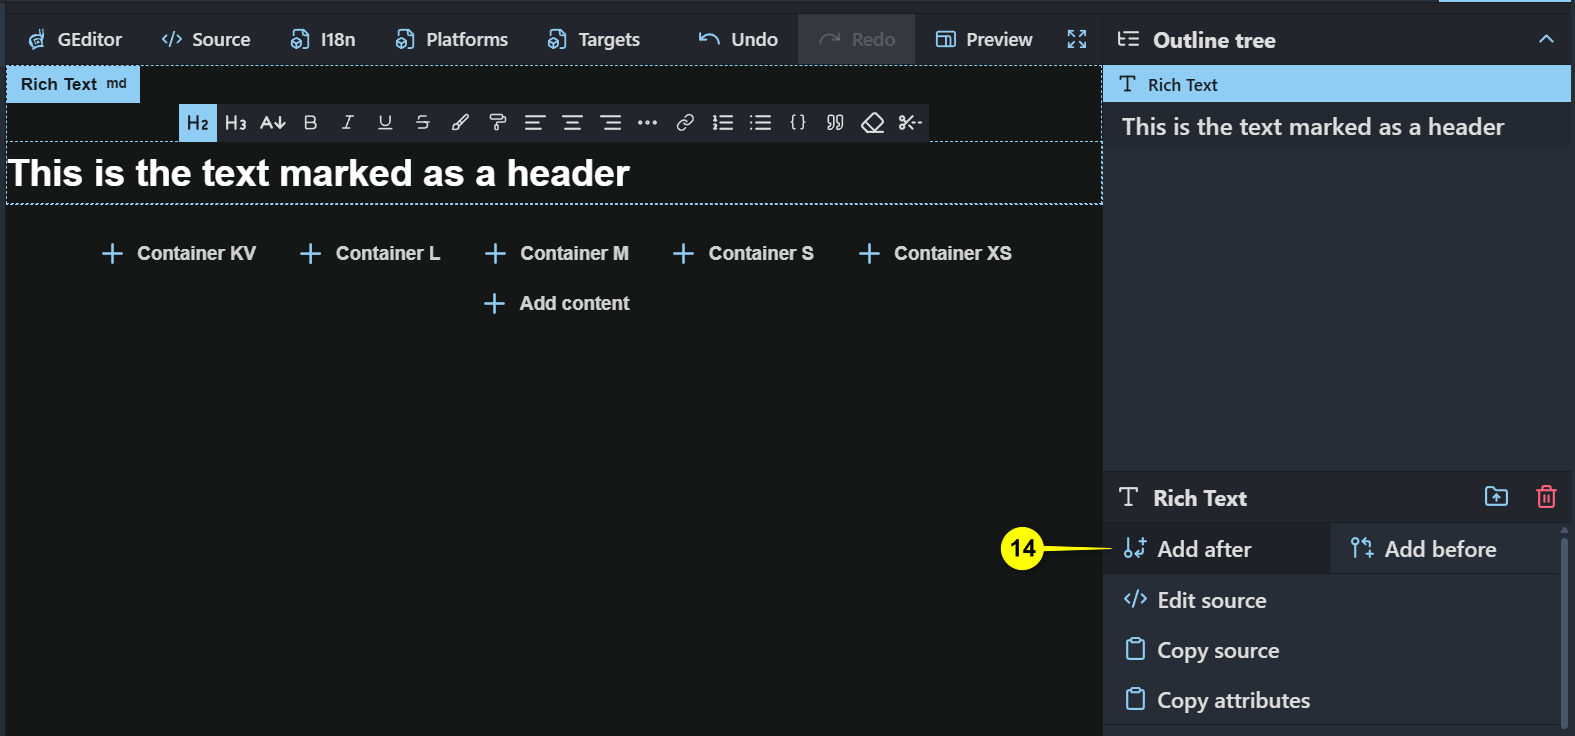
In the Outline tree on the right, click Add after 14 and add another Rich Text block.
Enter more text there, which will be, for example, the article content:
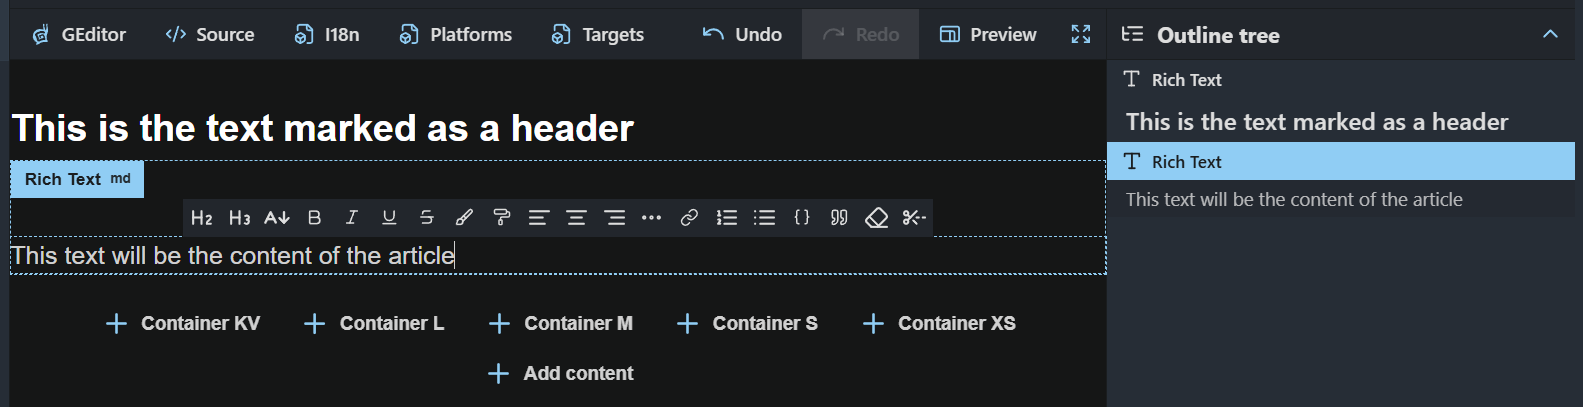
The Outline tree allows you to manage the parameters of each individual block and their arrangement.
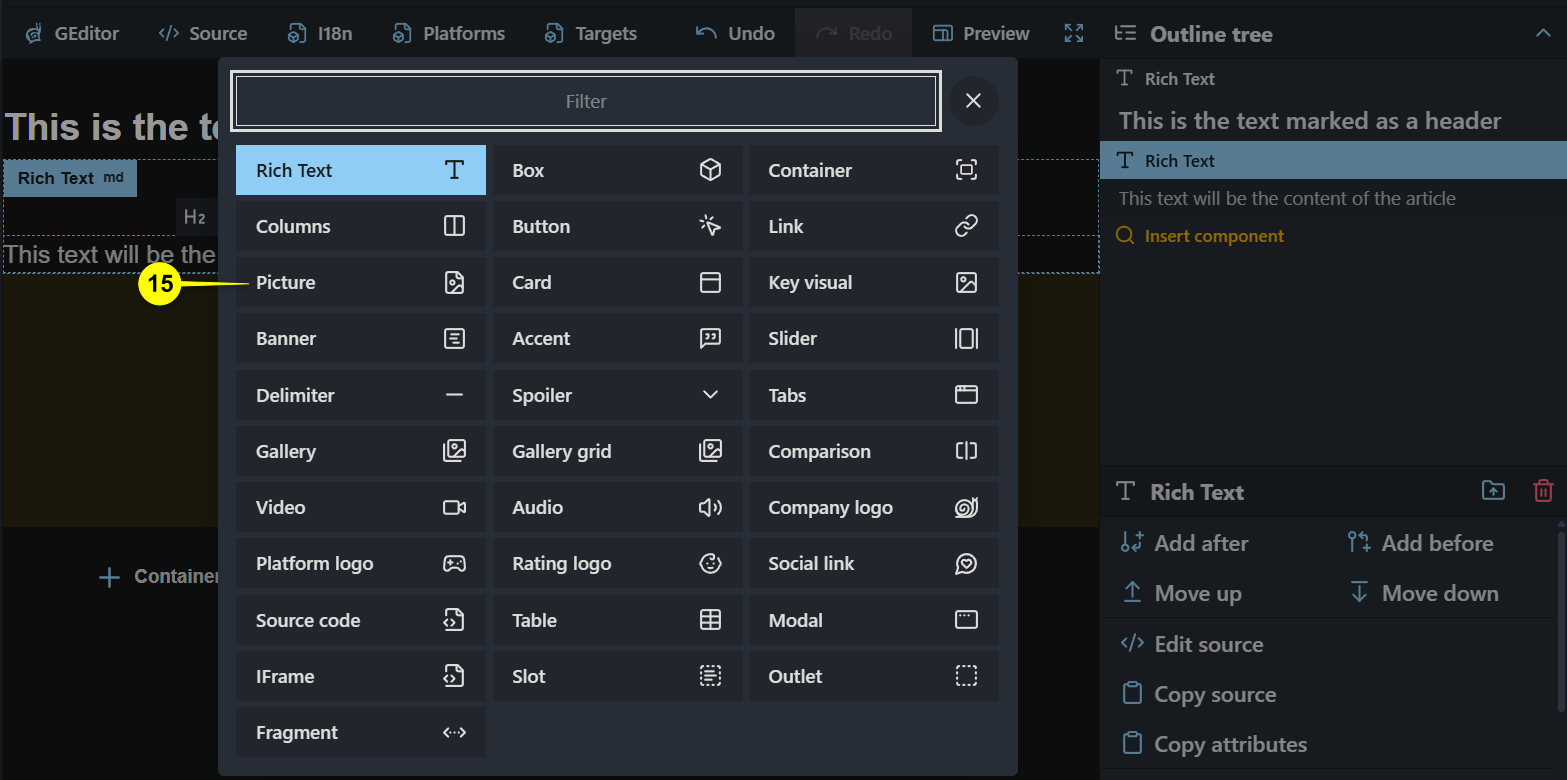
In the Outline tree, click Add after and add a block with an image by clicking Picture 15 in the opened window.
Insert the desired image into the image block using the explorer:
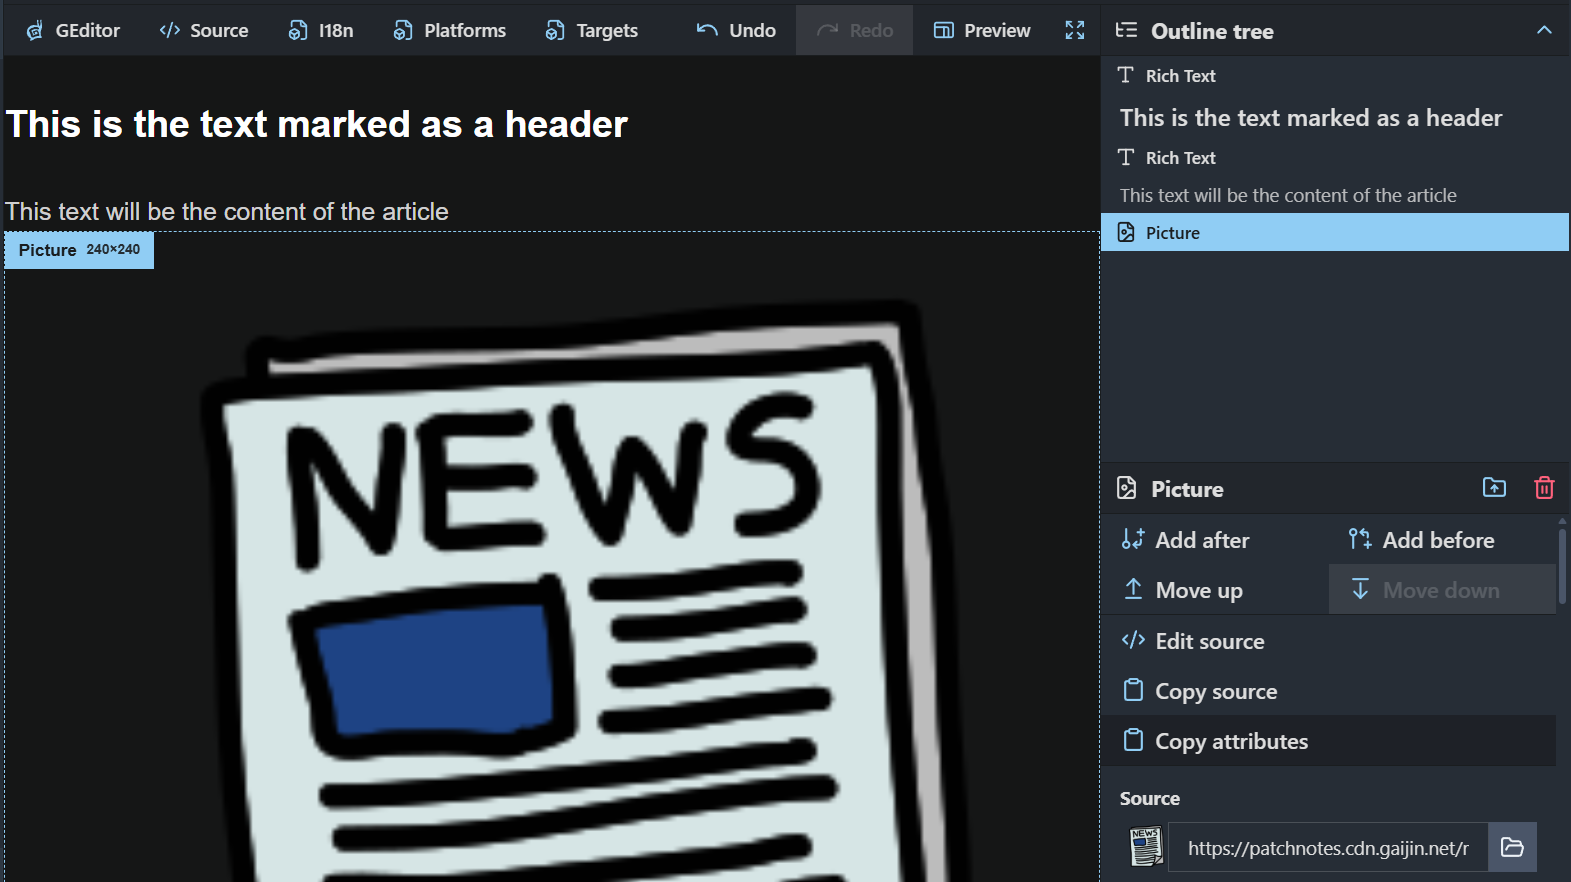
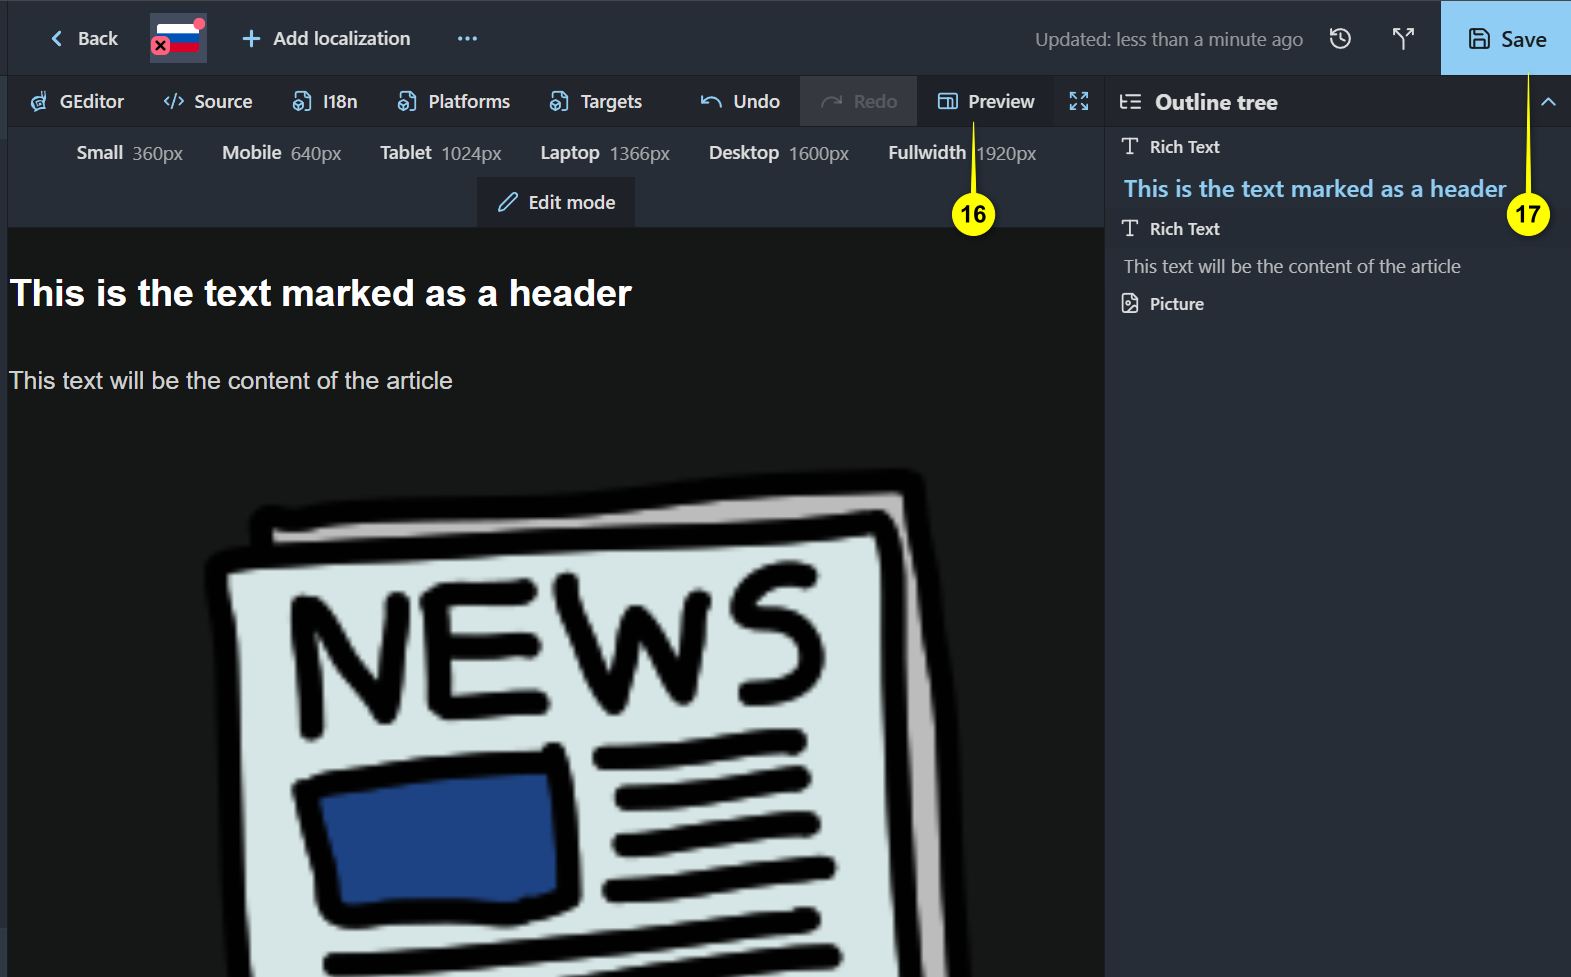
Click Preview 16 to see the result.
Save the prepared news item by clicking Save 17: