User Management
The Users page serves as a powerful tool for user management, allowing administrators to effectively manage their users in the application. It includes a paginated list of users with a filtering section that allows the administrator to search for users by role or user ID.
In addition, there is the ability to add or remove users, as well as the flexibility to manage each user’s roles. The page also allows administrators to import and export lists of users.
User List Filters
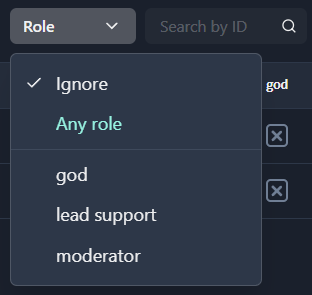
Role Selector
Possible filtering options by role:
Ignore: filtering completely ignores the “Role” field.
Any role: this is equivalent to passing the list of all available roles to the application.
Select a certain role from the list: filtering by the presence of the specified user role.
Search by ID
Allows you to search for an individual user by user ID. As a result of a successful query, only one user will be represented in the table.

Examples of Filter Usage
| Role | Result |
|---|---|
| Ignore | Get the list of all users in an application. |
| moderator | Get the list of users who have a moderator role at the root of this application. |
| Any role | Get the list of users who have at least one role in the current project of this application. |
User Role Table
The page provides an access table to the application that consists of rows and
columns, where each row represents a user and each column represents a
role. The purpose of an access table is to define which users have access to
specific roles within an application. Each cell in the table represents whether
a particular user has been granted access to a specific role, with a value of
TRUE or FALSE.
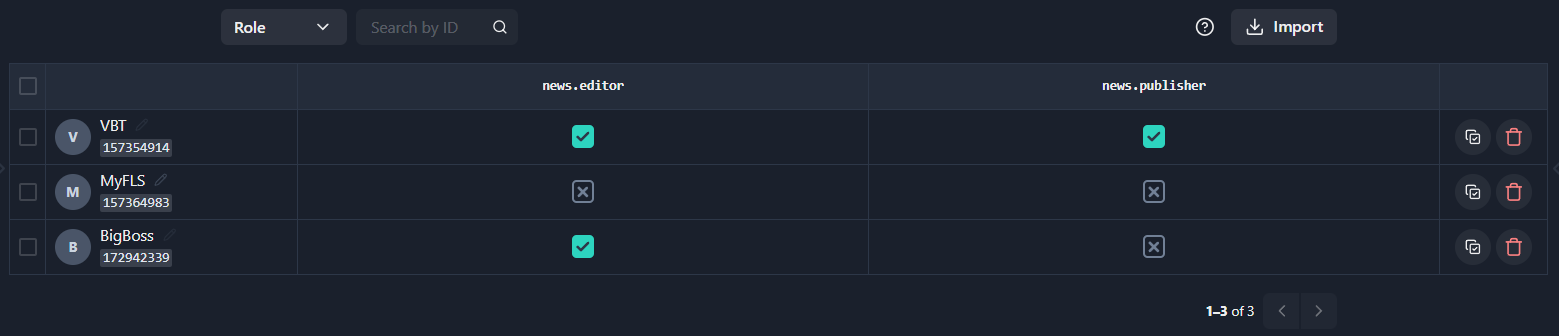
Each line contains the following elements:
Checkbox. Used to further export this user and his roles to another application.
User profile. Information about user: avatar, display name, user ID (copy to clipboard on click).
Role cells. Toggle value of role (the name is specified in the column header).
If the role is selected, you can specify the time limit until which this role will be set for this user. The timer icon appears in the cell when you hover mouse over it.
By default, the role is not limited in time. In the time limit selection widget, there are ready-made limit presets (per day, per week, etc.). To specify the date and time yourself, you must click on the calendar icon, select the date and time or enter the value manually in the format
dd.mm.yyyy hh:mm.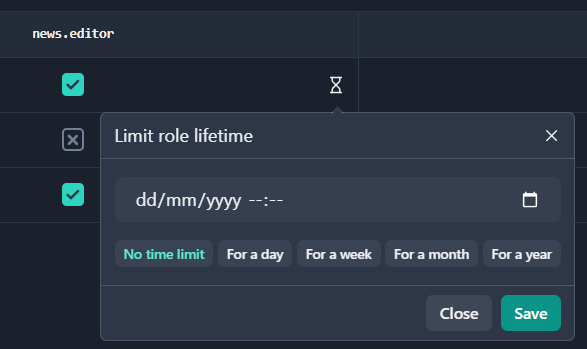
Actions on the user. Open the user access editing page, as well as delete the user from the application.
Save Changes to User Role Table
Changes in access rights do not happen instantly. Instead, the performed operations (setting or deleting the role, as well as changing the time limit) are written to the stack and are applied only after you click the Save changes button. This button displays a counter of users for which edits will be made, and the changed fields are highlighted with special shading. You can also rollback the changes by clicking the Reset button.
Note
You can make changes on more than one page.
After clicking on the Save changes button, a window with an overview of the access rights changes for each individual user will be displayed. The Apply button will apply the changes to the server.
Add New Users
The Add user button will open a modal window with user ID input. If the user is successfully found, the information about him will be displayed below and the Continue button will become active.
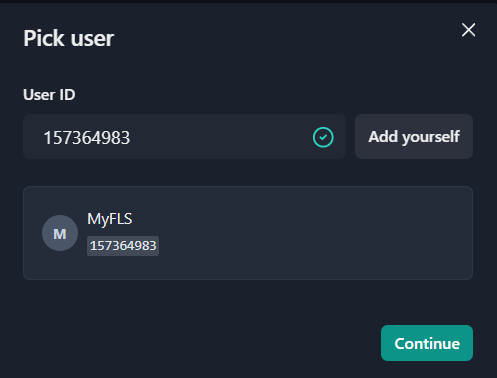
There is also an option to use your user ID when you click the Add yourself button.
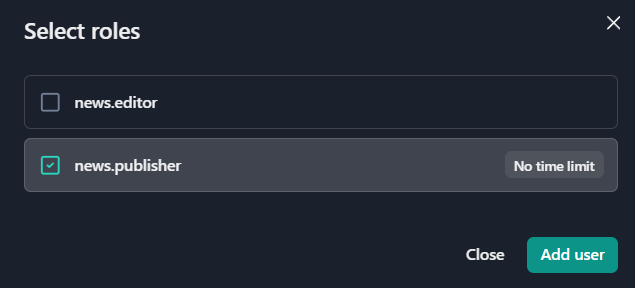
The next step will display a modal window with a choice of roles for the new user. You can select multiple roles or not select roles at all. It is also possible to specify the time limit for which this role should be set.
Note
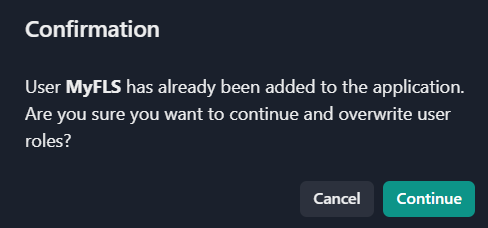
If the selected user already exists in the list of users of this application, an alert window about record conflict will be shown.
Export/Import Users
To make it easy for the administrator to export some (or all) users from one application to another, there is an export option.
Export
To export data:
Select the desired users using the checkboxes.

Note
You can pick users from more than one page.
Click on the Export users button (where the counter of selected records will be displayed) to open export modal.
The list of users and JSON data to be exported will be displayed in the opened window.
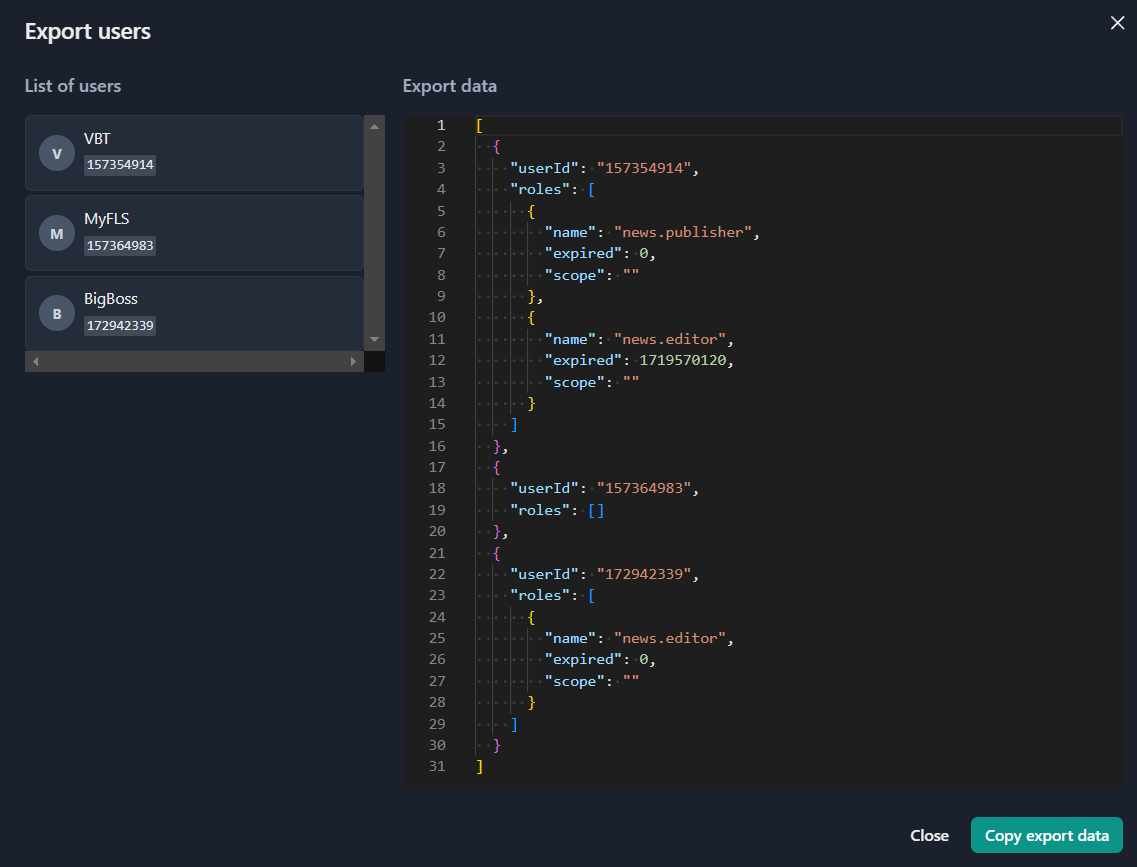
Click Copy export data to put the data to the clipboard.
Import
To import data:
Go to the users’ page in another application.
Click the Import button.
Paste the information from the clipboard.
Click the Import data button.