Roles and Permissions Management
This page describes how to manage roles and permissions within your application.
See also
For more information on the basic concept of roles and permissions within Gaijin Application Platform, see Roles and Permissions.
Application Schema Management
The application developer creates the application schema, which is a combination of permissions and roles.
Add Application Schema
In the application, you can add each permission and role manually. However, it is much faster to import a ready-to-use schema, so that later you can edit it by adding more permissions and roles. You can also create your own application schema from scratch. To add a schema to the application:
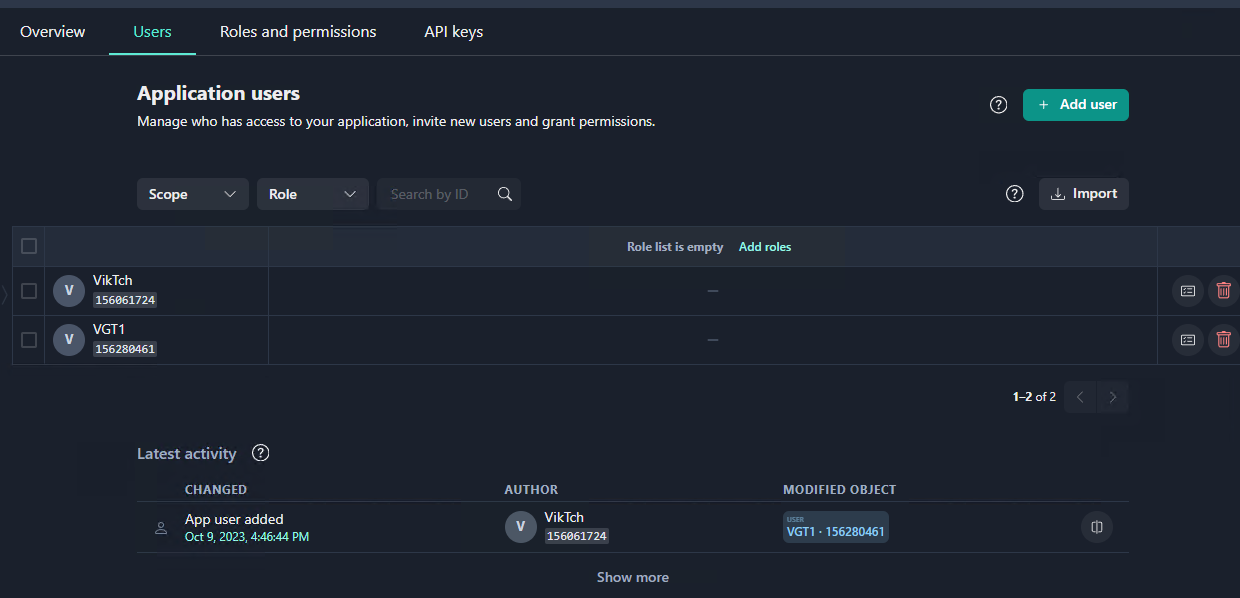
Click Users tab to open the Application users page.
Note
There are no roles or permissions assigned to the users because there is no schema defined for the application.
Open the Roles and permissions page. It is empty for now.
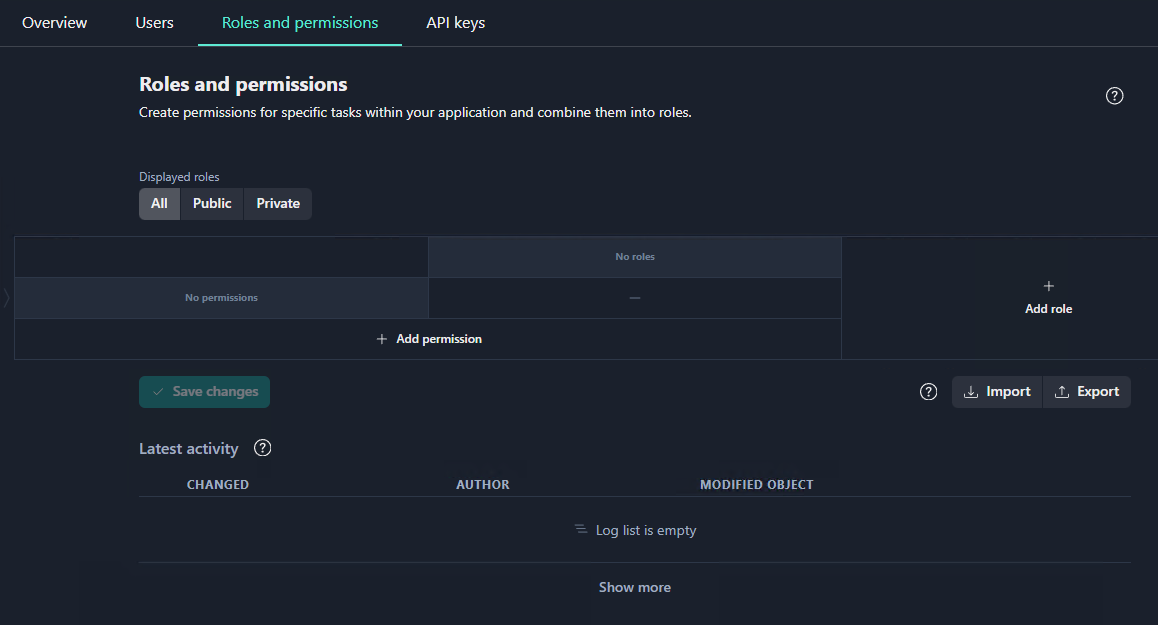
Click the Import button. This opens the form, enabling you to enter the application schema.
Copy and paste the sample schema into the form.
Sample schema
{
 "roles": {
   "moderator": {
     "name": "moderator",
     "description": "",
     "protected": true,
     "permissions": [
       {
         "name": "user.kick",
         "value": true
       },
       {
         "name": "user.mute",
         "value": true
       }
     ]
   },
   "lead support": {
     "name": "lead support",
     "description": "",
     "protected": true,
     "permissions": [
       {
         "name": "inventory.edit",
         "value": true
       },
       {
         "name": "inventory.view",
         "value": true
       },
       {
         "name": "user.ban",
         "value": true
       }
     ]
   },
   "god": {
     "name": "god",
     "description": "",
     "protected": true,
     "permissions": [
       {
         "name": "inventory.edit",
         "value": true
       },
       {
         "name": "inventory.view",
         "value": true
       },
       {
         "name": "user.ban",
         "value": true
       },
       {
         "name": "user.kick",
         "value": true
       },
       {
         "name": "user.mute",
         "value": true
       }
     ]
   }
  },
 "permissions": {
   "user.kick": {
     "name": "user.kick",
     "value": false,
     "description": "Can kick user from game session",
     "protected": true
   },
   "user.mute": {
     "name": "user.mute",
     "value": false,
     "description": "Can mute a  user permanently or for limited time",
     "protected": true
   },
   "user.ban": {
     "name": "user.ban",
     "value": false,
     "description": "Can ban a user from the game login",
     "protected": true
   },
   "inventory.edit": {
     "name": "inventory.edit",
     "value": false,
     "description": "Can edit a player inventory content",
     "protected": true
   },
   "inventory.view": {
     "name": "inventory.view",
     "value": false,
     "description": "Can view a player inventory",
     "protected": true
   }
 }
}
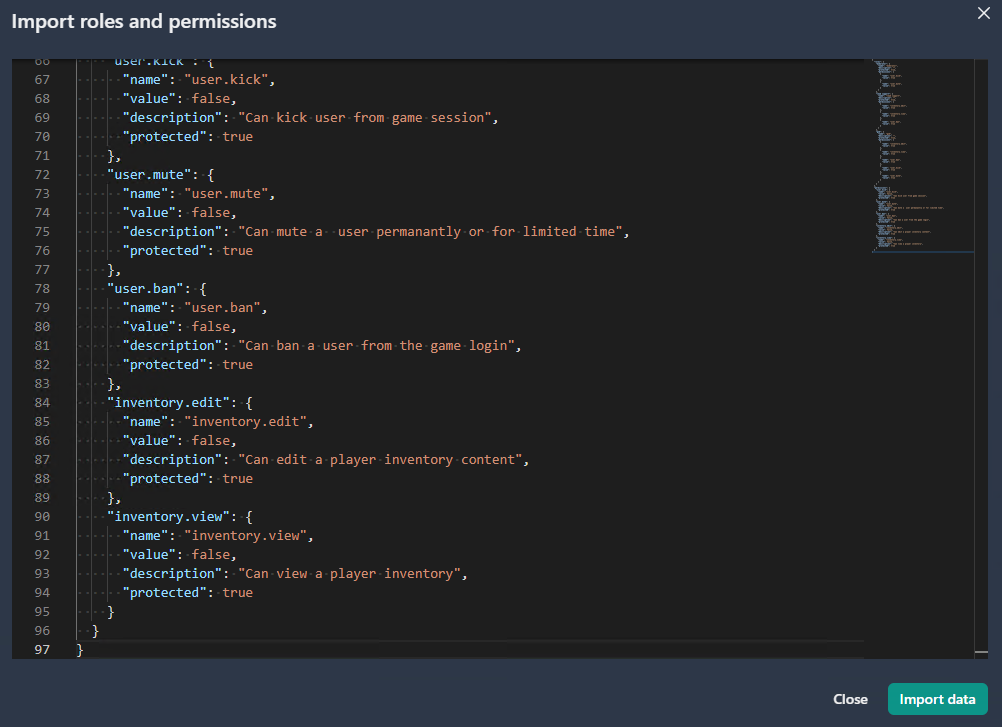
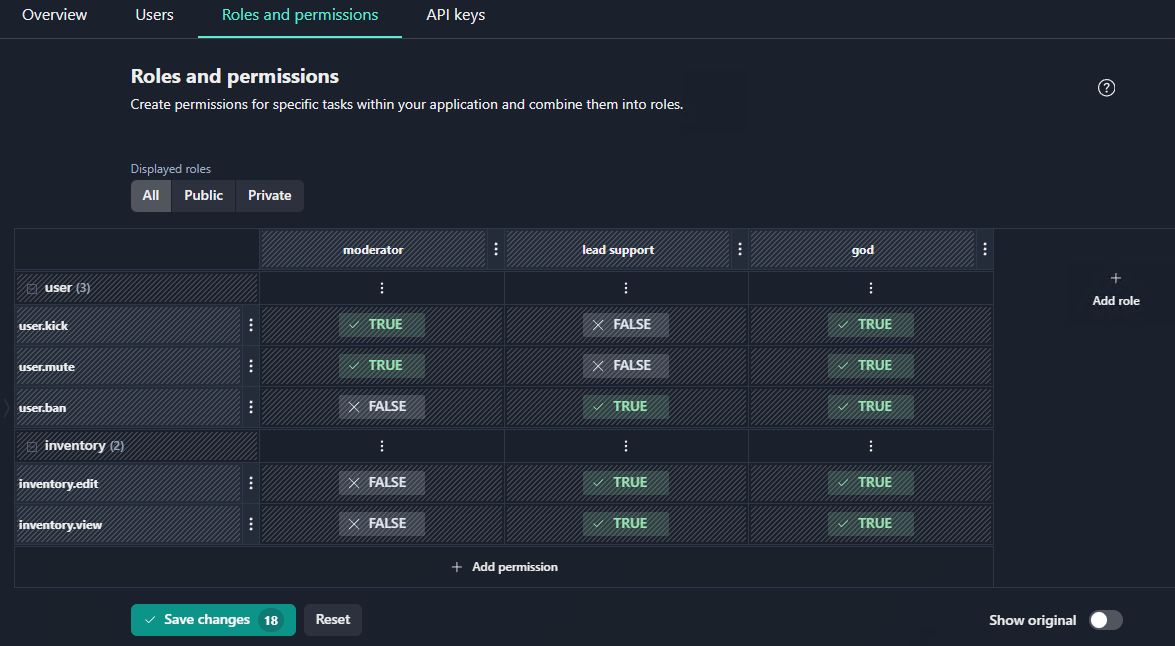
Click the Import Data button. The application schema containing the permissions is now displayed in the form of a table.
Note
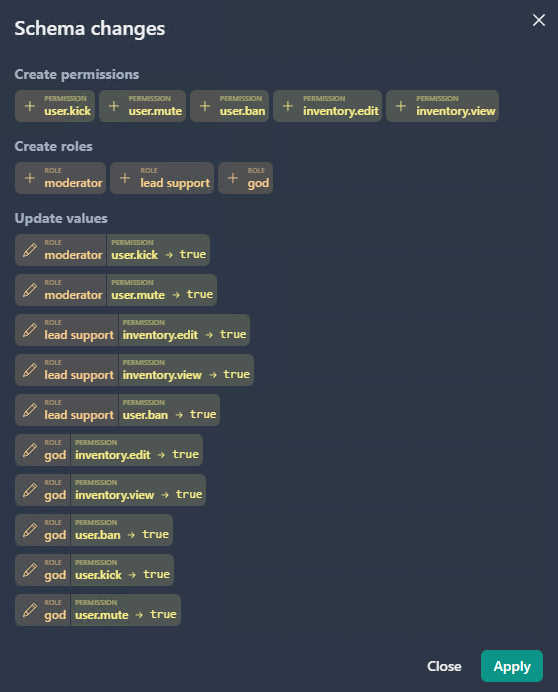
In this example, the number “18” displayed on the Save changes button means that 18 edits have been made to the existing application schema.
In the Schema changes screen, click Apply.
Note
Each time you manage application roles and permissions in Central, the application schema is changed.
Add Permission
To add a new permission:
Click the Add permission button at the bottom row of the table.
In the New permission window, enter the following:
Name (required): application-wide unique permission key. You can name permissions any way you like.
Note
You can start entering the permission name prefix by selecting the created permission group, as illustrated below.
For large schemas application, it is recommended using group permissions feature by entering prefixes in the name (e.g. using
<group>.<permission>format).Description: a text field describing the purpose of the permission.
Default value:
TRUEorFALSE.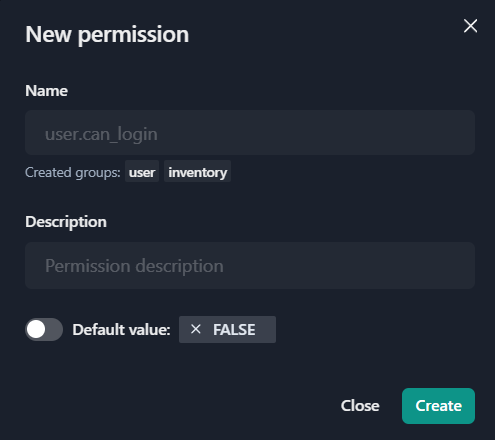
Click Create.
Edit Permission
To edit a permission:
Click three dots next to the permission you wish to edit and click Edit permission.
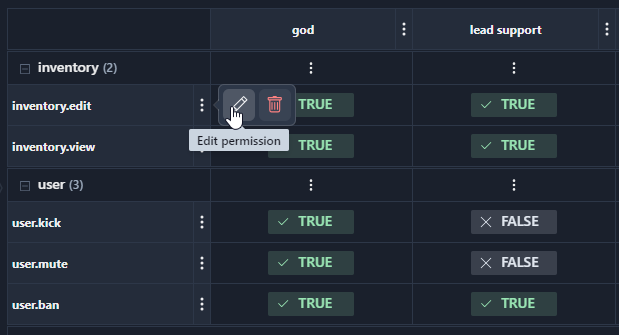
Here you can:
edit the description;
change the permission default value from
FALSEtoTRUEby selecting the Default value slider button.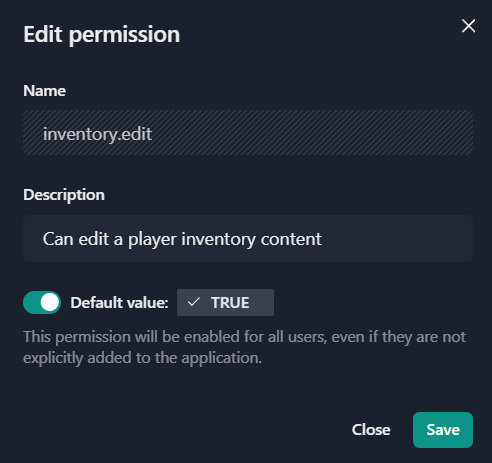
Note
You are not allowed to edit the names of already created permissions.
Click Save.
Add Role
To add a new role:
Click the Add role button at the right column of the table.
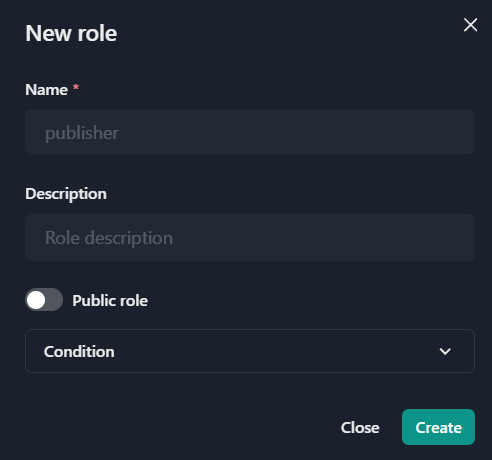
In the New role window, enter the following:
Name (required): application-wide unique role key.
Description: a text field describing the purpose of the role.
Public role: if checked, the role will be available for selection as a project role.
Condition: supports the following types of filters: domain (comparing the domain of the user’s login with the specified one), tag (tag presence), ip (comparing the client’s IP address with the specified one) and logical operations: or, and. Conditions with any level of nesting are allowed. IP address value is specified in CIDR format (with mask).
Example:
{
  "and": [{"tag": "2step"}, {"tag": "email_verified"}],
  "ip": "192.168.65.1/32",
  "or": [{"domain": "gaijin.ru"}, {"domain": "gaijin.team"}]
}
Click Create.
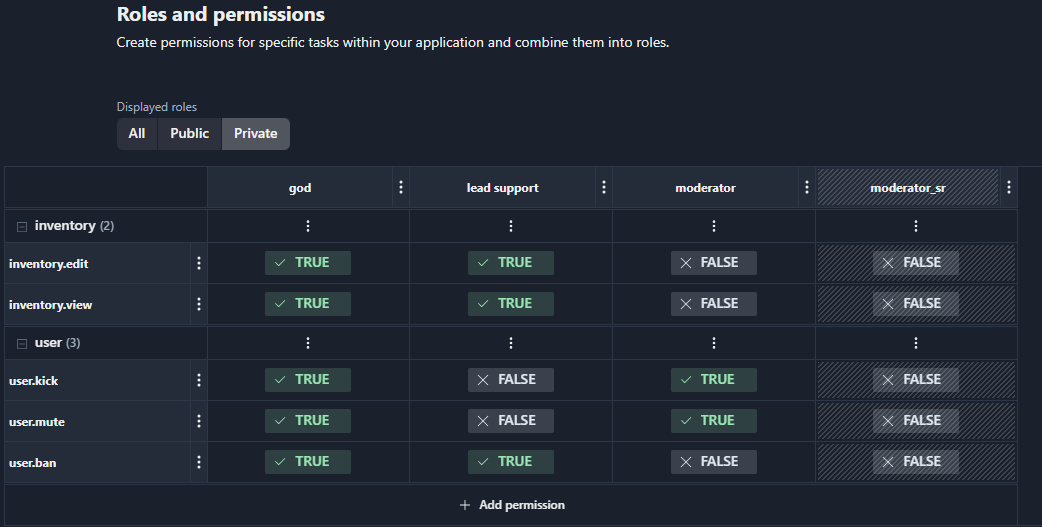
The newly created role is now added to the Roles and Permissions page as a new column in the table.
Set Permission for Role
You can set the value of each permission within a role in the table by selecting the corresponding cell.
Click each required cell repeatedly. This will change the value in the cell toggling between
TRUE(green),FALSE(red), anddefault(gray). Let’s make some changes to the god role.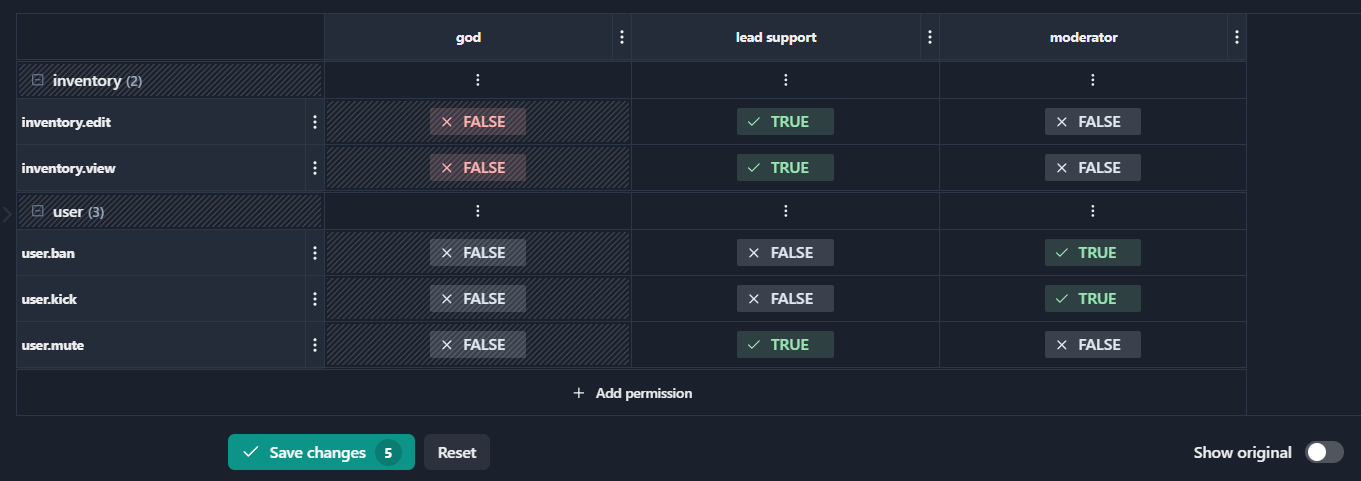
Note
Clicking Reset will rollback your edits. Toggling Show original enables you to view of the table before the changes made.
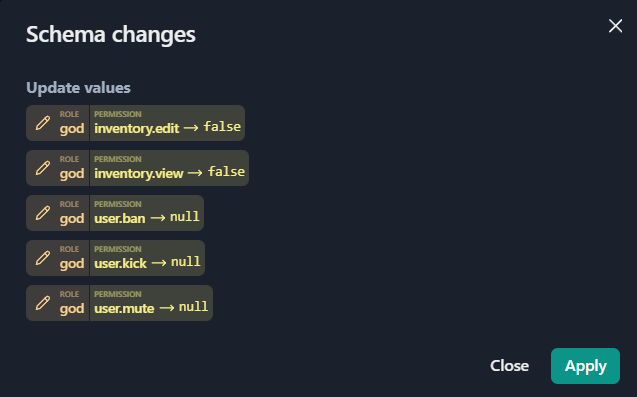
Click the Save changes button and the system will present a summary of the updates.
In the Schema changes window, click Apply. This will save changes to the server.
Group Permissions Feature
Central enables a developer to logically organize permissions in the Roles and Permissions table. This feature is especially helpful for large schema applications.
Note
Any permissions group can be collapsed or expanded in the user interface; you can make edits to the schema for the entire group at once.
To combine a set of permissions into a logical group, you specify a permission
name in the format <group>.<permission>.
For example, the schema may have the permissions named inventory.edit and
inventory.view. This will place the edit and view permissions in the
inventory permissions group when displayed on the application permissions
list.

Note
Using the grouping notation <group>.<permission> does not impose any
additional functionality in Central. This feature only provides the convenient
way to structure schema permissions displayed on the application permissions
list.
Warning
If you group permissions using the <group>.<permission> notation, the prefix
name cannot be the same as the name of an individual permission. For example,
you cannot use inventory and inventory.edit permissions in the schema at the
same time. This applies to permissions of any nesting level.
Assign Role to User
When the application schema is ready, you can assign roles to application users. To assign roles:
Click Users tab to open the Application users page.
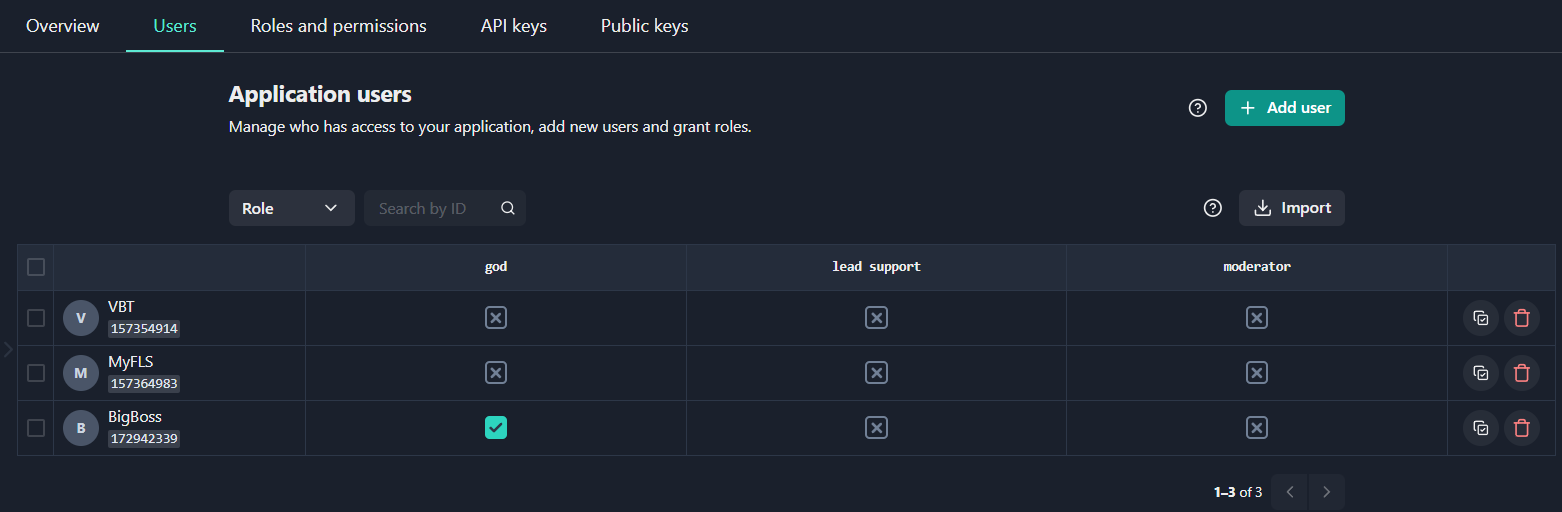
Select the check boxes in the cells to assign one or more required roles to each user.

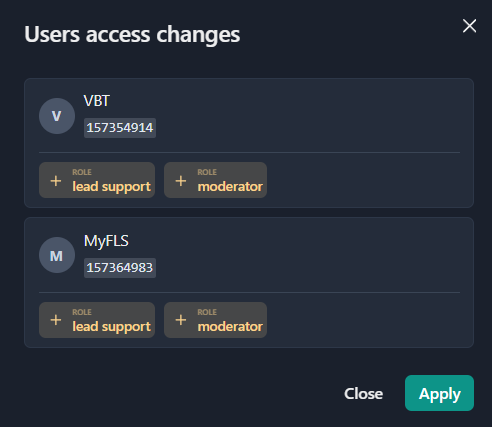
Click Save changes.
Click Apply in the User access changes window.
Assign Multiple Roles
Roles combine permissions according to a particular business task. There can be dozens of separate permissions within a single application. Since you can assign several roles to a user, you don’t need to create many complicated roles.
Instead, it is much better to create several roles complementary to each other and assign a necessary role combination to a particular user. This enables administrators flexibly to add (or remove) a permitted task to a role assigned to multiple users.
For example, you created the moderator role and assigned it to the number of
users. If later you decide to grant all moderators with the ability to ban
players, you just need to add the user.ban permission to the moderator role.
Any user with the moderator role will automatically get the ability to ban
players.
Set Temporary Role
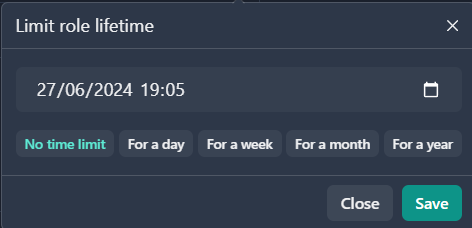
If you need to assign a role not permanently, but temporarily, you can limit its lifetime.
To set a period of role validity:
Click the Limit role lifetime icon.

Select the validity period and click Save.
Note
If you choose No time limit option the expiration period will be set at 10 years.
Edit Role
To edit a role:
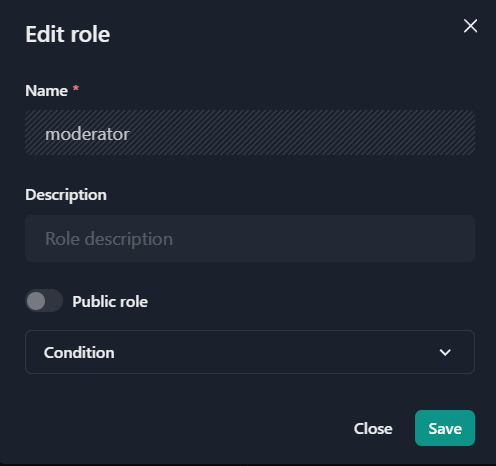
Click three dots next to the role and select the Edit role icon.
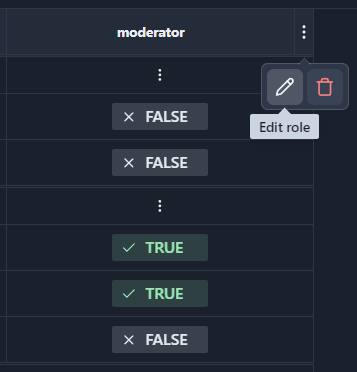
In the Edit role window, you can edit the role description, public role flag and condition.
Note
You are not allowed to edit the names of already created roles.
Click Save.
Apply Changes to Schema
The system keeps track of changes you made to roles and permissions, but it will save them to the server only after you apply the changes to the application schema.
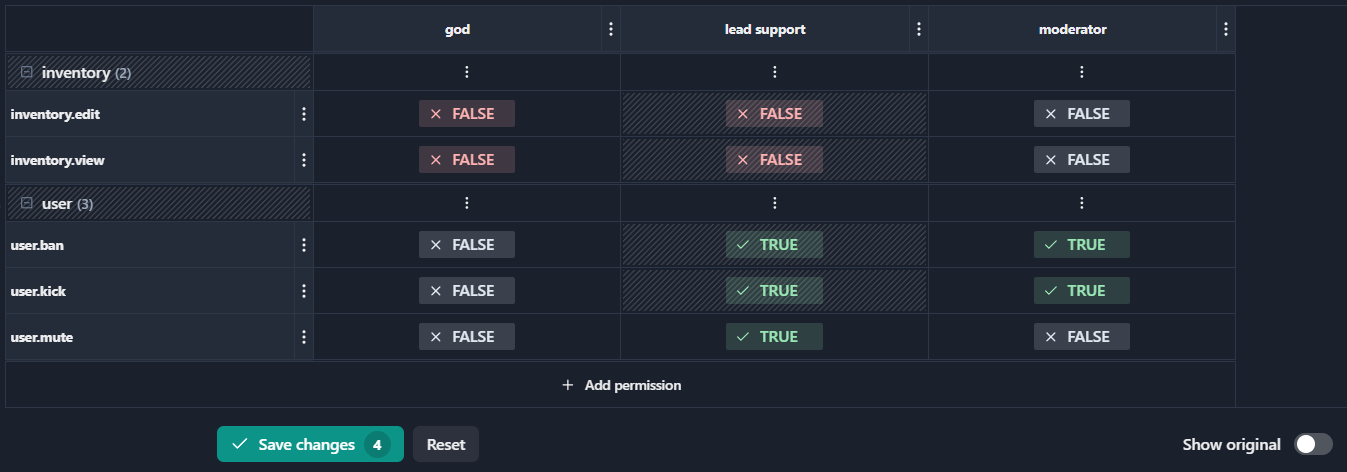
The Save changes button displays the edit counter, showing the number of edits performed on the schema. A special shading highlights the changed fields on the table.
You can also rollback edits by pressing the Reset button. To view the table before the changes made, select the Show original slider button.
To apply schema changes:
Click the Save changes button. The Schema changes window will show an overview of the changes (added, deleted, changed roles and/or permissions, updated values).
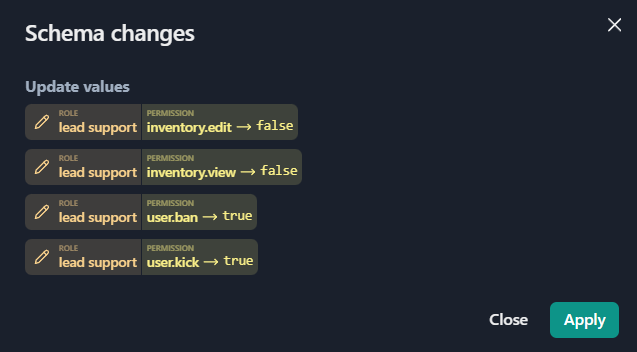
Click the Apply button. This will save these changes to the server.
Export Application Schema
Central enables you to export an entire application schema or a part of the schema by selecting necessary roles and/or permissions.
To export an application schema:
Open the Roles and permissions page for your application.
Click the Export button in the lower right corner.
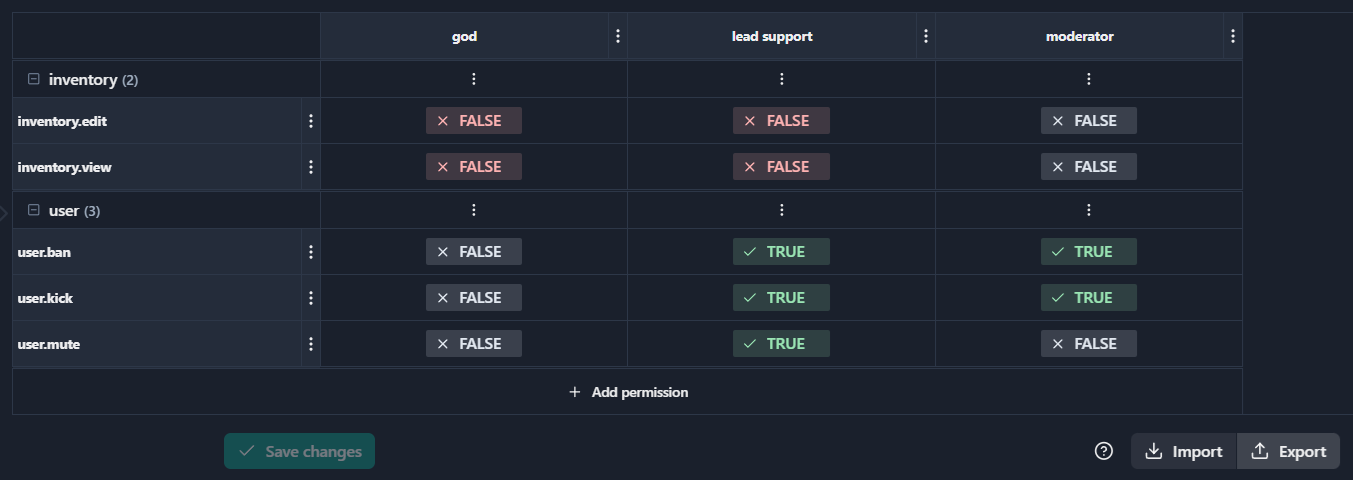
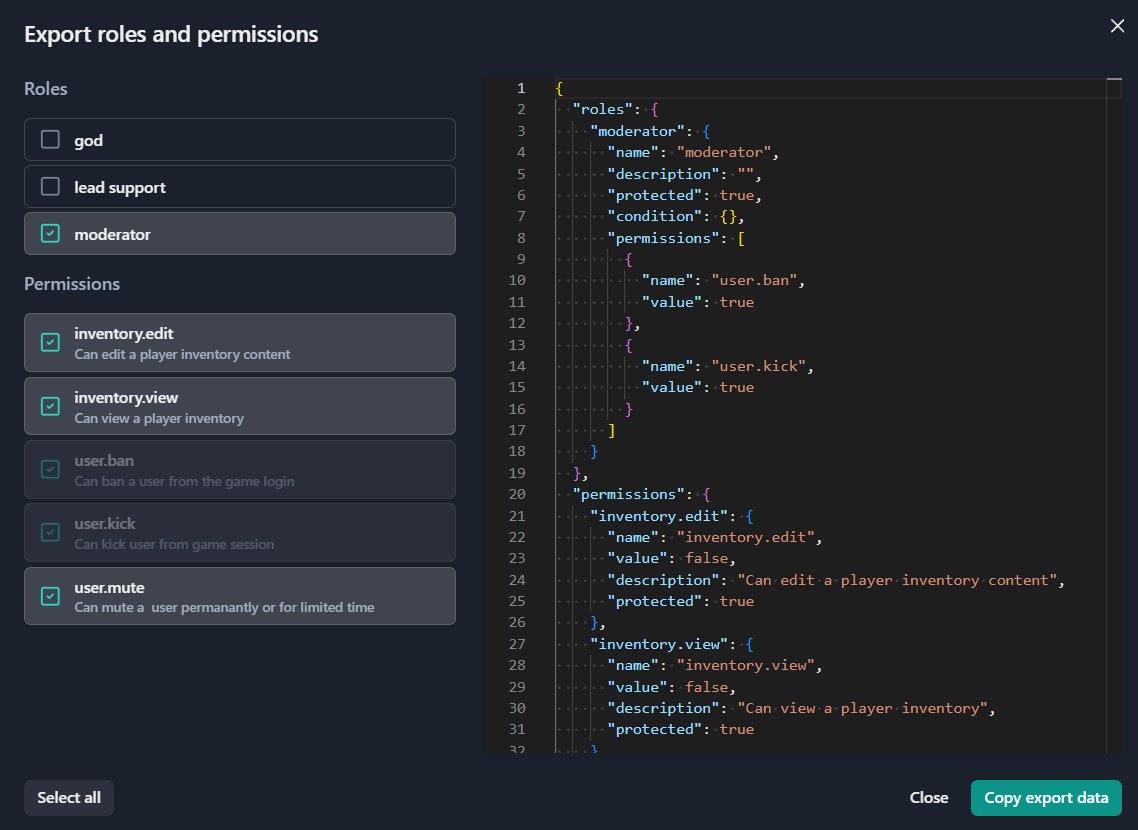
The Export roles and permissions window contains a list of roles and permissions available for selection. Select the roles and permissions you wish to export.
Note
When you select a role for export, the system automatically selects the permissions related to that role, and you cannot exclude them. When you select roles and/or permissions, the auto-generated Json data for export is displayed in the right part of the Export roles and permissions window.
Click Copy export data.
This will copy data to the clipboard, making it available for a developer. Then you can import this schema from the clipboard into another application.